

Flower chart report
|
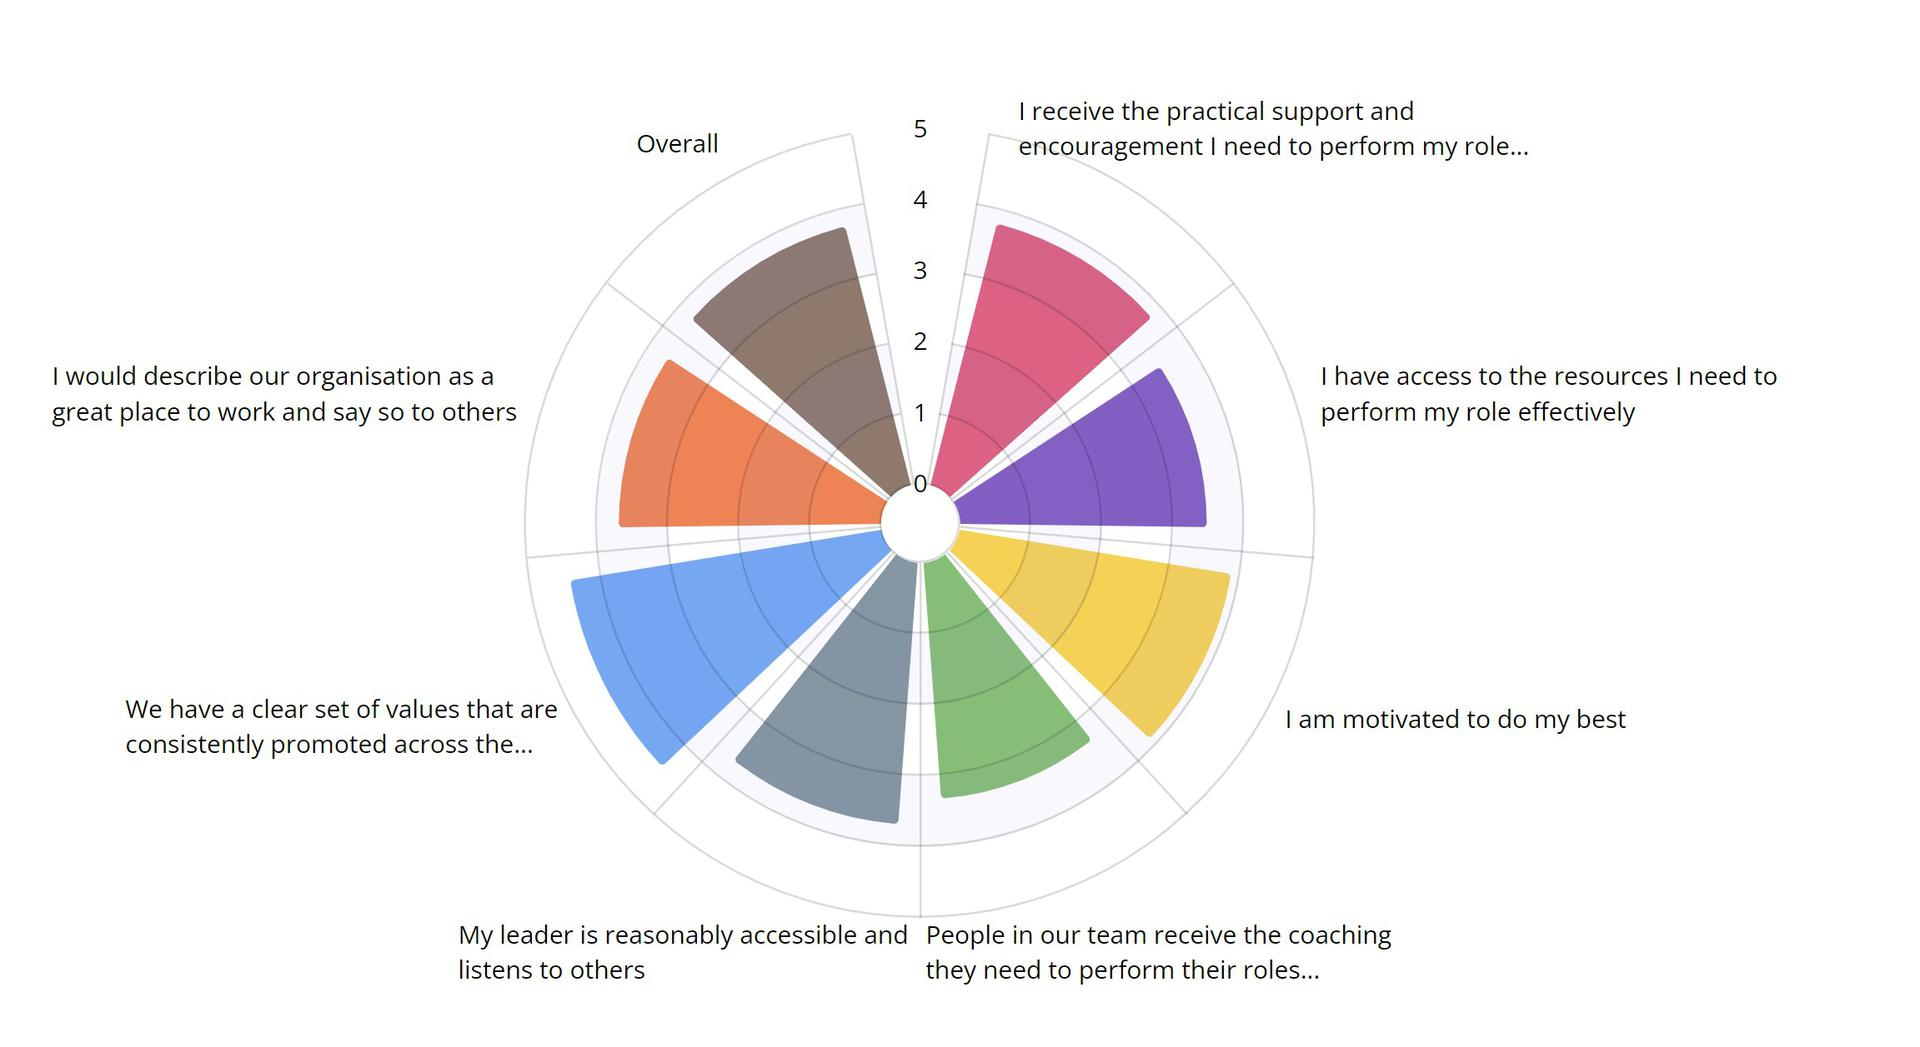
Scale changes for some chart types
The Spider and new Flower charts now use the question rating scale for the data axis while plotting the mean. This presents a much more attractive & useful chart, and is particularly useful for projects like 360 degree feedback or where a mean comparison is required for multiple questions. Previously the response percentage was used as the chart scale. As a smaller feature, the Spider chart appearance has also been tweaked.
As a reminder, Rating Scale Pivot reports can be used to compare the responses to a lead multiple choice question against responses to selected rating scale or emoji scale questions. The Rating Scale Summary allows you to select a Rating Scale (or Emoji Rating Scale) and two or more questions and get a comparison of the responses for the questions, as well as an overall average for all your selections.
|
New project customising options and menu changes
The Wecome Page menu has changed to Welcome Options and the Finish Page menu has changed to Finish Options. This is to reflect the optional nature of the content of these sub menus and to relocate some options to more intuitive places.
|
New "Page Options" menu and "Additional Header Content"
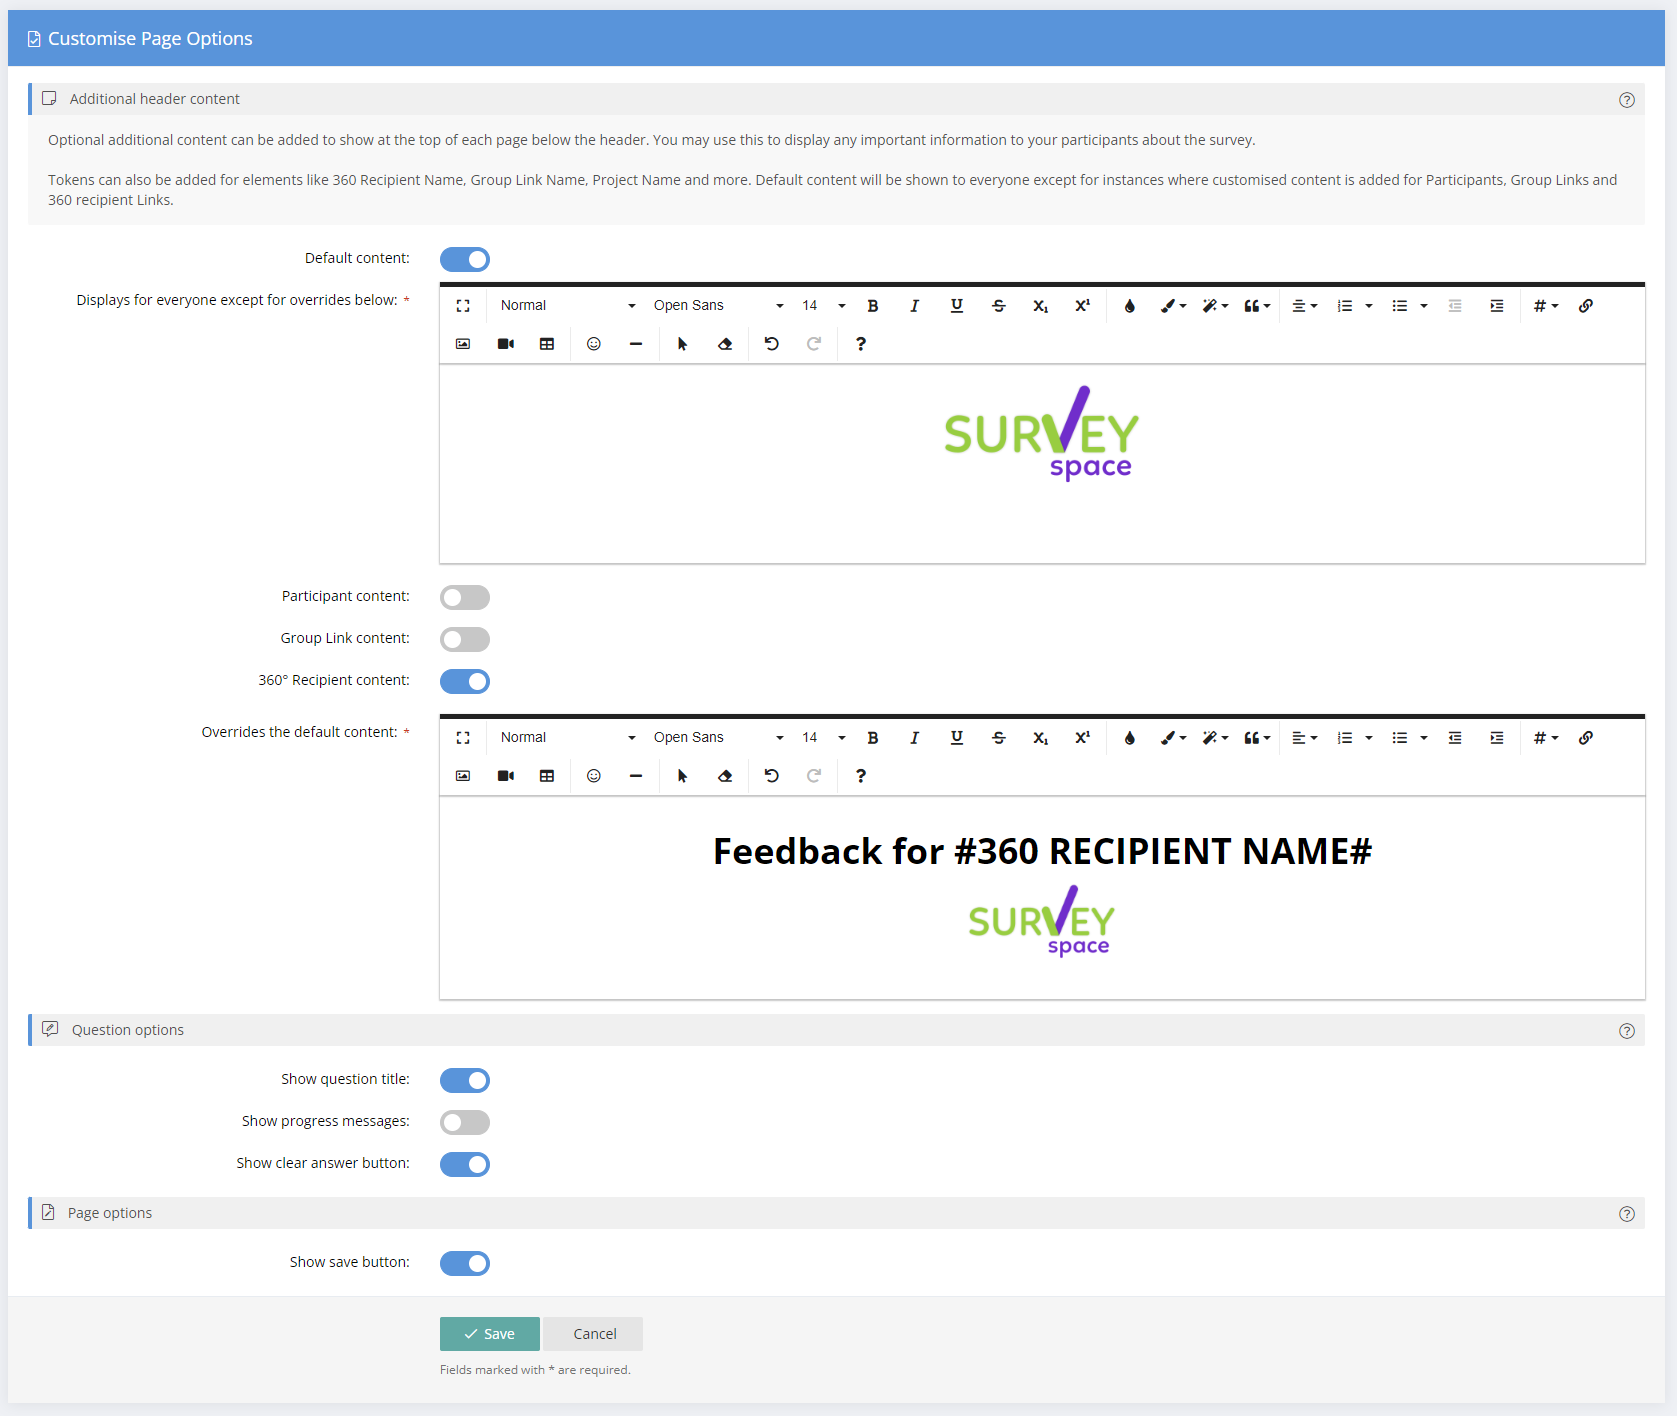
A new Page Options sub menu has been added. Here, optional "Additional header content" can now be added to show at the top of each page below the header. You may use this to display any important information to your participants about the survey, including rich text, videos and images. Default content can be set to show to everyone or the content can be customised for Participants, Group Links and 360 Recipient Links.
You can enter any content you like, and it will be displayed at the top of every survey page while the participant is answering the questions. Tokens can also be added to this additional header content for elements like 360 Recipient Name, Group Link Name, Project Name and more. So, you have complete control over the additional header content that will show depending on the type of link used to start the survey.
Importantly, Tokens can also be added to this additional header content for elements like 360 Recipient Name, Group Link Name, Project Name and more. So, you have complete control over the additional header content that will show depending on the type of link used to start the survey.
Below is a screenshot of the new "Page Options menu.
|
New "Token" options in Mail Templates and "Additional Header Content"
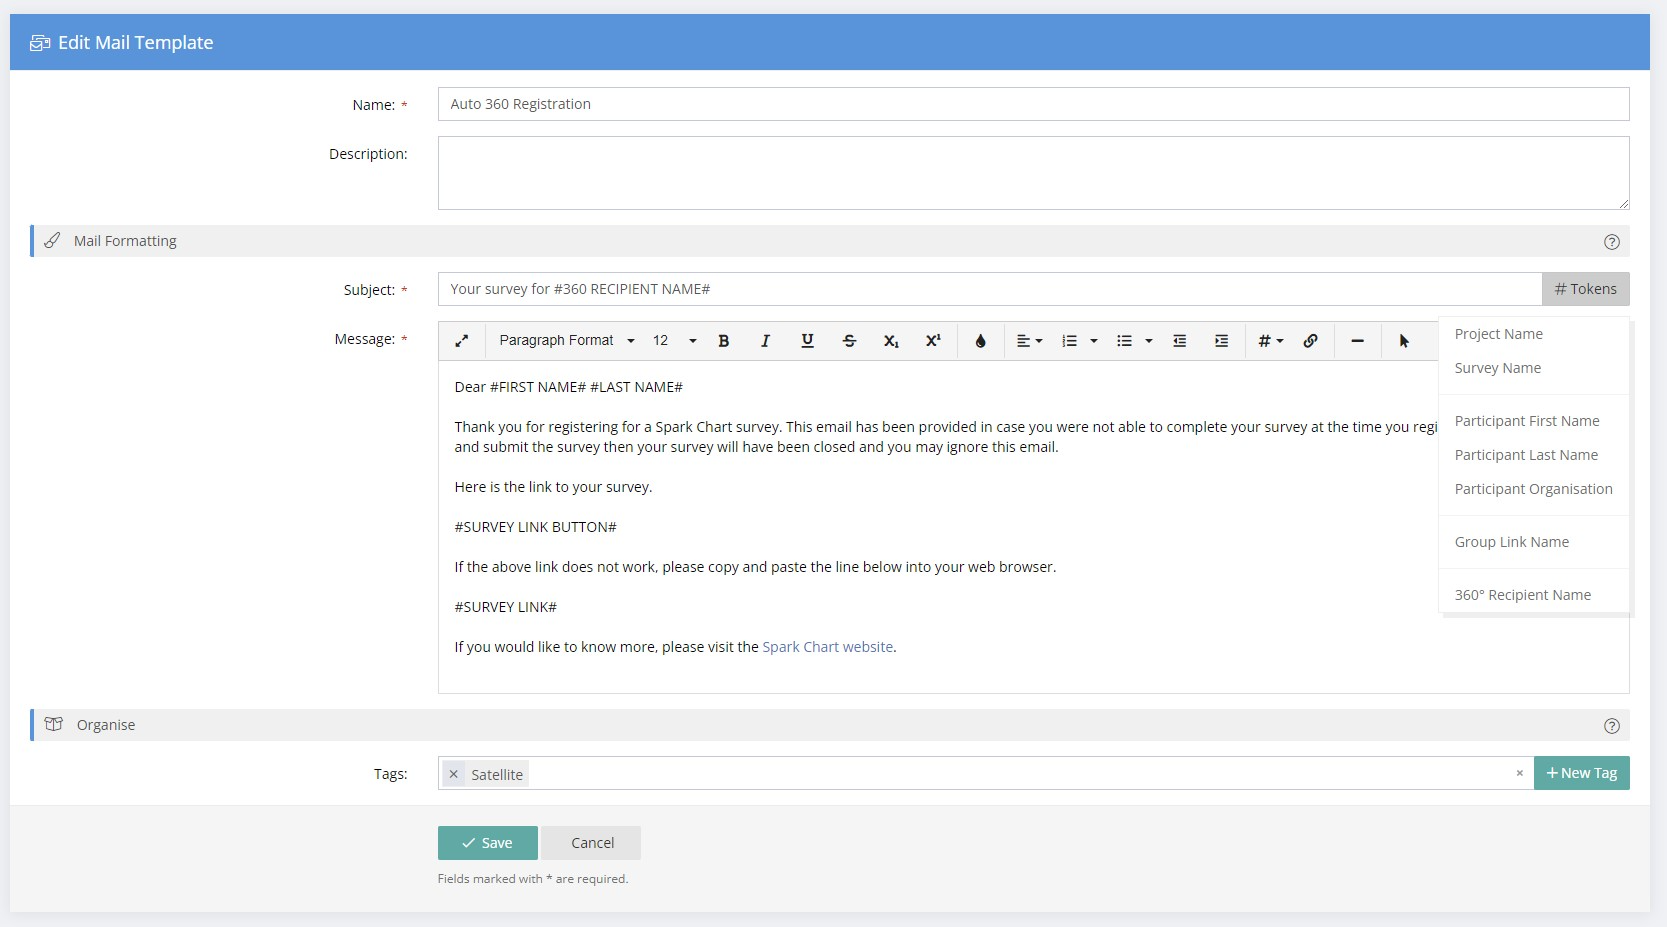
A Token is a field that will automatically be replaced with an assigned value. For example, with participant email containing the #FIRST NAME# token, these will automatically be replaced with that Participant's first name (if you have entered it in the system of course).
The functionality of Tokens in mail templates and also in the new Page Header feature has been enhanced to make them more relevant depending upon the type of survey link used. Tokens for 360 Recipient Name, Group Link Name, Project Name can be used more effectively in the subject line and the main message.
Tokens have worked in the main body of the message, but they can now also be added to the mail subject line. There is a handy # Tokens button next to the subject input to help you insert specific tokens.
|
More control over automatic emails
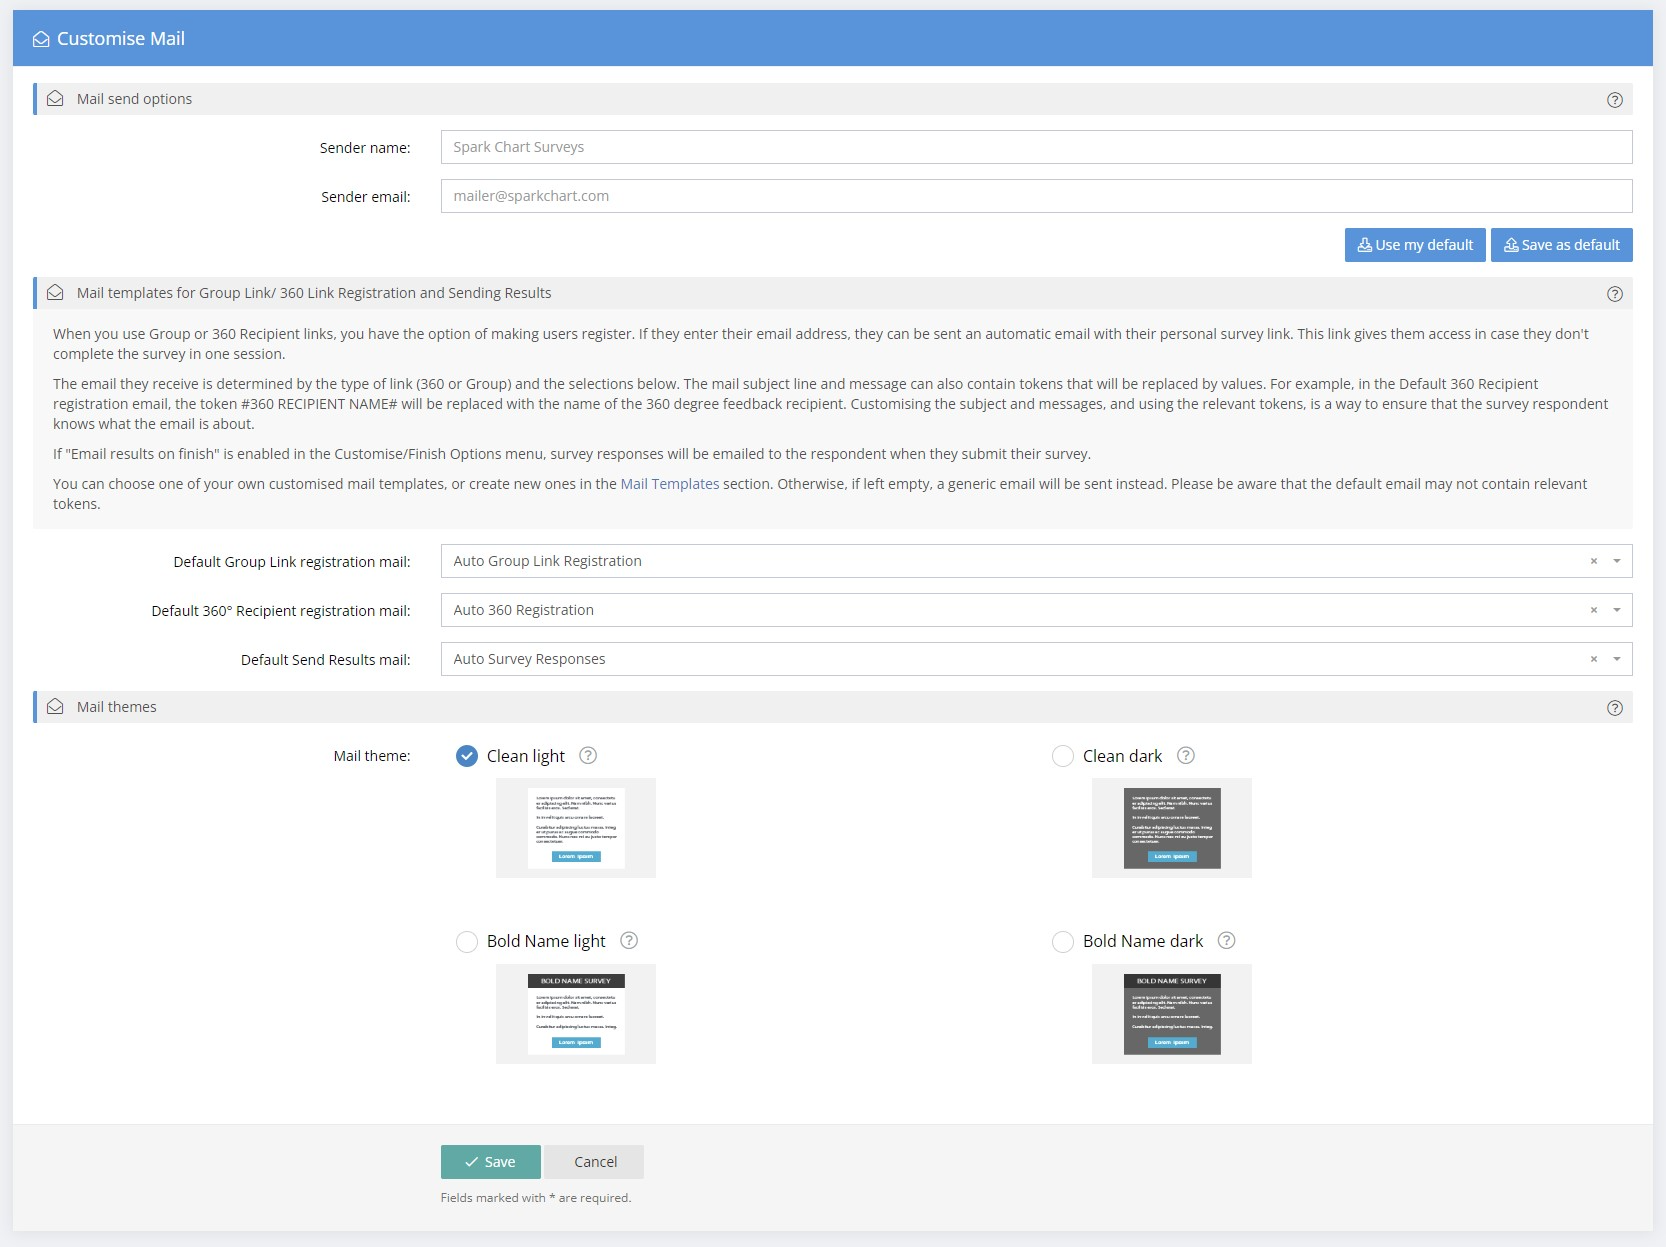
When you use Group or 360 Recipient links, you have the option of making users register. If they enter their email address, they can be sent an automatic email with their personal survey link. This link gives them access in case they don't complete the survey in one session. The email they receive is now determined by the type of link (360 Recipient Link or Group Link). You are now able to choose individual mail templates for the two types of links in the Project > Customise > Mail menu.
The mail subject line and message can now contain tokens that will be replaced by values that are relevant to the type of survey link. For example, in the Default 360 Recipient registration email, the token #360 RECIPIENT NAME# will be replaced with the name of the 360 degree feedback recipient. Customising the subject and messages, and using the relevant tokens, is a way to ensure that the survey respondent knows what the email is about.
If "Email results on finish" is enabled in the Customise/Finish Options menu, survey responses will be emailed to the respondent when they submit their survey.
You can choose one of your own customised mail templates, or create new ones in the Mail Templates section. Otherwise, if left empty, a generic email will be sent instead. Please be aware that the default email may not contain relevant tokens.
|
Rich text response option for free text, additional comments and validated text questions
A Rich Text Editor can now be enabled for individual free text questions in survey templates. This option can also be edited for live projects from the Modify Survey sub menu in the project Customise menu. This gives survey respondents greater flexibility to customise the look and feel of their free text responses. Copying and pasting from Microsoft Word is also possible. Please keep in mind that when text is copied and pasted from another application the formatting may not be completely compatible, but most basic elements should remain.Images and html links will be stripped automatically for security reasons.
Please keep in mind that when text is copied and pasted from another application the formatting may not be completely compatible depending on the underling code in the source copied content.
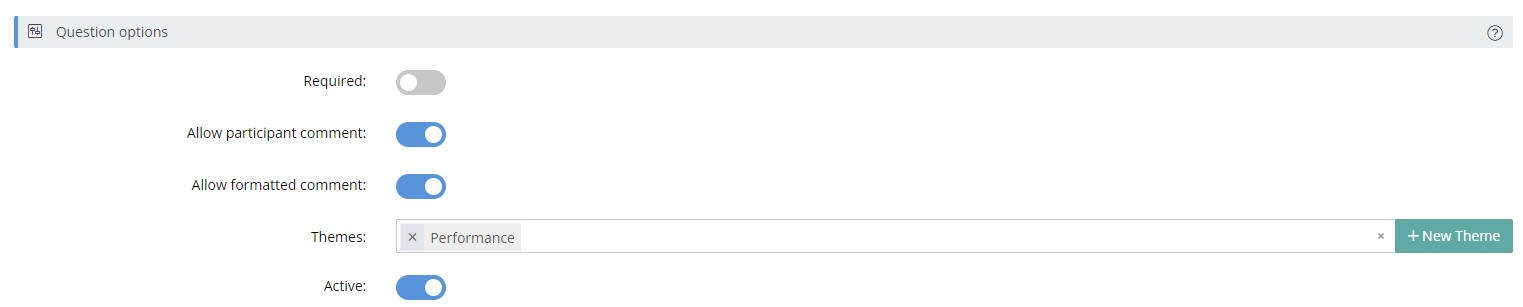
For most questions, you probably still want plain text responses to keep everything simple for the participants. For this reason, Formatted responses are off by default and need to be enabled on a question by question basis. You can do this in Survey Templates by clicking the "Allow formatted responses" option in the Layout options section of the add/edit question screen. This feature can also be activated for any active surveys you have running, by using the Modify Survey option in the Manage Project screen.
The Rich Text formatting will display when "Show my responses" or "Email results on finish" is enabled for survey participants. The formatting will also show in reports and shared reports.
Look for the "Allow formatted responses" option under Question Options when adding or editing survey questions.
|
Logic notification email can now include survey responses
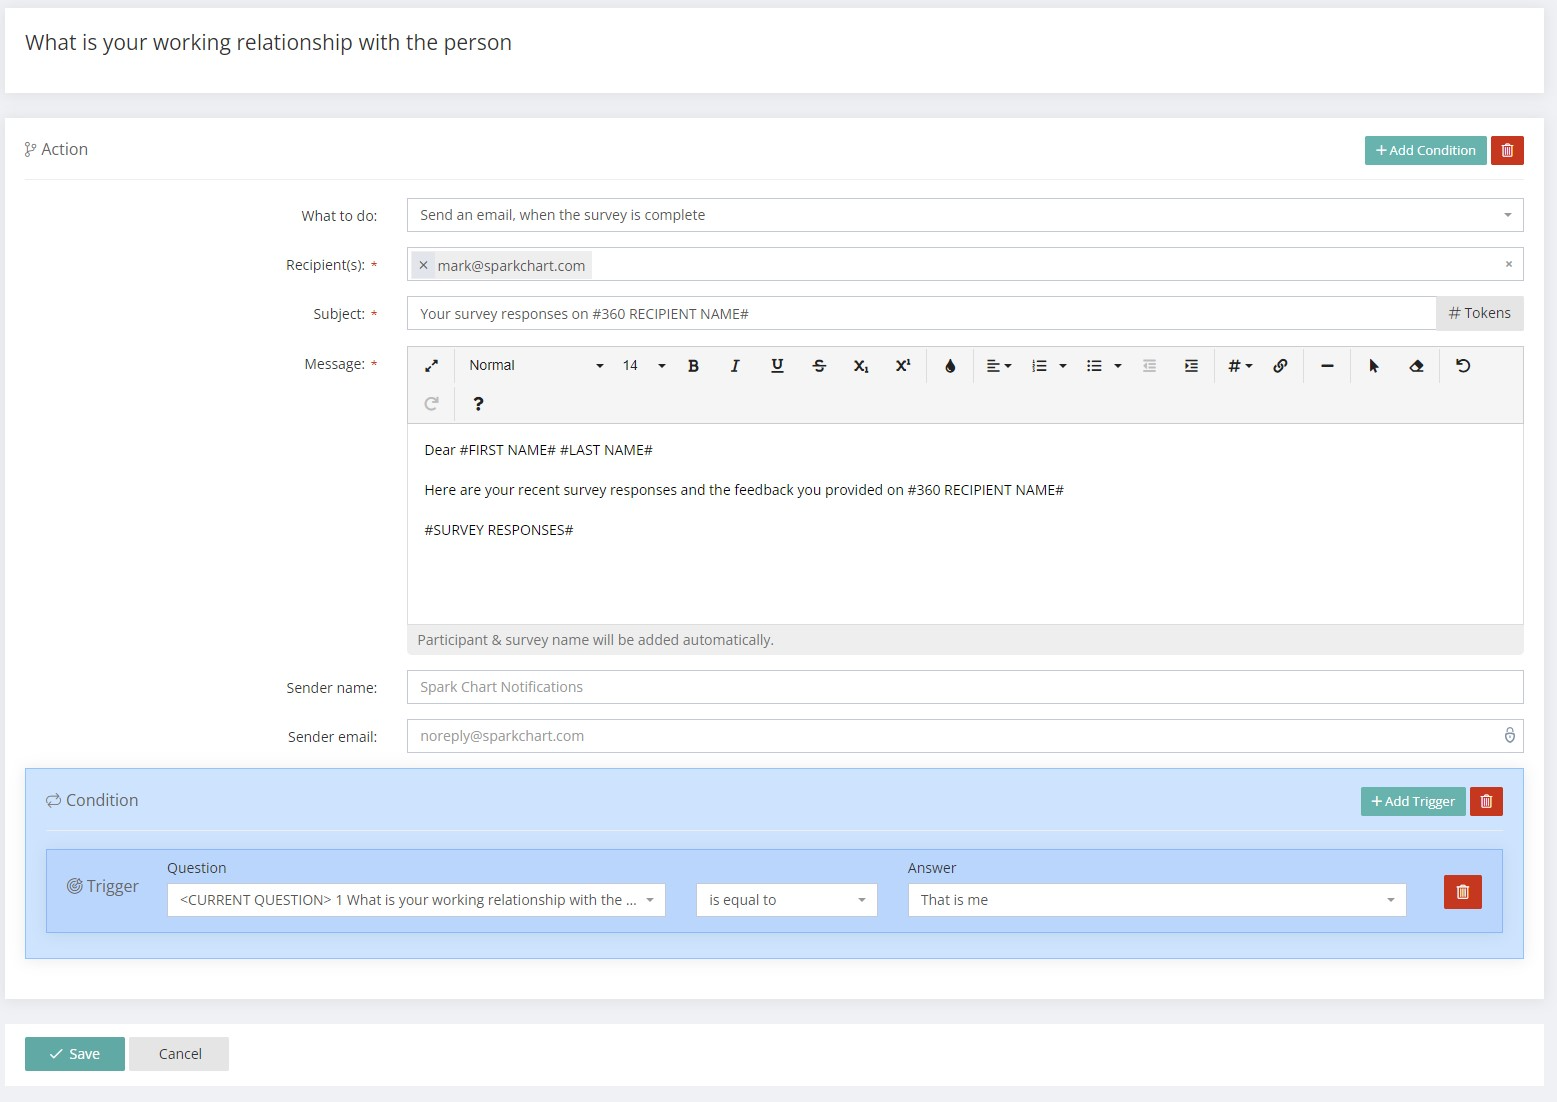
If you are using our Logic feature to send notification emails, this email can now include full survey results for that participant (previously it would only include a link to the participant details in the app).
When adding content to the main message, just add a #SURVEY RESPONSES# token. The token will be replaced with the survey responses.
Here is an example of the logic action setup.
|
Report filtering and searching enhancements
|
Survey styling
With this upgrade we have added new options to customised styling. Head over to your Manage Project > Customise > Styling section and you will see the new functionality available. You can set/change these options at any time, and your survey will update instantly when you save your selection.
The first option is allowing you to change the style of the shadows used in the surveys for each of the question panels. While only a small visual effect, it gives you a little more styling choice, but it also enhances the next new feature.
Wallpaper images can now be applied to the survey background. You have always been able to change the background colour of your surveys, but now you can apply an image to it as well. For the best effect, we recommend you use a large image (such as 1920x1080 pixels) - and when applied, it will be automatically placed behind the survey content. To ensure the best usability and accessibility, you should test your wallpaper (by opening your survey) to make sure the colours don't interfere with the most important part - the content.
A transparency effect can be used when a wallpaper is applied to your survey - it makes all the panels in your survey (very) slightly transparent. Because the level is very low, it won't reduce the readability of your content, while applying an attractive look to the survey.
|
Performance upates
The speed of loading sections like Participants, Contacts, Group Links has been greatly enhanced when you have thousands (or more) items present.
|
Little surprise Easter Eggs here and there
There are some other small new features that you will find as you build and launch your survey projects. |