

The Participants menu lists all the participants in the project. Here, individuals can be added to the project and invited to complete the survey with a personalised survey link and email. Survey completion progress can also be tracked.
In this article
Distributing Surveys and Personalised Links or Messages by Email
Scheduling Automated Mail and Tasks
Option to Re-open or Close an Individual Participant's Survey
Enable Notifications (with or without Results)
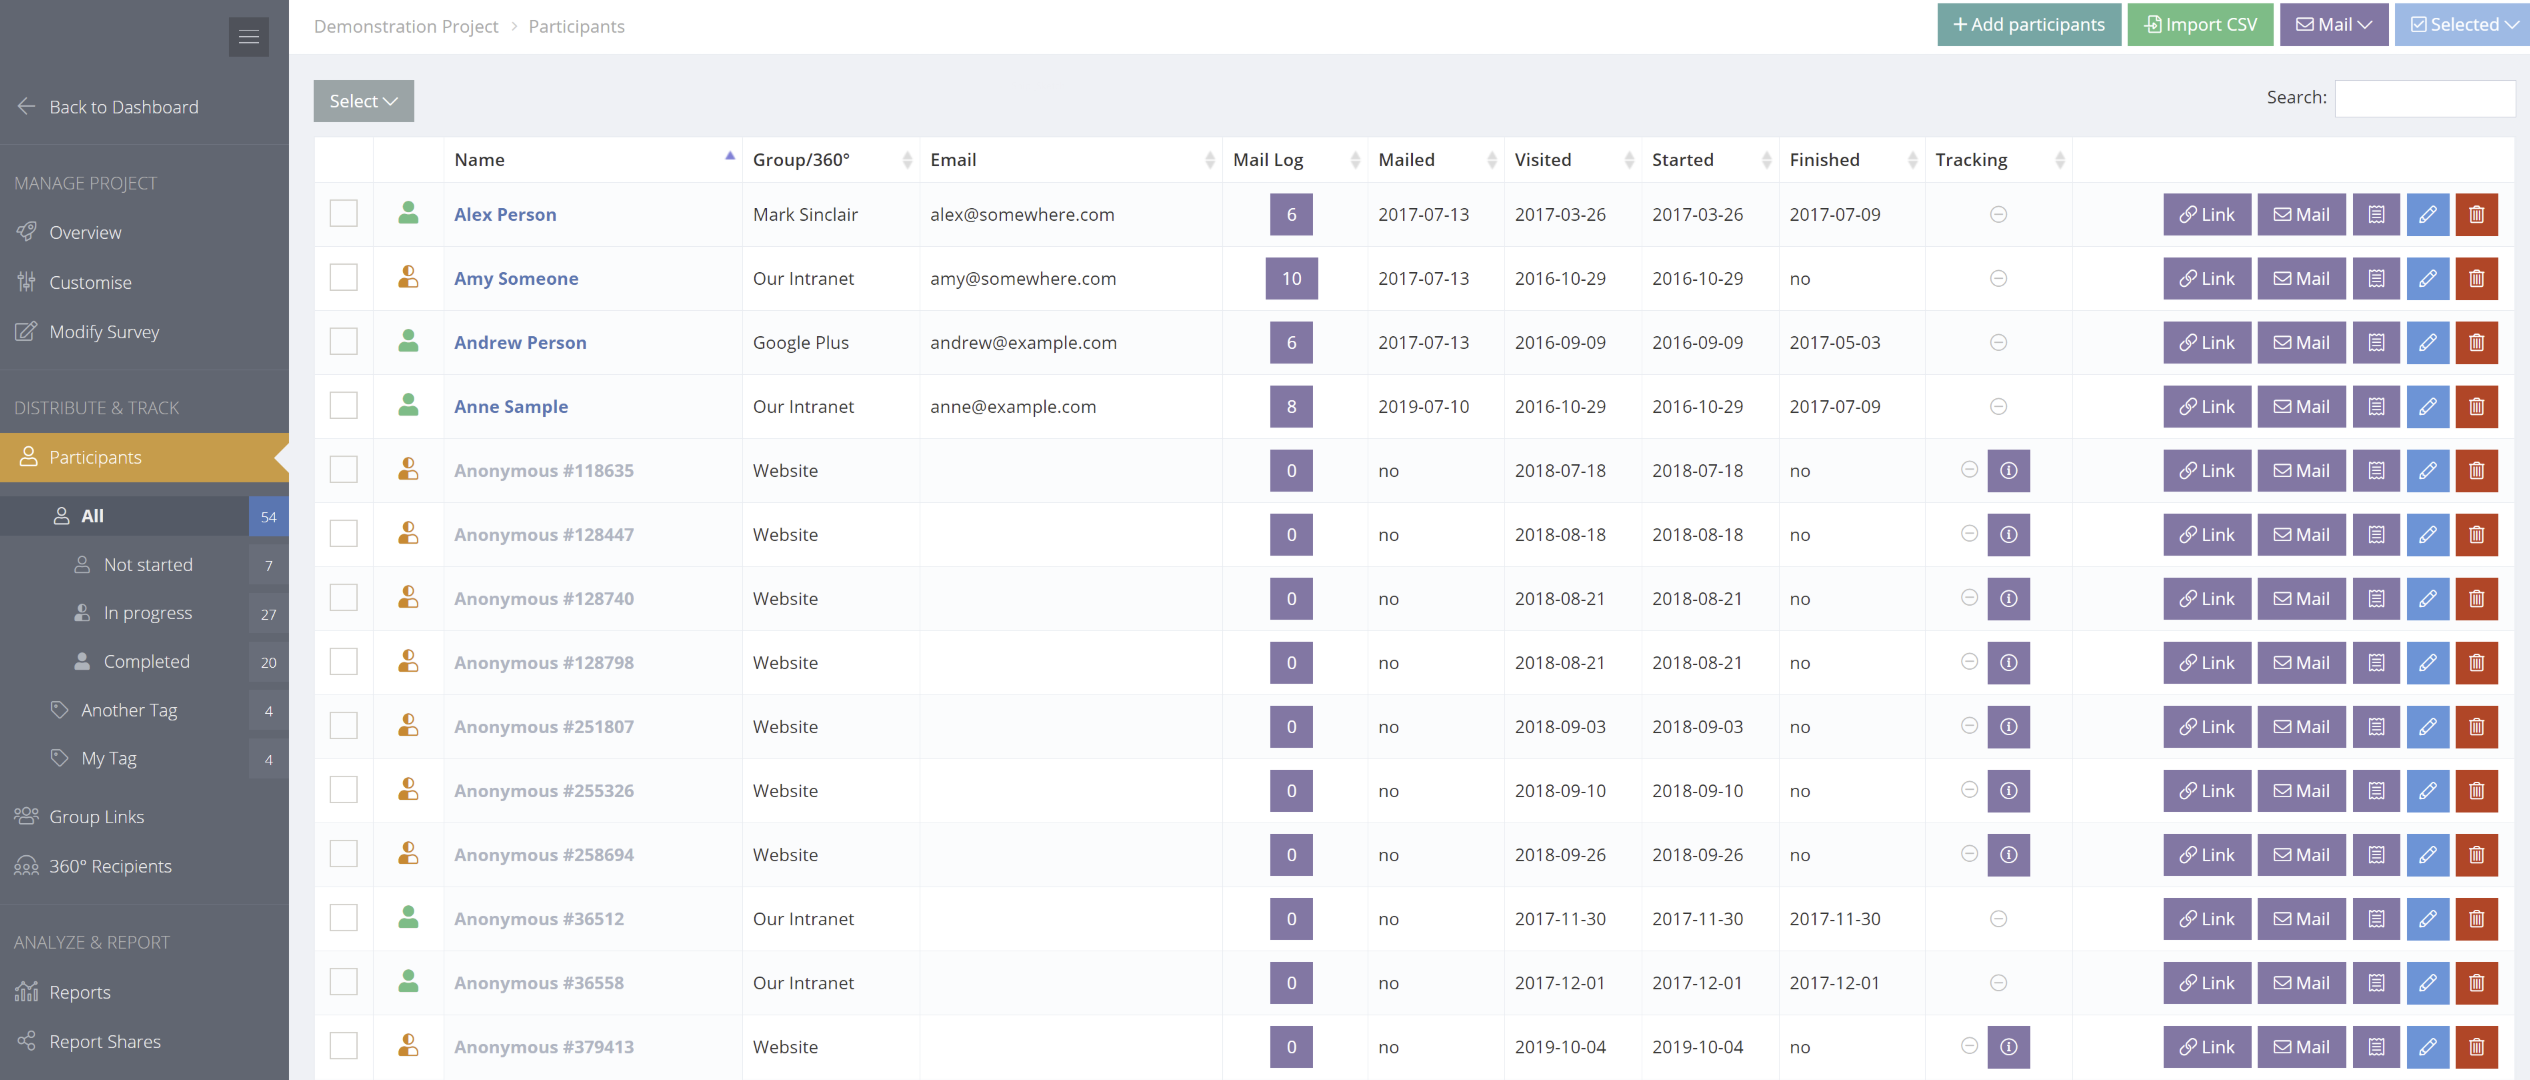
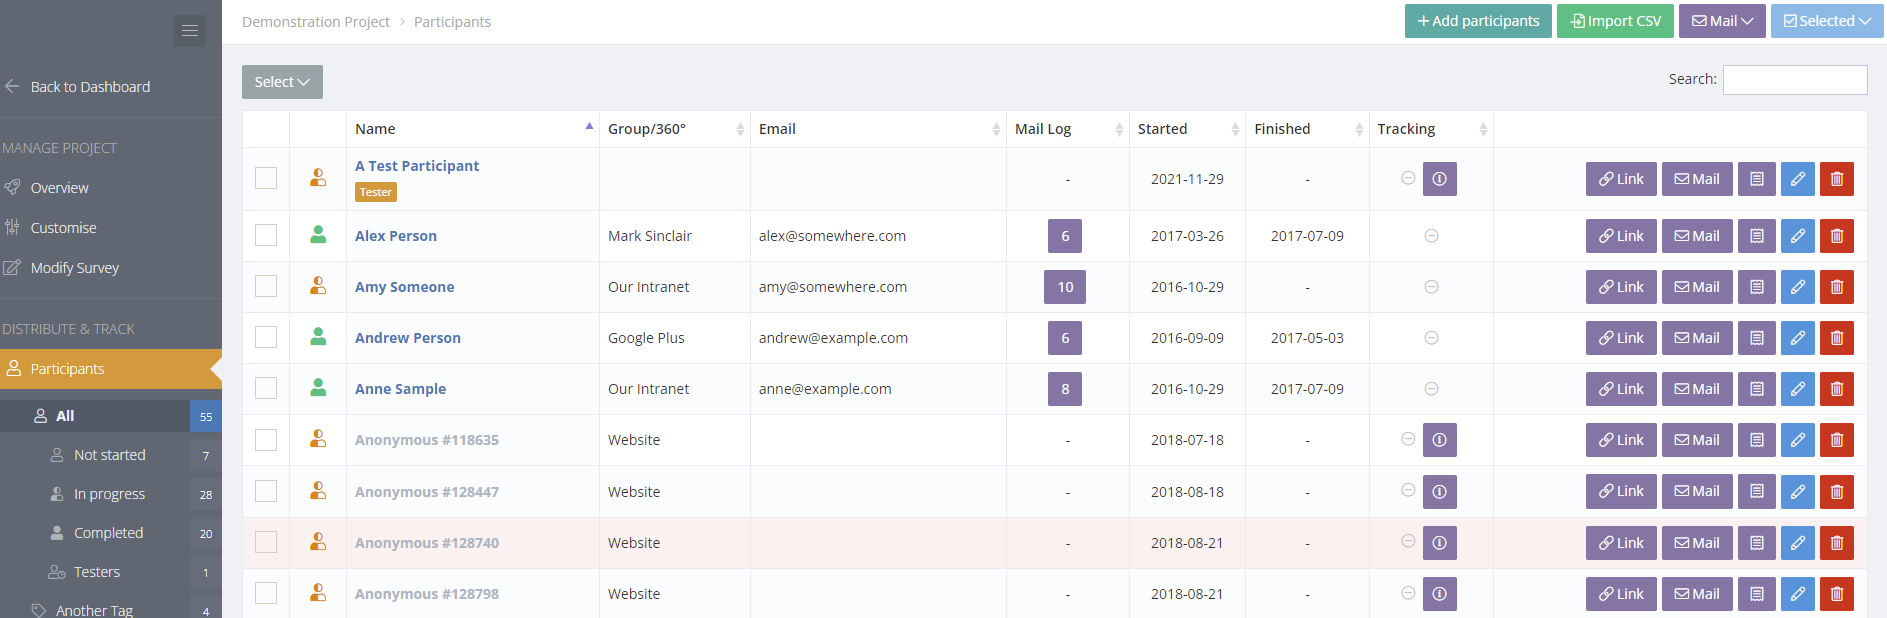
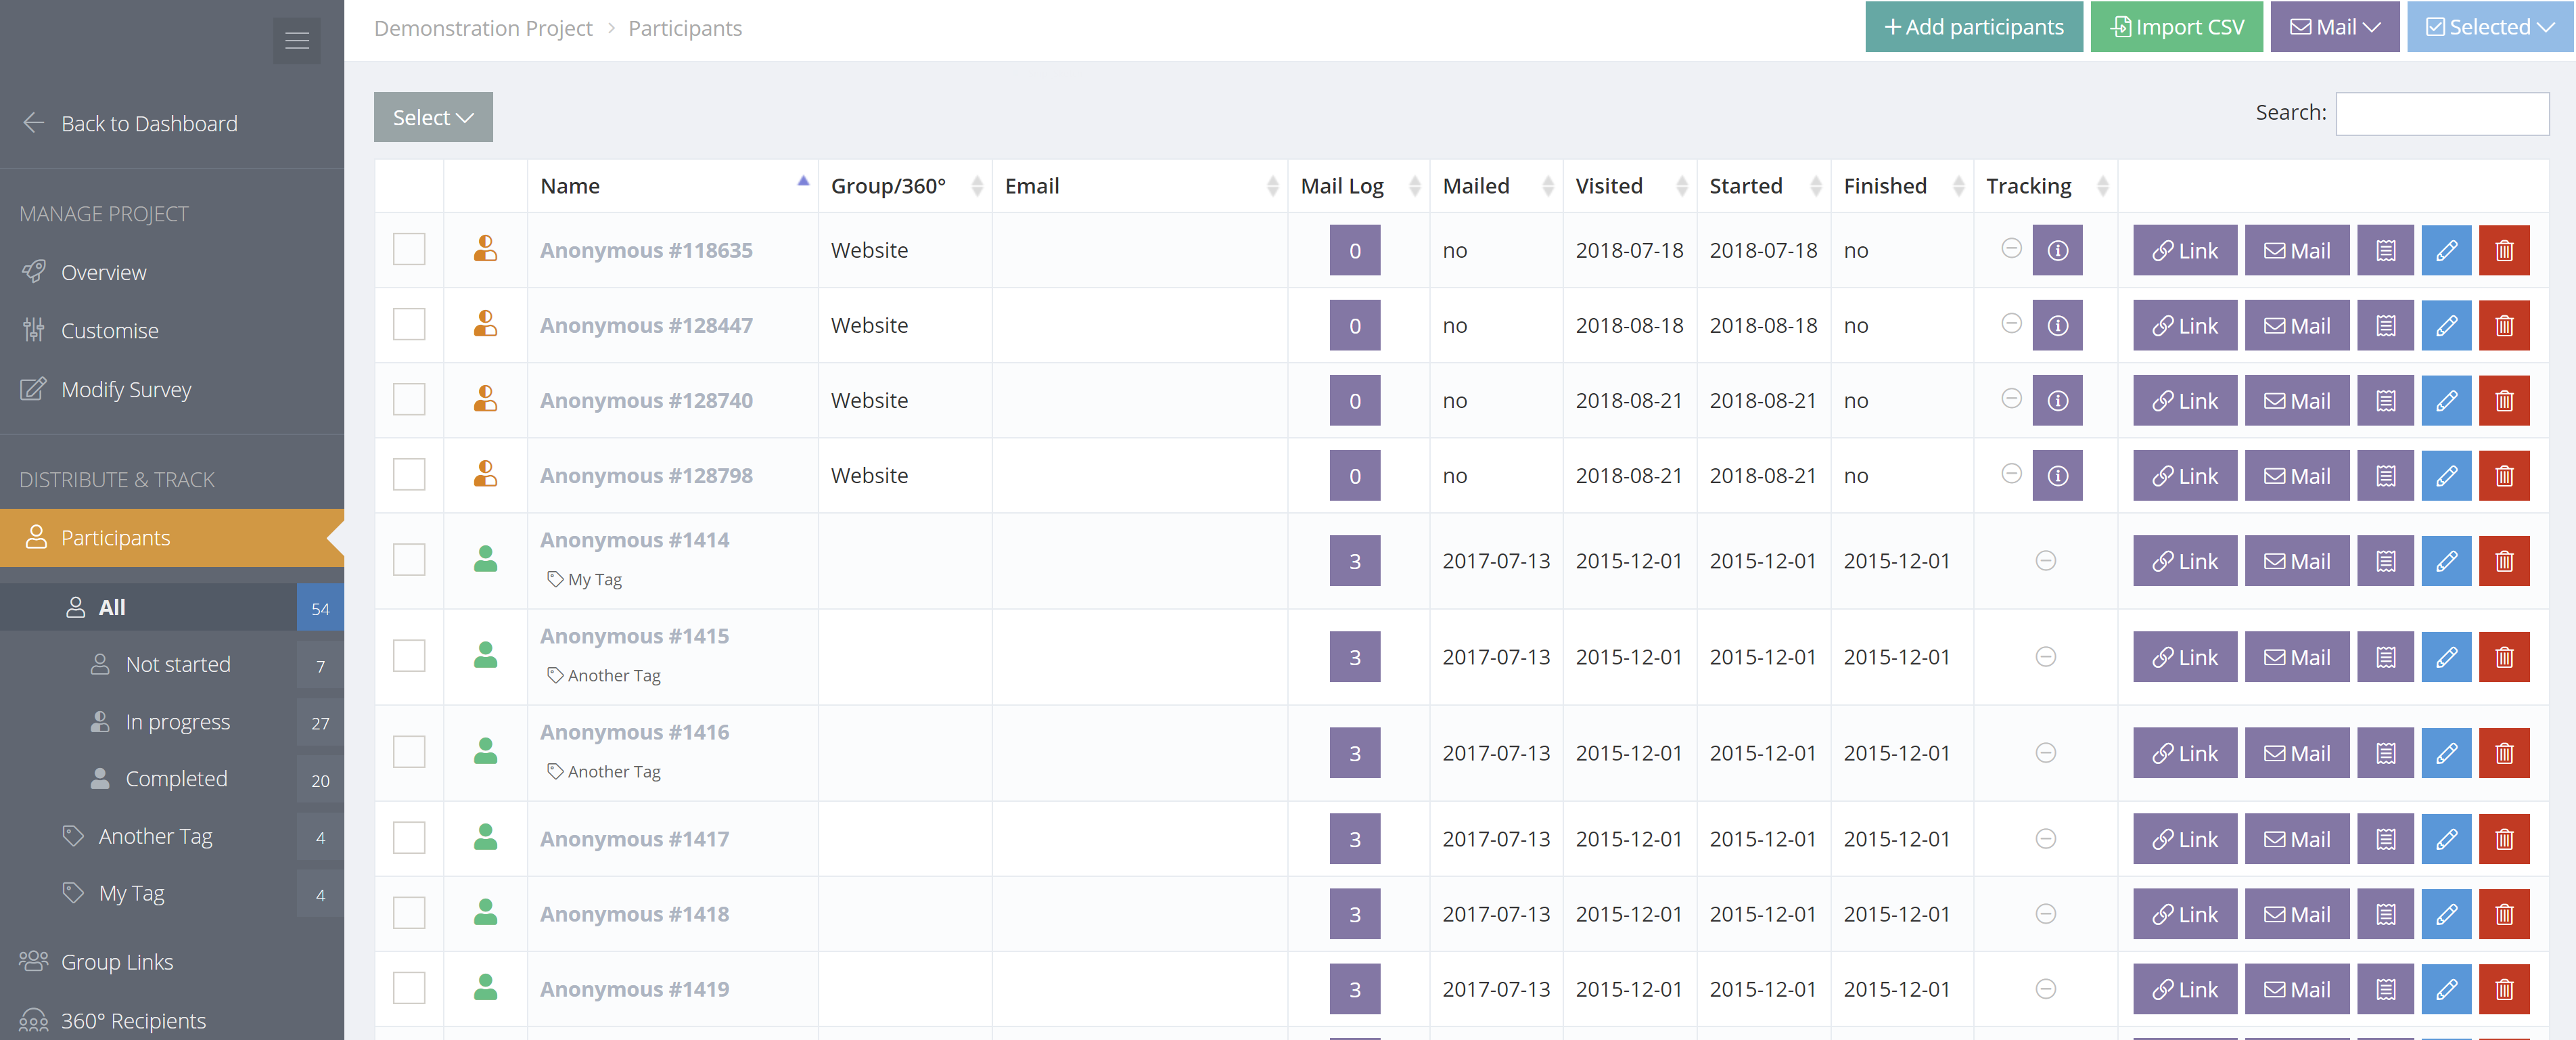
The Participants Menu
Participants are added in one of two ways:
- Directly in the Participants menu, or
- Automatically when they commence a survey from a Group Link (a link that can be shared) or a 360 Recipient Link.
Survey completion progress can be tracked and managed in the Participants Menu.
Depending upon the number of participants selected, the records may be shown over more than one web page. If you have a very large number of records, and select the “Show all” option, it may take a longer time to display. If you experience problems, choose a lower number and then take action in batches.
Participants are Grouped by Survey Status
The participants menu has sub menus showing participants according to their survey completion status, i.e.
- Not started
- In progress
- Completed
Tags can also be created to group and organise participants. Tags appear below the status menus.
Adding Participants
Participants can be added by clicking the "+ Add Participants" or the "Import CSV" buttons. They are also added automatically when commencing a survey from a Group Link.
Add Participants Individually
There is an option to quickly add an individual to the Participants List. Select the "Manual" option and enter their name and details.
Add from Contacts or Participant Lists
Choose "From Contacts" or "From Participants" and select people to add to the project. Don't worry if the person already exists as a participant, they won't be added twice. Editing or deleting participants in a project does not delete or change the person's details in Contacts or Participant Lists.
Import Participants from a CSV File
Multiple participants can also be imported directly into projects using the "Import CSV" button. Create columns in the CSV for First Name, Last Name and Email Address. Optional data fields include Tags, Organisation and Job Title.
When importing participants into Projects duplicate records are allowed and will be created in the project.
A message will appear to confirm successful import and to advise the results of the import.
Automatic Addition from Group Links
When a person commences a survey from a Group Link, they are automatically added to the Participants List.
Distributing Surveys and Personal Links or Messages by Email
Personal survey Links and messages can be distributed by email from the "Mail" button. There is significant flexibility when emailing.
Mail can be sent:
- To "All" participants or to "Not started" or "In progress".
- To selected participants. Check the box next to individual participants then click the "Mail" button and choose Selected.
- To individual participants. There is an email icon alongside each participant.
Mail Button

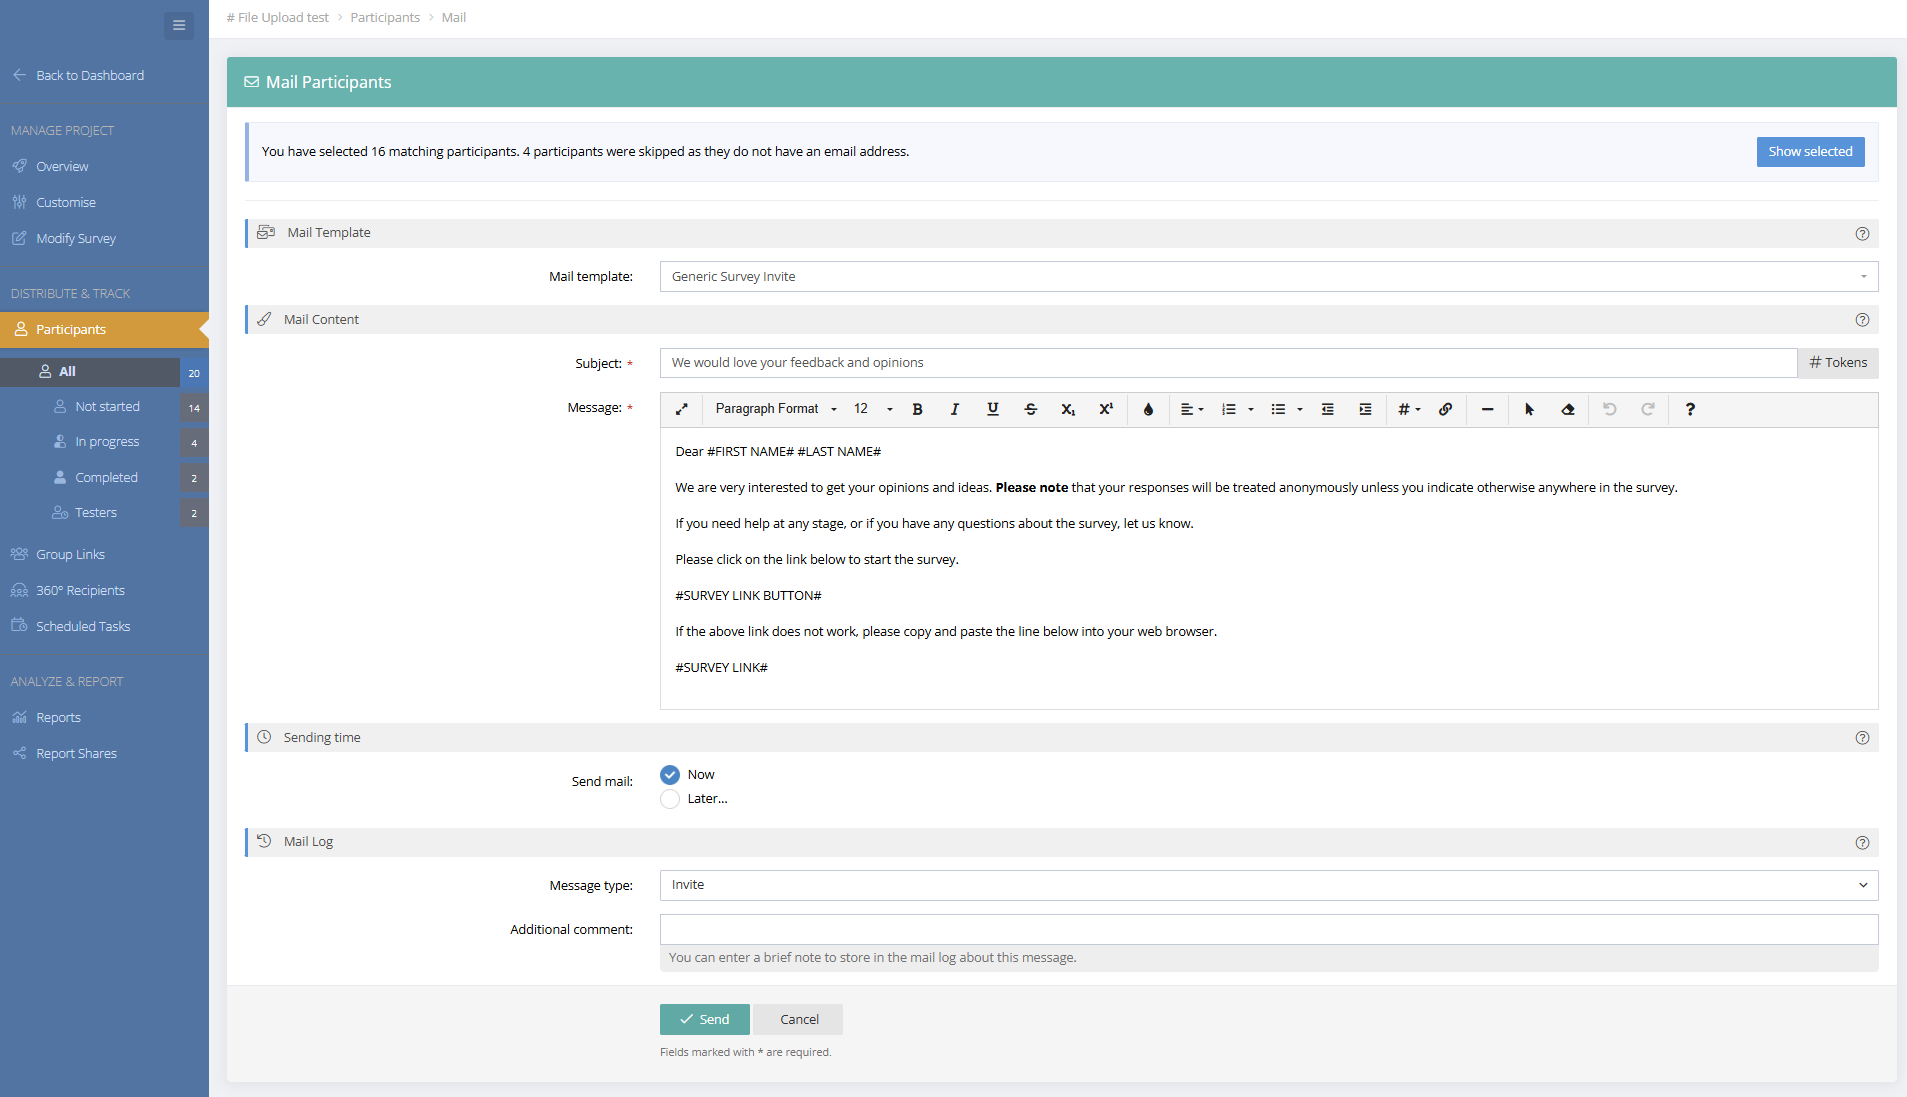
The Mail Window
The mail window has a button to show the selected participants to be emailed along with a Mail Template selector and Mail Log fields. There are options to send "Now" or schedule to be sent "Later".
The Mail subject and message may be edited without affecting the Mail Template. Alternatively, create the email directly into the subject and message settings without using a Mail Template.
It is important to ensure relevant "Tokens" are inserted into the email. In particular, it is imperative to add a "Survey Button" token. Tokens contain # symbols either side of the field. This token will insert a button with a the link to the survey. Without this token the participant will not be able to access the survey.
A field is available to enter a "Mail log Comment". This comment will be recorded and can be viewed in the Mail History log for the participant.
If the project has been set to "Anonymise" responses then emails cannot be sent to participants who have completed their survey as their personal details are no longer available.
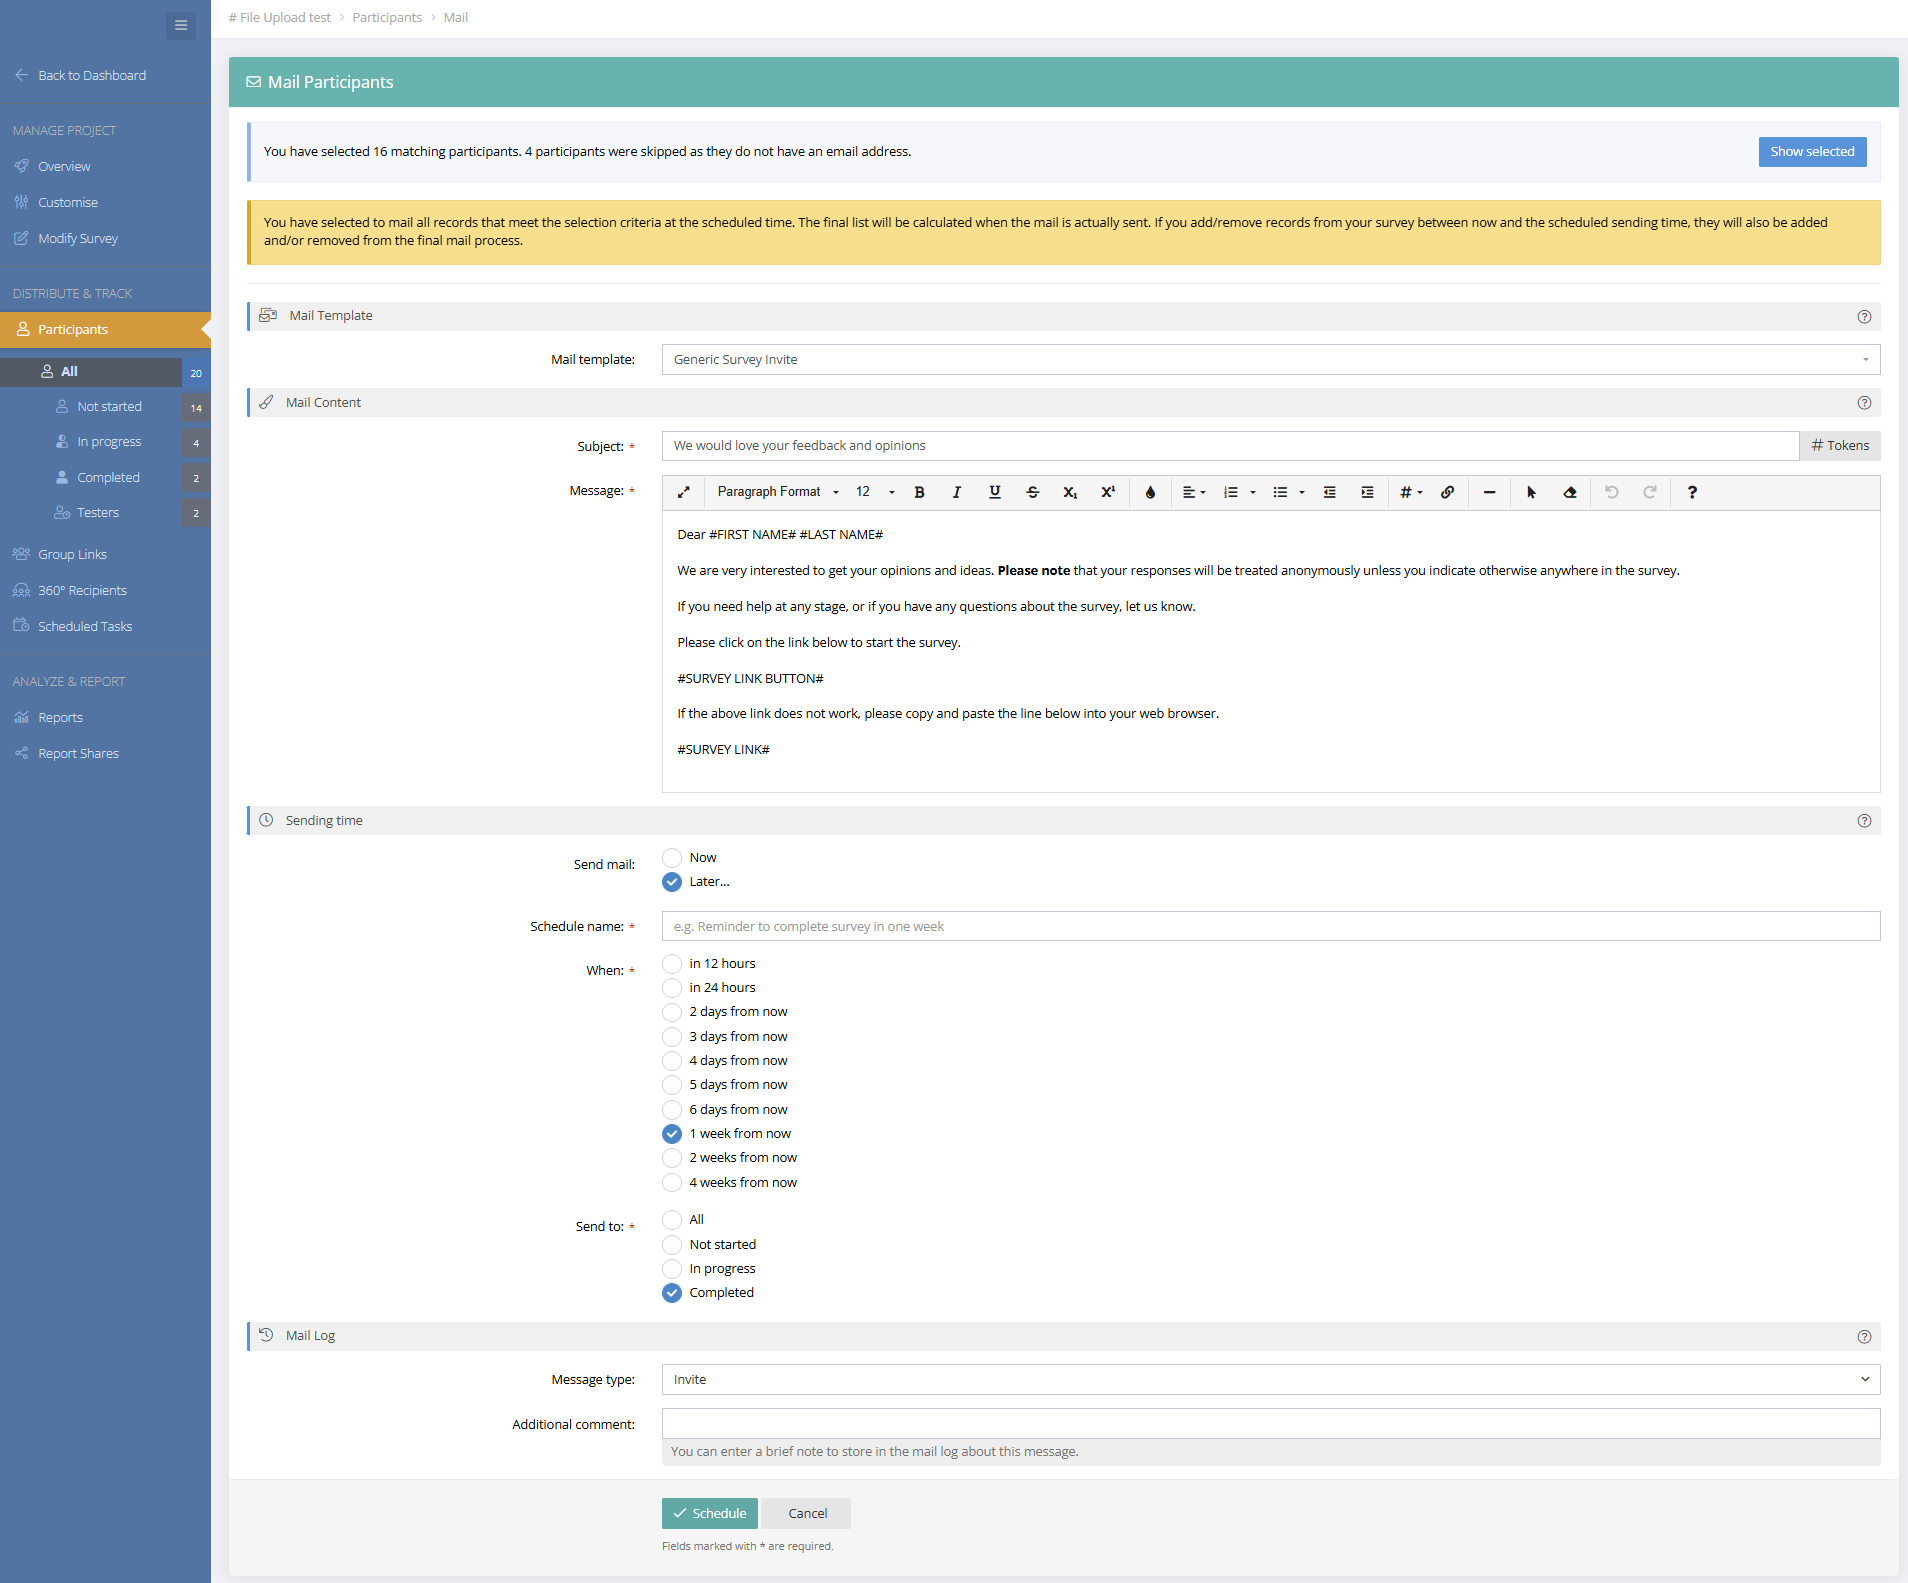
Scheduling Automated Mail and Tasks
You can set mail to be sent immediately or at a future time. When scheduling mail for "Later" choose the timeframe and make a "Send to" selection. Mail will be sent to all selected records that meet the selection criteria at the scheduled time. The final list will be calculated when the mail is actually sent. If you add/remove records from your survey between now and the scheduled sending time, they will also be added and/or removed from the final mail process.
Note: The Timezone can be set for any region in your Profile > Accounts & Settings > User Interface menu.
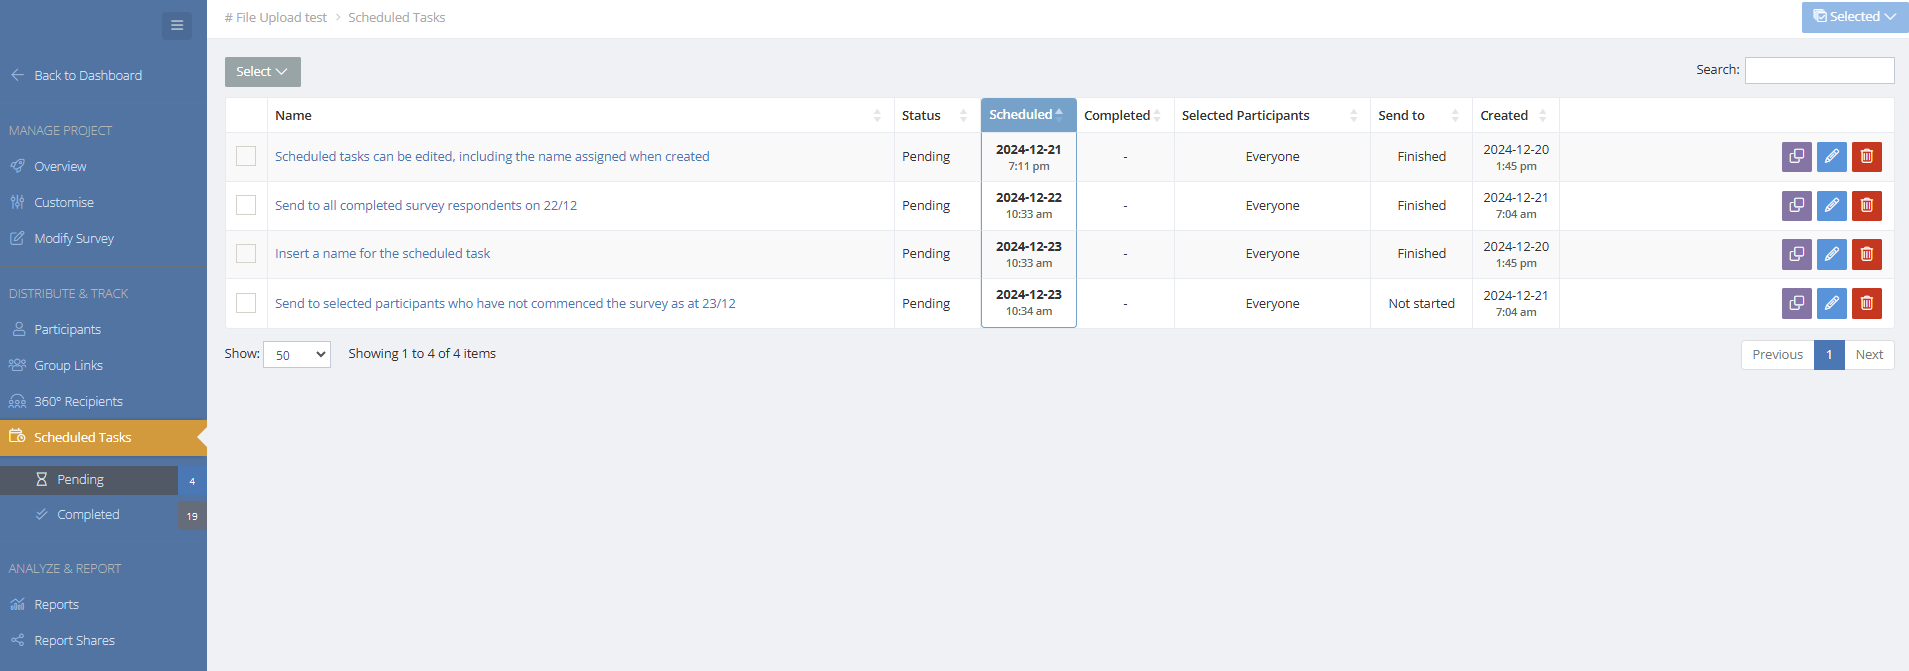
Viewing and Editing Scheduled Tasks
The Scheduled Tasks menu shows Pending and Completed tasks. Tasks can be edited up to a few minutes before the scheduled send time. Scheduled Tasks also appear in the Project Overview menu and on the Dashboard.
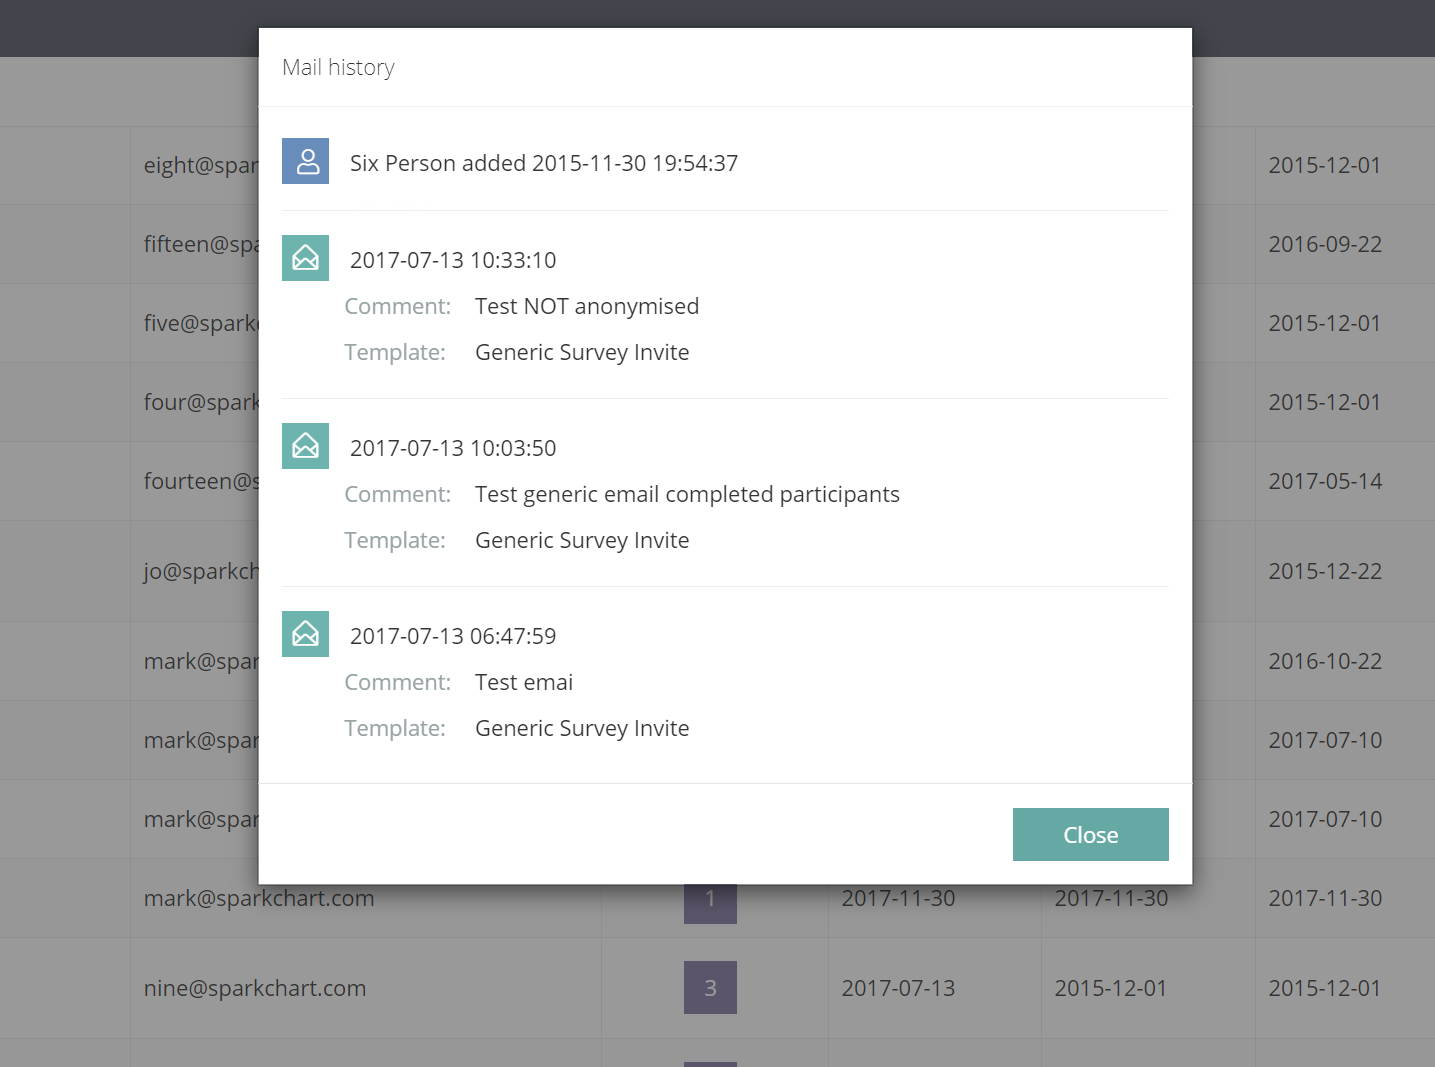
Mail History
The Mail Log column shows the number of emails sent to the participant. Clicking on the mail sent number exposes the email log with dates and details about emails sent along with other information like the date the person was added to the project.
When email is undelivered, an error message will appear and the Mail # column will show a red button. The date of the last successful email will be recorded in the "Mailed" column.
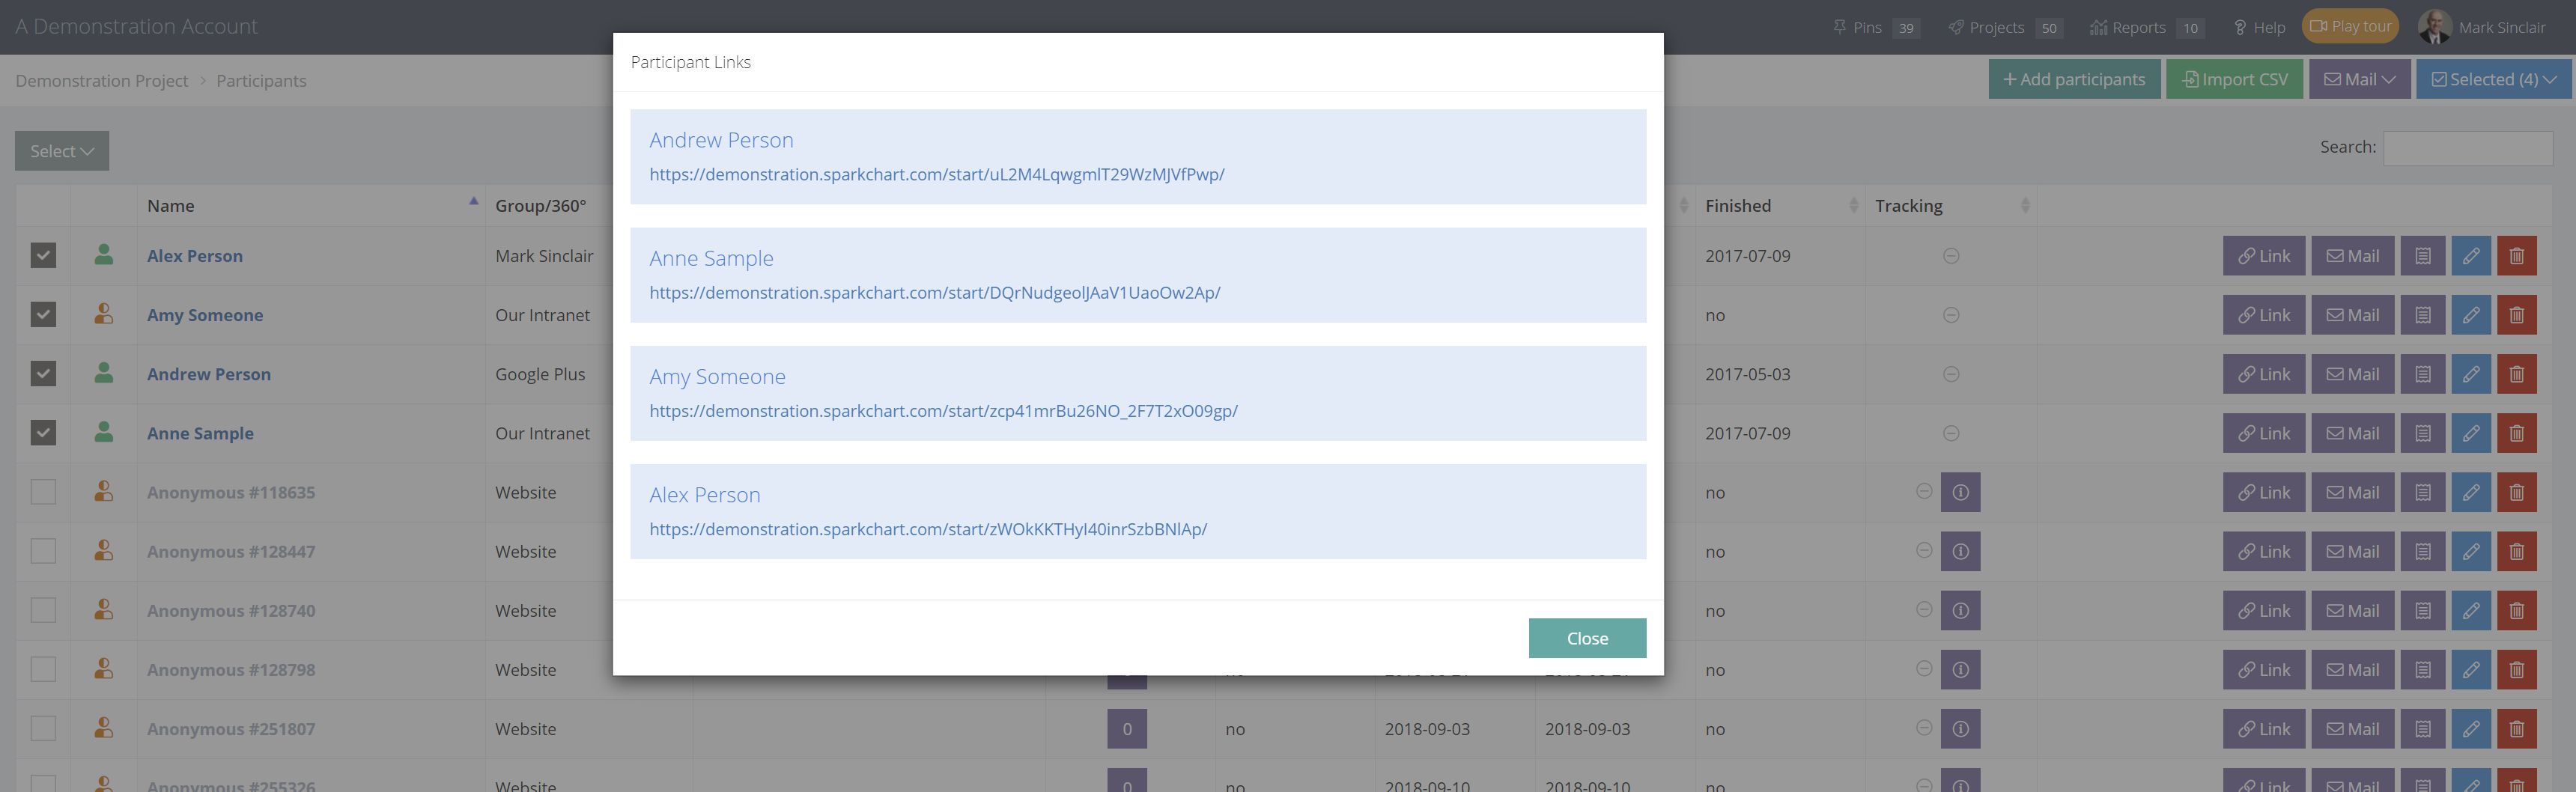
Survey Links
Survey links can be viewed for individual participants or selected groups of participants. To view links for multiple participants, select the participants and then click on the "Selected" button at the top and choose links. A list will appear with the names and survey links of the selected participants. A survey link for an individual participant can be viewed by clicking on the survey link button alongside the participant.
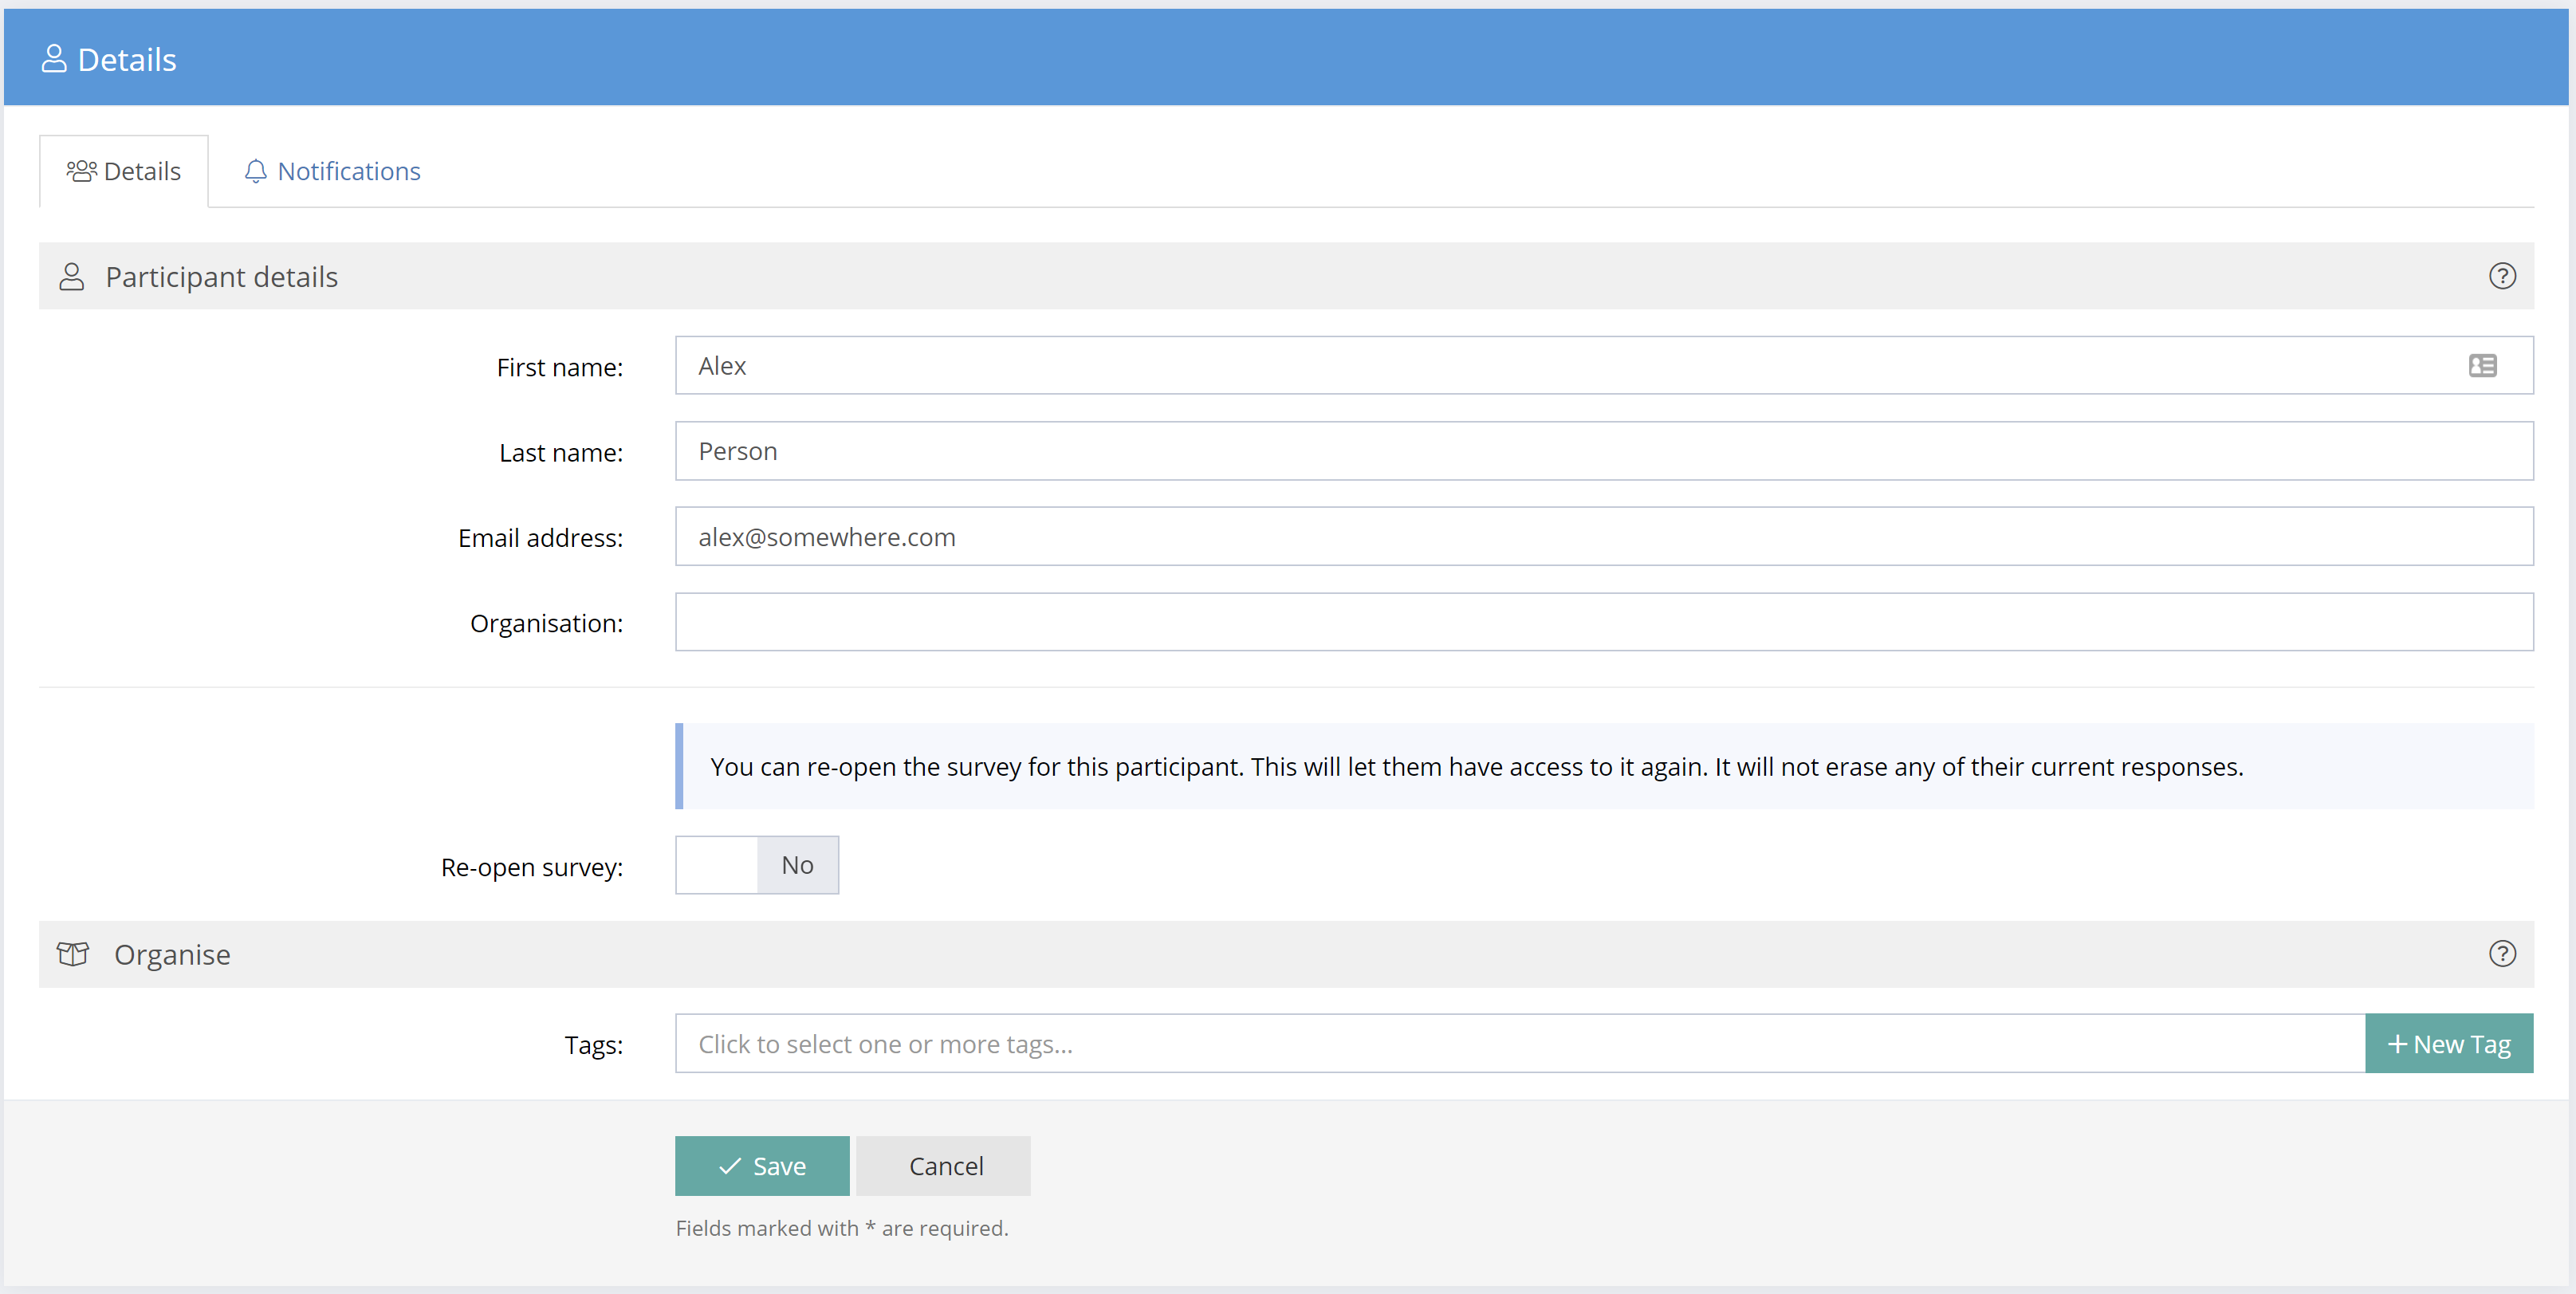
Edit or Delete Participants
When deleting participants a warning message appears with a list of participants to be deleted and asking if you are sure you want to delete them. Deleting participants does not delete them from Contacts or Participant lists.
Take care. Deleted participants will no longer be able to complete the survey and their information and responses will be removed from the project.
Click the Edit button or the Delete button alongside a participant to make changes. To delete multiple participants, select the check boxes next to the participants, then click the "Selected" button at the top of the screen and click Delete.
Option to Close or Re-open an Individual Participant's Survey
In the Edit Participant form, there is an option to close or re-open the survey.
Enable Notifications (with or without Results)
Automatic notifications can be enabled for Participants or for Group Links. When the survey is started or completed an automatic email or Slack notification can be sent.
Set the notification content to either "Compact (participant details & link to the results page)" or "Expanded (participant details, full survey answers & link to the results page)".

Anonymise Responses
The Advanced tab in the Project/Customise/Advanced menu includes the function to anonymize survey responses. Participant details are anonymised as they complete and submit their survey.
This feature allows surveys to be distributed with names and email addresses and followed up with email reminders. However, once a participant has completed a survey, their personal details and email address no longer show. The participant name is replaced with "Anonymous" and a number but their personal details are not shown.
Anonymized view
In an anonymized project, the participants name is changed to "Anonymous" and a number is added simply for reference and not to identify in any way.
Emailing Participants after Anonymizing
After a project is anonymized, the completed survey participant details are hidden, including their email address. You may still email those participants who have not completed the survey. A message will advise if the email selection contains anonymised participants.