About Survey Templates
Survey Templates contain questions, headings, instructions, page breaks and conditional logic. Survey Templates are NOT survey projects. They are templates that can be used in multiple projects.
Important: When ready to conduct a survey project, you create a project, select a survey template and launch the project. The template is copied into the project when you launch it. There you can customise the presentation, deploy surveys and create reports. Editing a survey template will not change a survey in a launched project. If you wish to change the survey in a project simply edit the survey template and re-launch the project.
Why do we do this? To avoid accidental changes to live survey projects, and to make it easy to re-use survey templates in different projects.
What is in this help article
How to create a Survey Template
Add survey content (questions, matrix, text, images, video, instructions, page breaks, etc.)
Copying a Survey Template (in Full or in Part)
Archive, restore or delete a Survey Template
Creating a Net Promoter Score® (NPS®) Survey - Use Emoji Scale Question Type
Learn about adding Conditional Logic here.
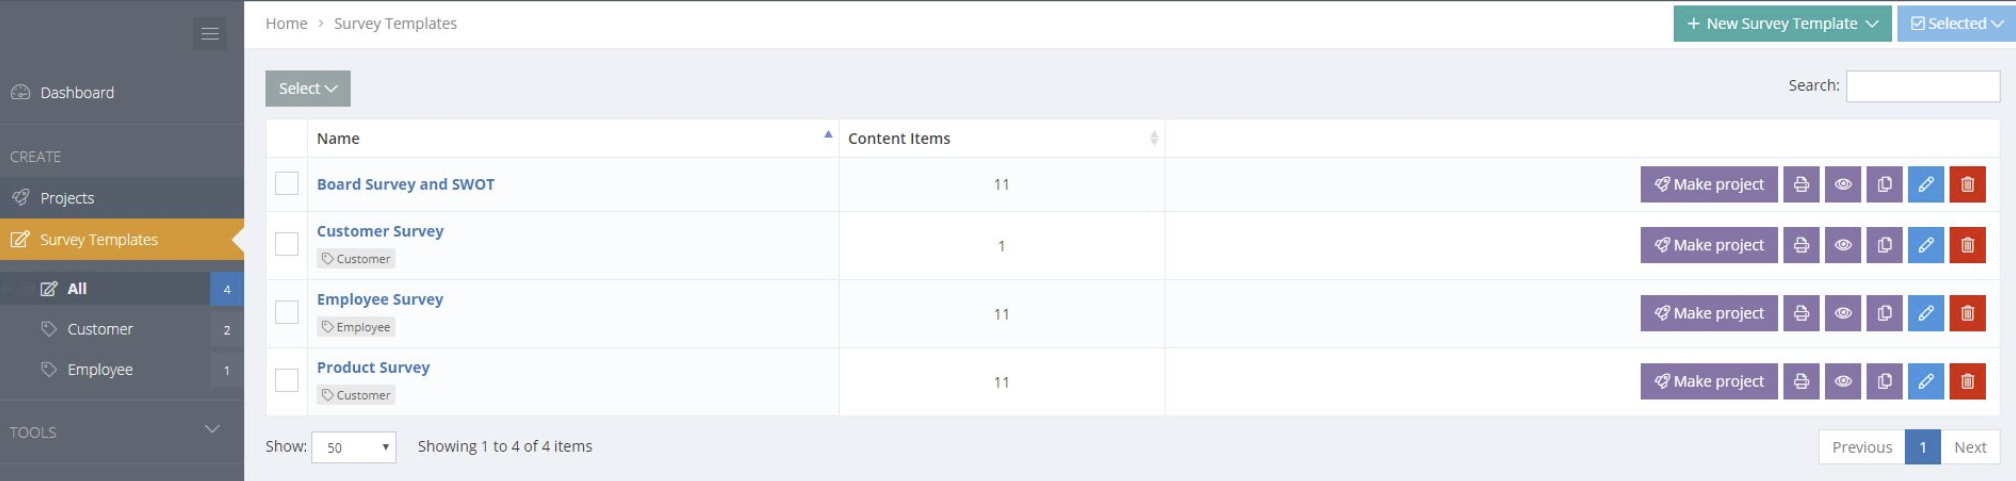
The Survey Templates Menu
The Survey Templates menu lists all survey templates. Surveys can be organised using the Tags feature. Learn more about Tags here.
Creating a Survey Template
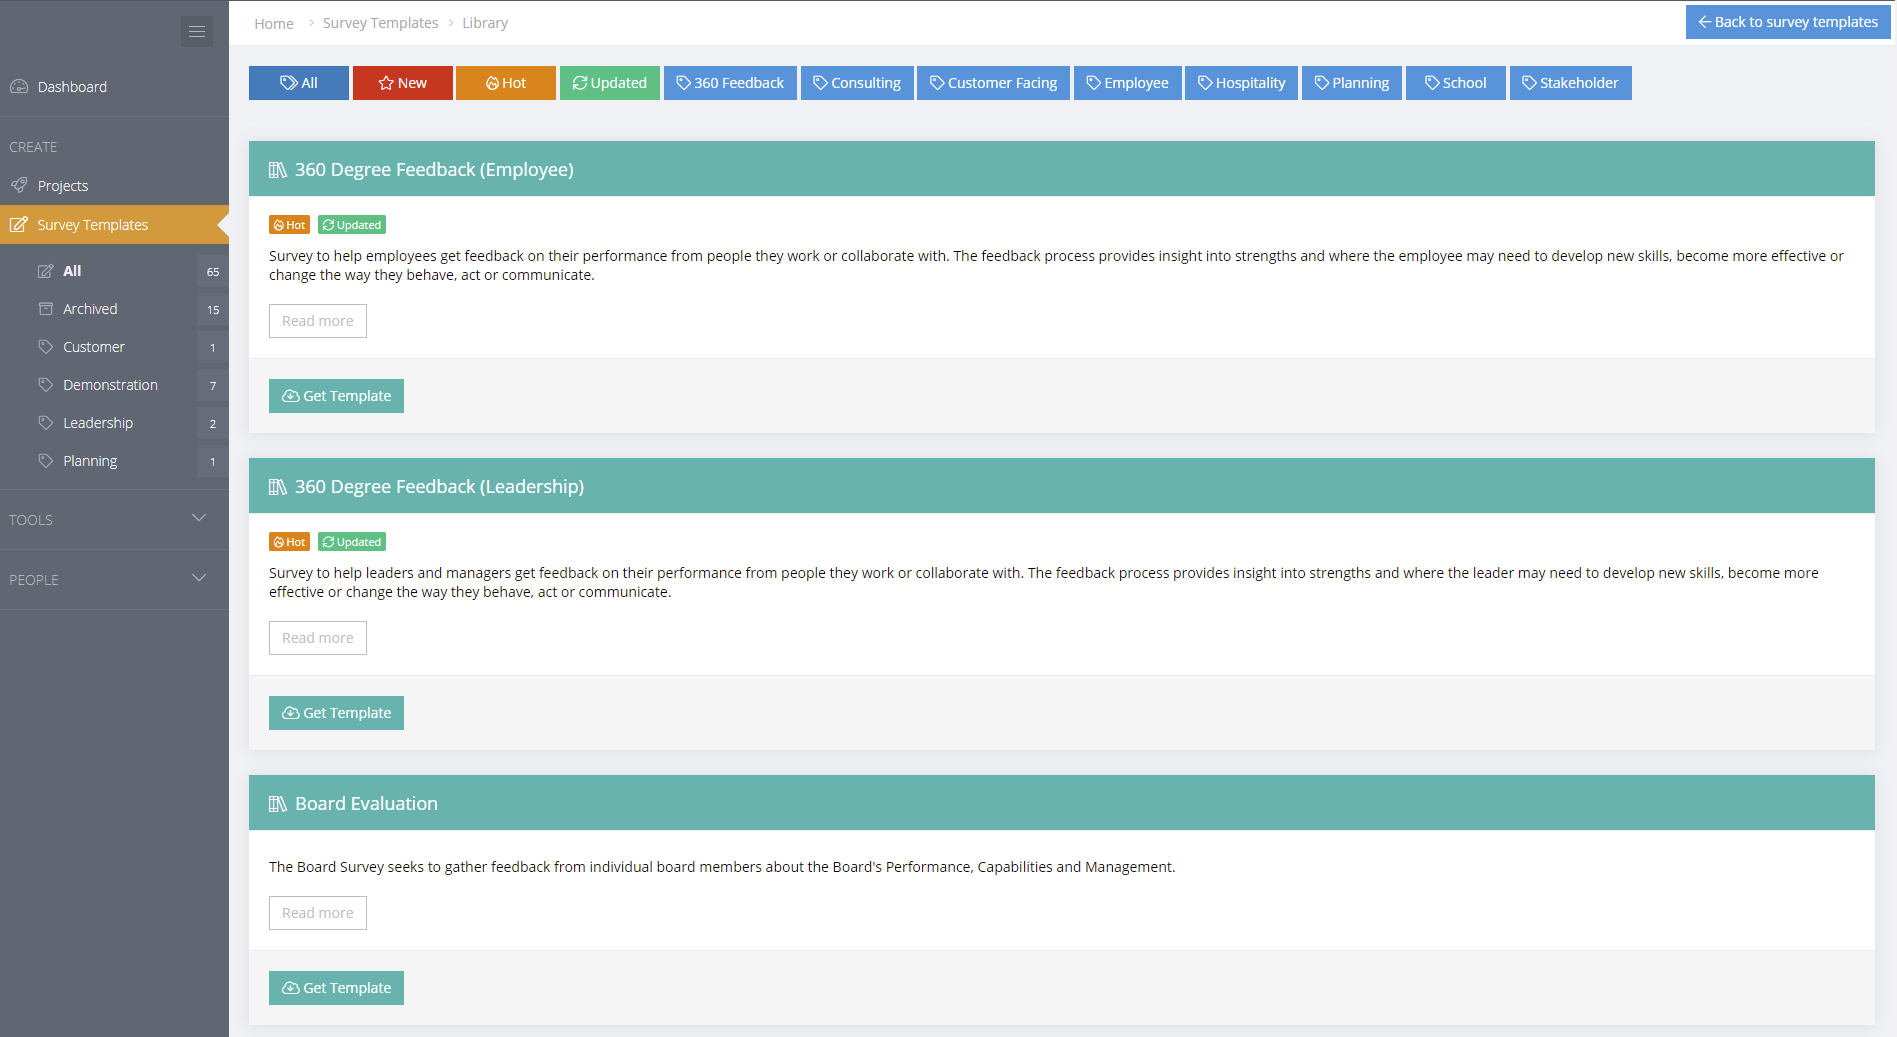
To create a new survey template, go to the Survey Templates menu and choose "+ New Survey Template" at the top of the page. There are two choices. Choose "Empty Survey" and build a survey from scratch. Or, choose "From library" and then select and install a survey template from our library.
Choose the Make Project button to start a project and add the welcome and finish pages and customize the branding.
When starting with an empty survey template, you will first be presented with a form to enter the overall survey template settings - name, description, default scales, randomise options and tags. After saving, buttons will appear to add questions, text, page breaks and conditional logic.

The survey template settings can be edited at any time by choosing the Edit button in the blue bar at the top.
Default Scales and Answer Lists
These defaults are optional as rating scales and answer lists can be selected when adding individual questions. Setting defaults can save time if your survey uses a specific Rating Scale or Answer List for a lot of questions. Setting defaults will make it quicker to add those questions when building the survey. Additionally, you can change the selected Rating Scale or Answer List at any time and all the questions that use the default will update automatically.
Randomising survey pages and content
When randomise options are enabled, the survey content (pages, questions and text items) is randomised based on the options selected. Page breaks are respected so that survey content will always appear with content from the same page. Randomising recognises the individual participant's personal survey ID, so participants will always get the same order if they come back to the survey later.
To ensure a consistent experience for participants, anyone who has a survey in progress when you change this option will still see the previous settings. New participants will be presented with the updated version.
These survey level options will not randomise the response options for individual multiple choice and answer list questions. There is an option to randomise the response options for those question types when creating or editing the question.
This feature works with conditional logic action except question hiding logic, in which case it will be ignored.
The Survey Library
The Survey Library contains ready-made survey templates that can be installed instantly. These survey templates can be used as-is in projects or they can be edited.
Testing (Previewing) a Survey Template
There is a Survey Test feature to view and test the content of a survey template (questions, instructions, page breaks and conditional logic). Data checks are performed but responses are not stored. Look for the preview icon alongside the survey template or at the top of the page. Note: Customised branding is not shown in the survey template test, including the optional welcome and finish pages, logo, title, branding, colours, registration form, footer, consent form and more. They are added when creating a project.
There are two options for testing surveys - Classic (as designed) and Focused (one question at a time). The Focused Mode simply overrides the survey template page breaks and presents one question at a time. The same layout can be achieved by inserting page breaks after every question.
We highly recommend piloting surveys in a live project before deploying to wider audiences.
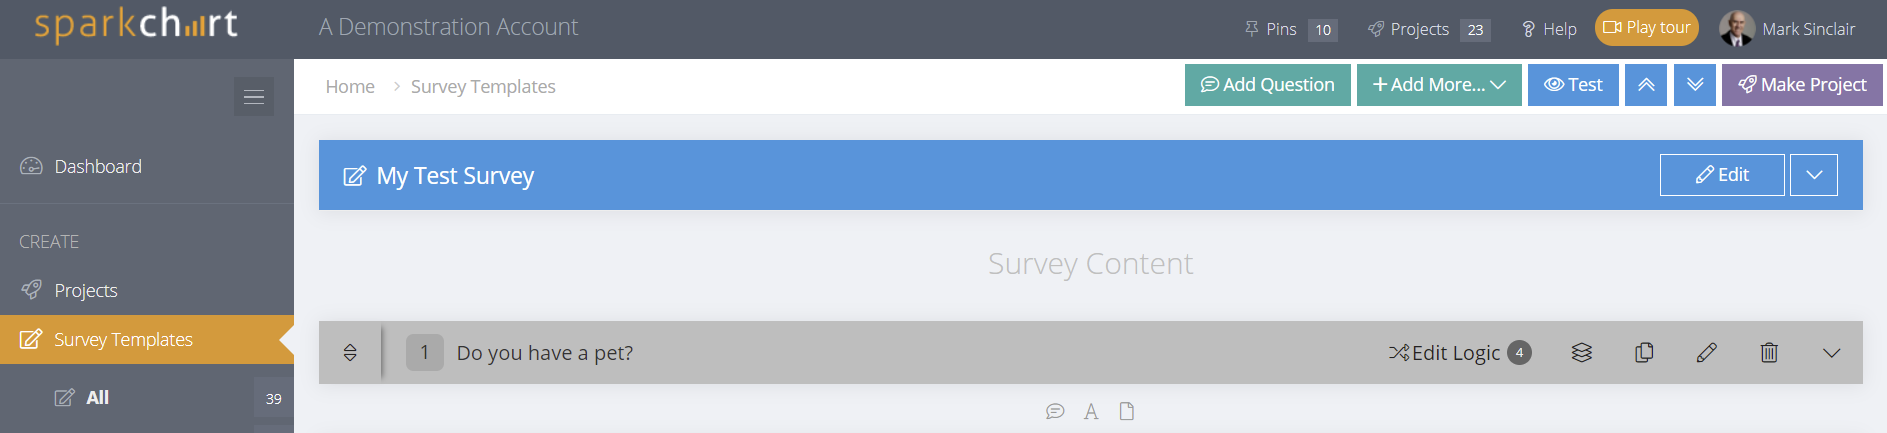
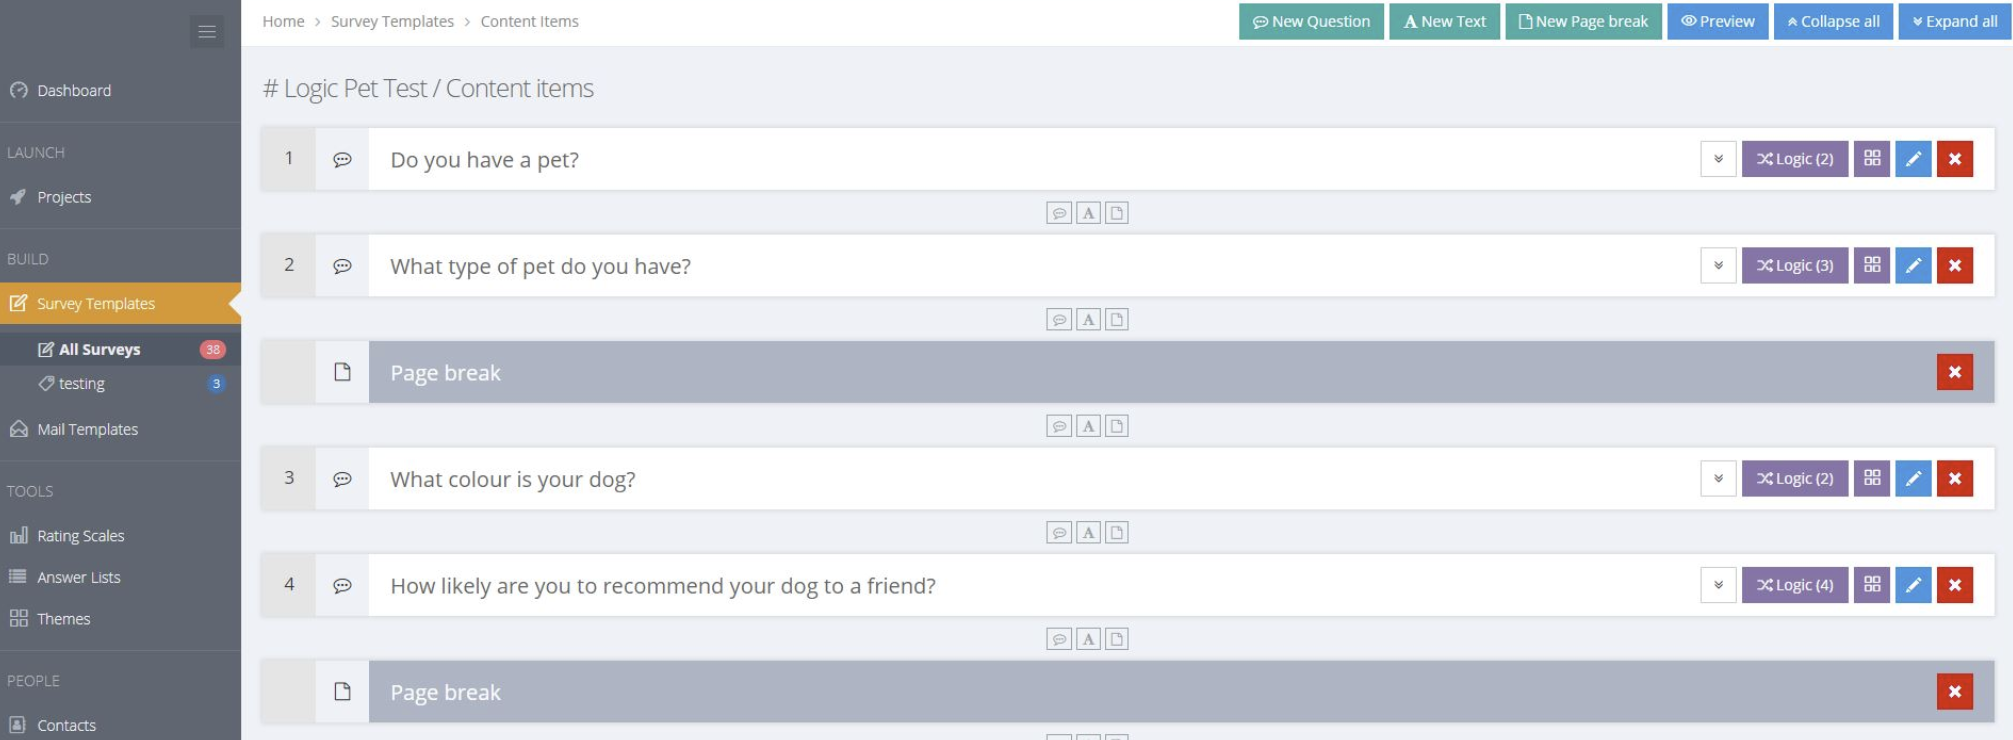
Adding Survey Content
To add or edit survey content, go to the Survey Templates menu and select the Content button alongside the survey. This is where to build the :
- Survey questions (statements) are the questions or statements where participants enter their responses. For example, Free Text comments, Multiple Choice, Rating Scale and Emoji Scale. Accounts come with pre-installed Rating Scales. Customised Rating Scales and Answer Lists can be created in the TOOLS menu.
- Text can be used for inserting instructions, messages or headings. Rich text formatting is available.
- Page Breaks control how many survey items appear on each page on the web. Survey responses are saved when participants move to the next page.
Survey Questions
To insert a Survey Question, select the + New Survey Content buttons at the top of the page or choose the Insert button below or between the content items. To edit a survey question, select the Edit button alongside the survey question in the survey content.
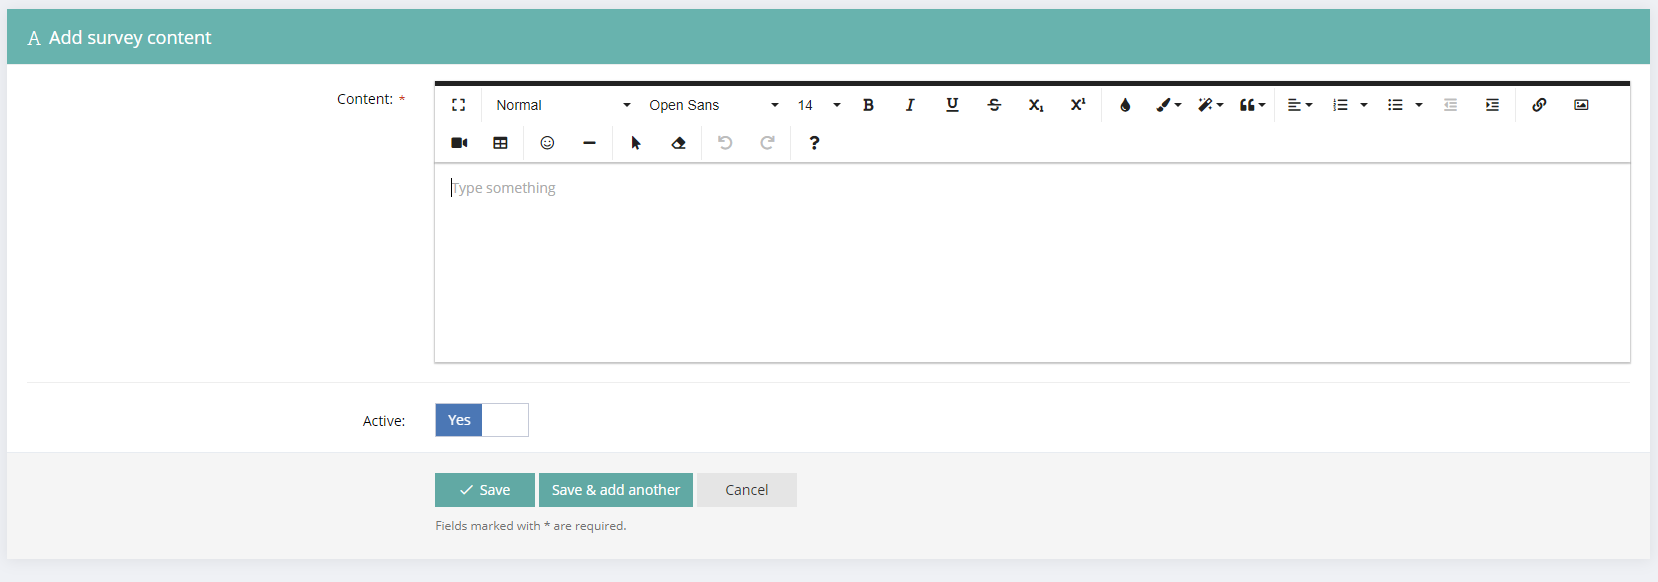
Survey Text, Images, Videos and More
To insert survey text, select the + New Survey Content button at the top of the page and choose "Text". "Text" can be used to insert instructions, headings, images, videos and more throughout the survey. Note: The Welcome and Finish pages can be added to the live survey project when setting it up the live survey project.
Page Breaks
To insert a page, select the + New Survey Content button at the top of the survey content page or the Insert button below each content item. Inserting a page creates a new page with "Next" and "Previous" buttons as participants complete the survey. Pages are useful for separating survey sections and different types of questions. They also help to ensure that respondents do not lose many responses if they are interrupted while completing the survey. Survey responses are saved each time a respondent clicks the "Next" button.
Copy survey questions
Questions in Survey templates can now be copied with all layout settings. This saves time for users when they are entering many questions with the same layout. Select the purple copy button and then edit the copied question.
Sorting Survey Content
To sort or re-order survey content, move the mouse cursor to the element with the up and down arrows and drag it to the desired position.
Making changes to the content of a survey template will not affect a live survey project. The survey template is copied into the project when it is made live. This is to avoid accidentally changing a live survey.
Survey Question Types
Survey question types include:
- Free Text
- Validated Text
- Multiple Choice Single Answer
- Multiple Choice Multiple Answer
- Answer List
- Rating Scale
- Rating Scale Matrix
- Emoji Scale
- Emoji Scale Matrix
- File upload
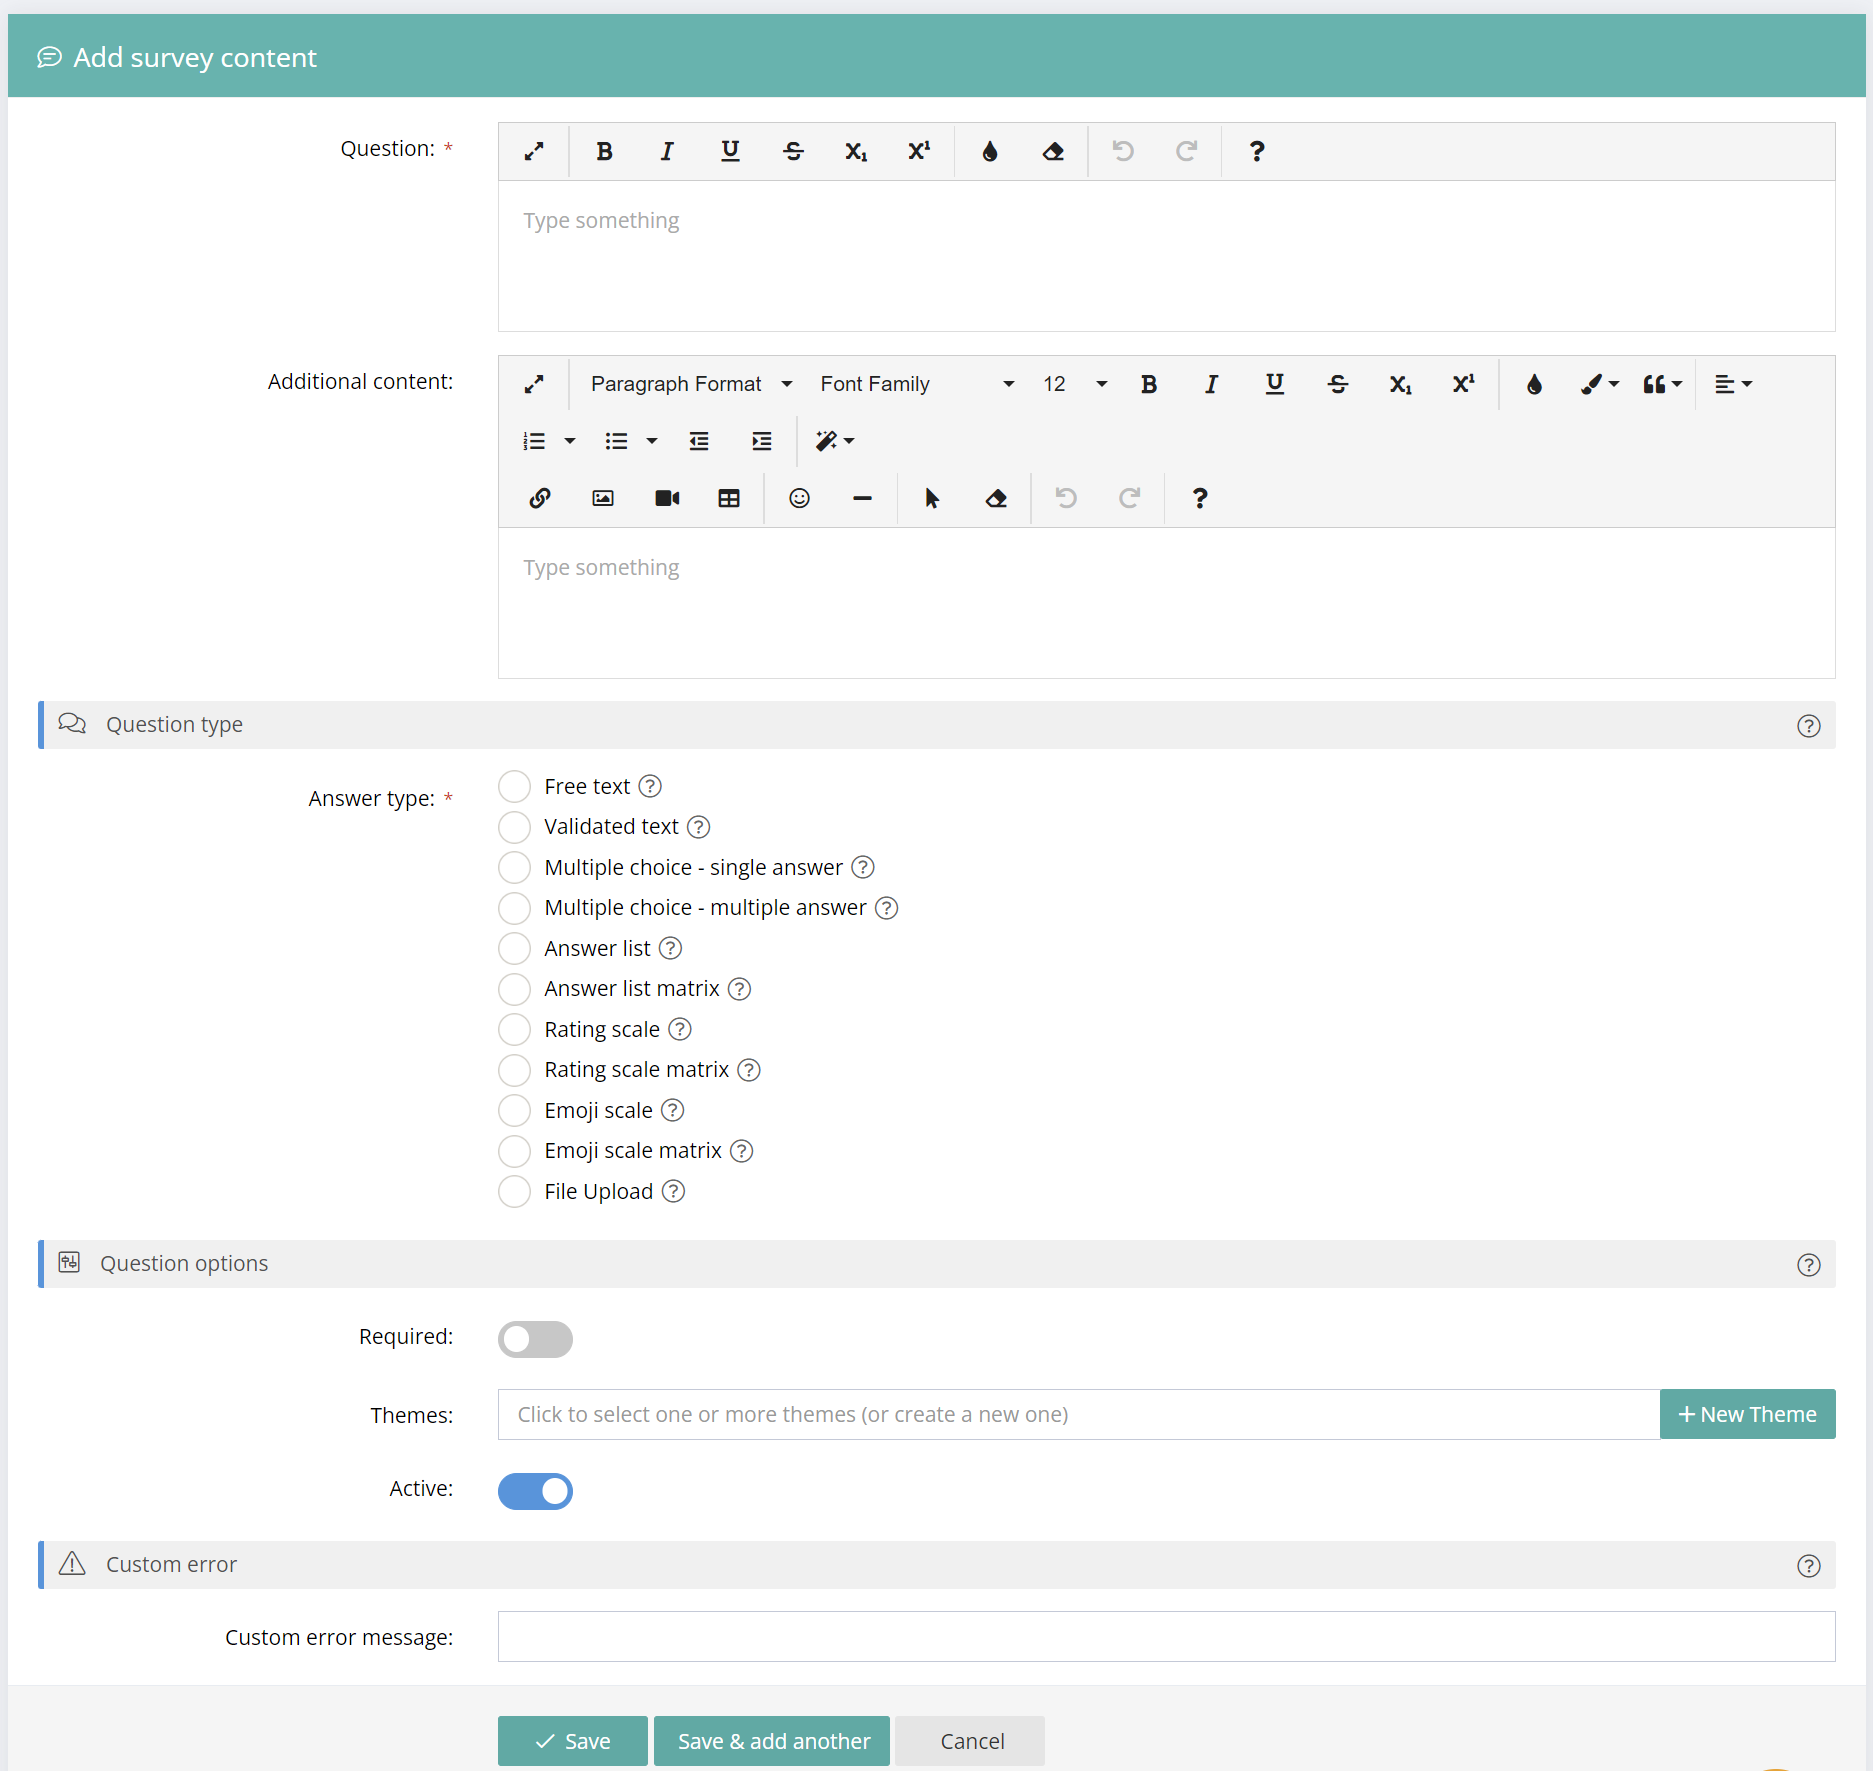
Steps to create a question.
- Enter the question or statement text.
- Enter instructions specifically related to the survey question/statement. This is optional. These instructions appear below the survey question. Rich text formatting is available.
- Select the Answer Type and create the answer options relevant to the Answer Type. Standard Rating Scales are provided with the account. You can also create your own customised Rating Scales and Answer Lists under the TOOLS menu.
- The Question Options will vary for each answer type.
- The Layout Options will vary for each answer type.
- Select whether an answer is required. By default, this is set to optional/not required. We recommend that questions remain optional and only use required by exception.
- Decide whether to allow participants to add comments to their response. Allowing comments can be very useful for reporting as the comments are attached to the specific question.
- Choose a Question Theme if desired. Think of Question Themes as being the survey objectives. Multiple themes are allowed. Themes are not visible to survey participants.
- Click "Save" to store the question and selections in the survey.
The survey question add/edit window
 Free Text questions
Free Text questions allow respondents to respond to questions or statements with their comments.
Multiple Choice Options
Multiple Choice options may be added individually from the + Add Option button or may be added from a typed or pasted list from the Quick Add button. Templates are provided for commonly used multiple choice options - like Yes/No and Agree/Disagree.
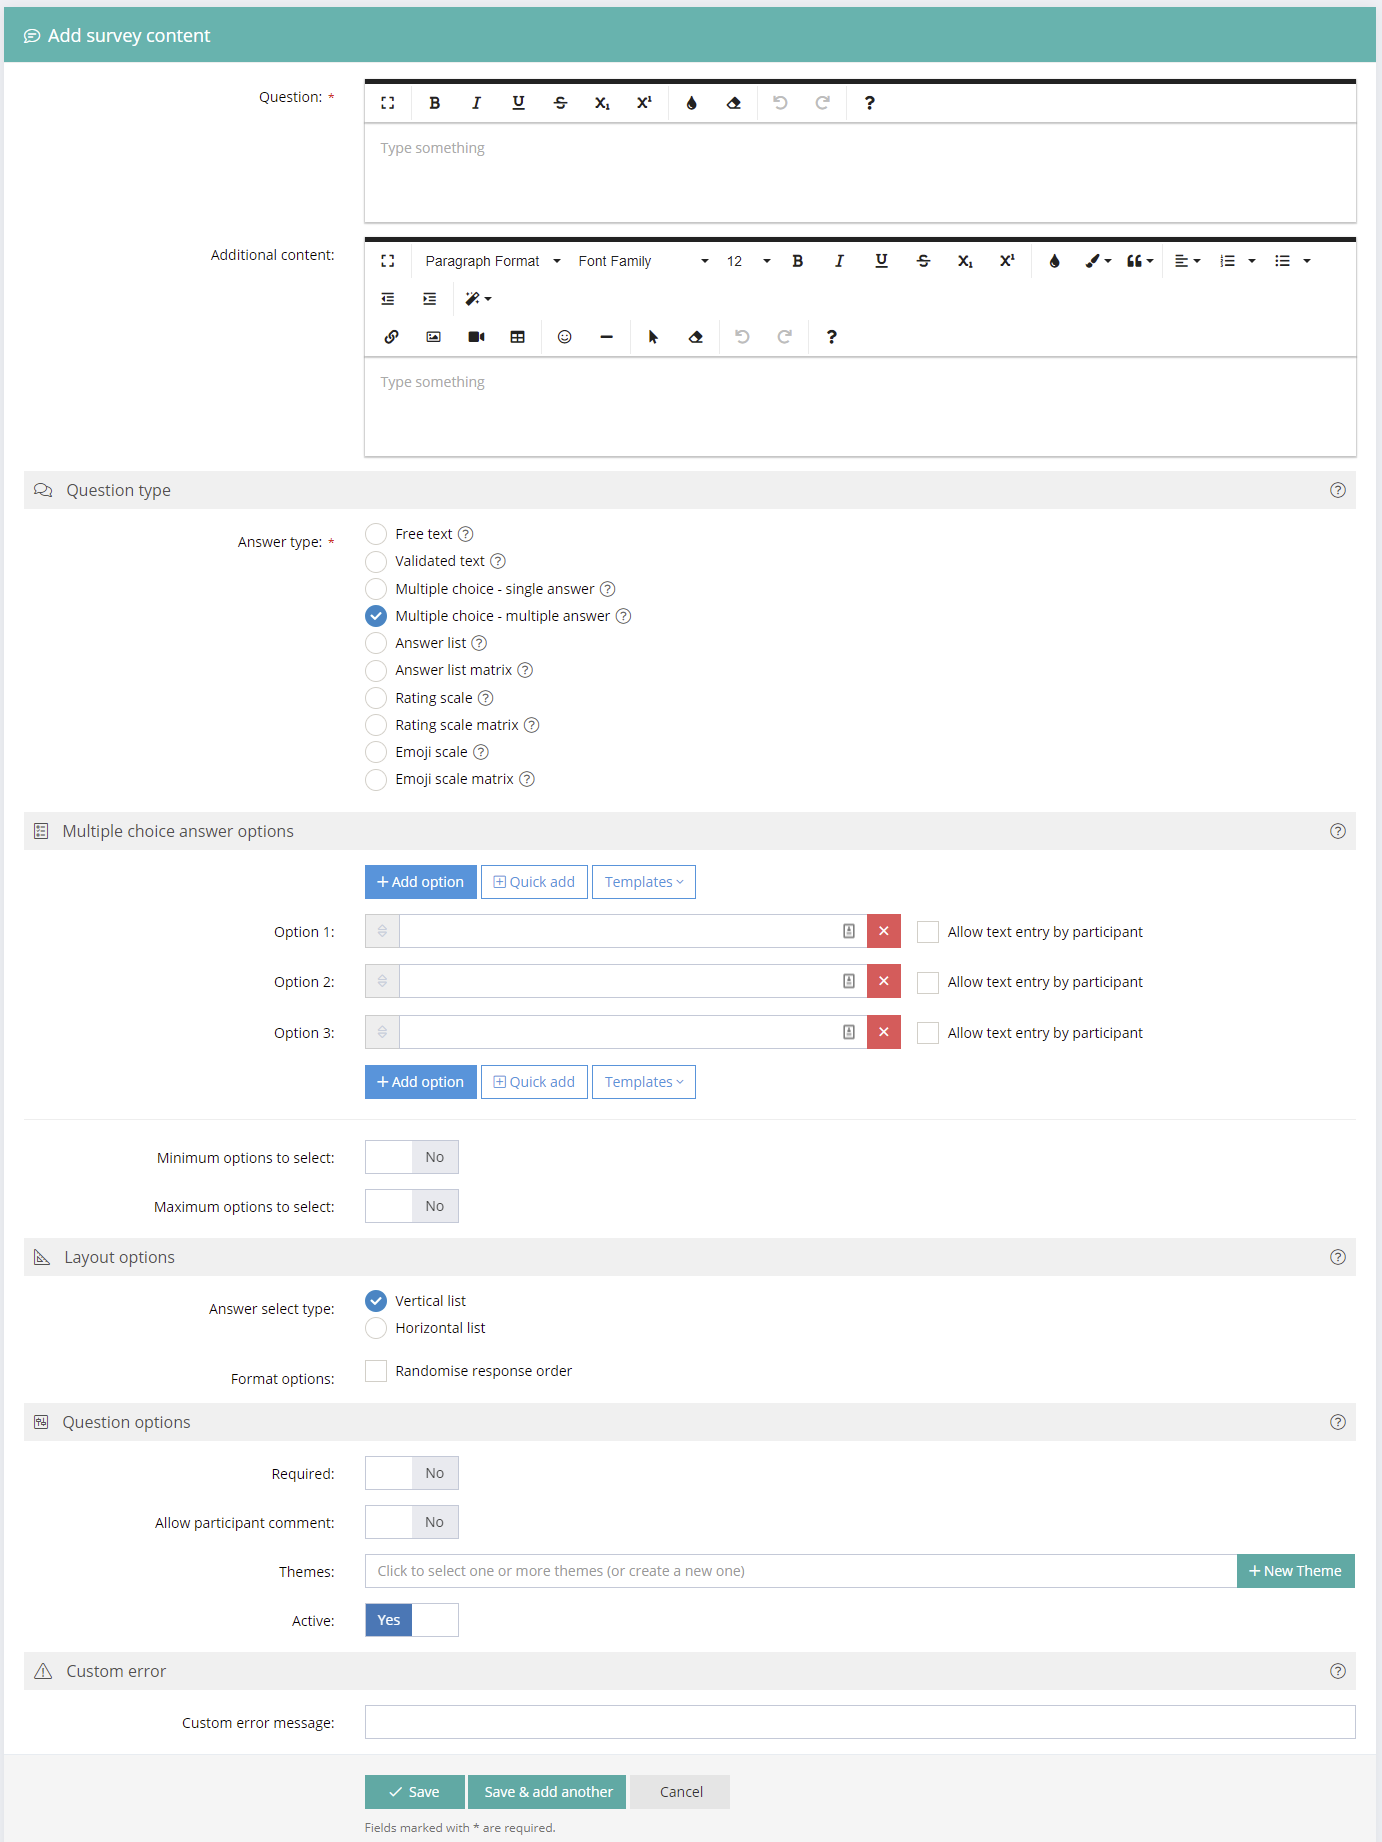
Change the order of Multiple Choice question options by dragging them using the arrow button to the left of the option.
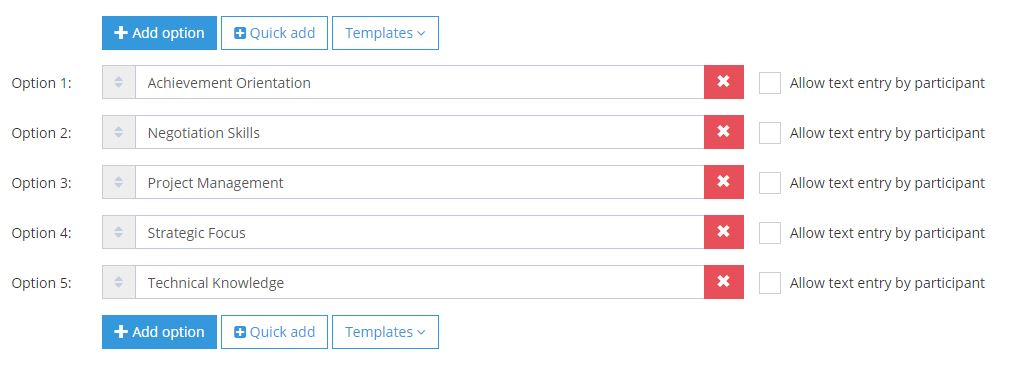
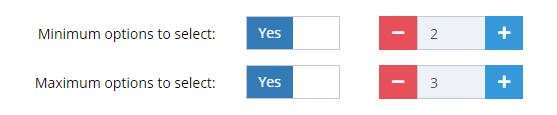
Minimum and Maximum response requirements can be set for Multiple Choice - Multiple Answer questions and also for Answer List questions.
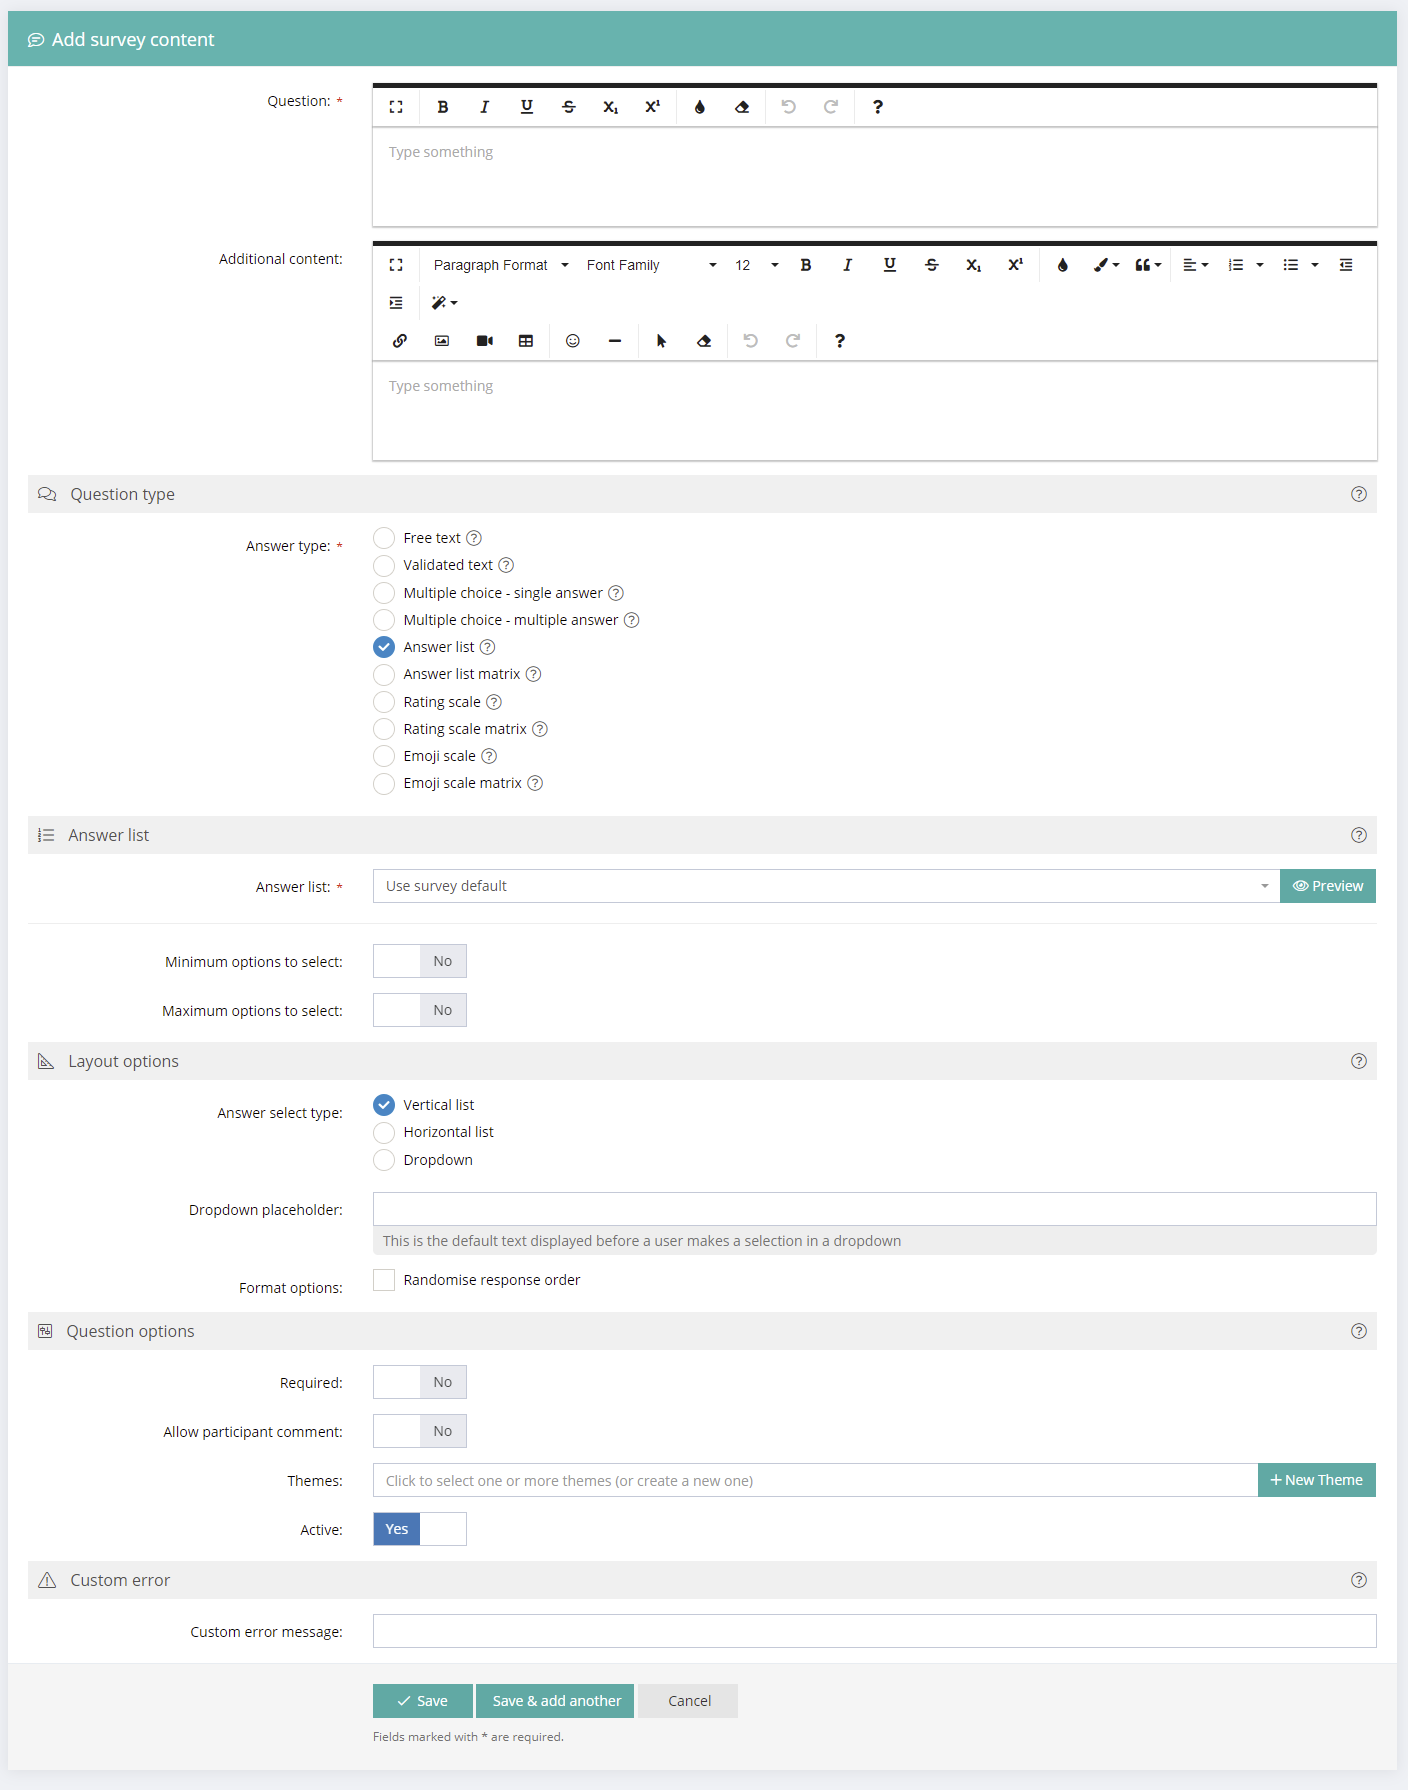
Answer List Questions
Answer Lists are simply multiple choice lists that you have created and saved under the Tools/Answer Lists menu. They are useful for regularly used lists to save retyping each time.
Answer Lists are created and stored in the Answer Lists Menu.
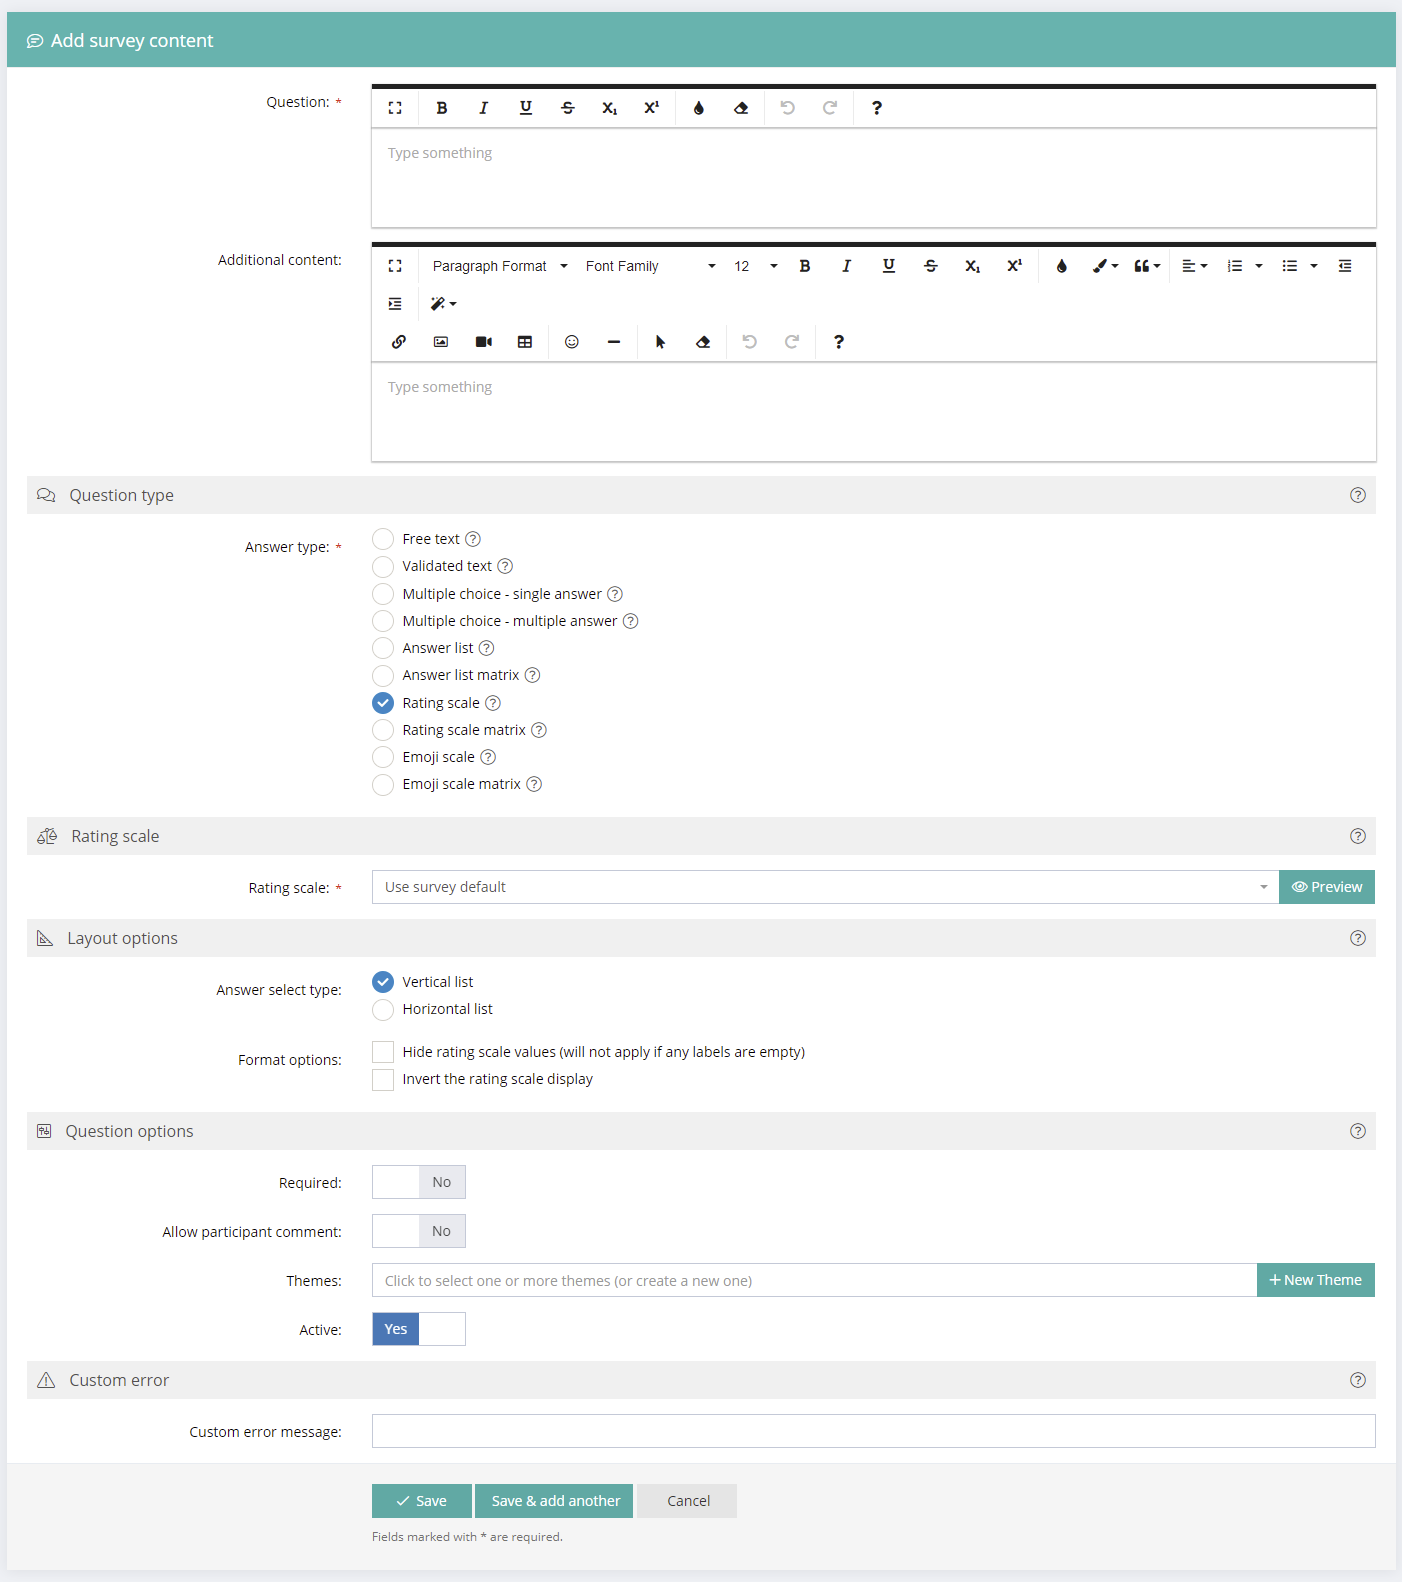
Rating Scale Questions
Rating Scales are a type of survey question (or statement) that is commonly used in surveys. They are useful because they allow comparison of responses from one question to another. Rating scales contain "Values" that allow report calculations and "Labels" to define the scale item for interpretation and to make answering easier for respondents.
There are options to choose a Vertical or Horizontal layout for presentation of the response options in the survey.
By default, the scale is presented from Lowest to Highest value. There is an option to "Invert" the scale and show Highest to Lowest value.
Accounts and surveys from the library come with pre-installed common Rating Scales.
Rating Scales are created and stored in the Rating Scale menu ready for use in surveys.
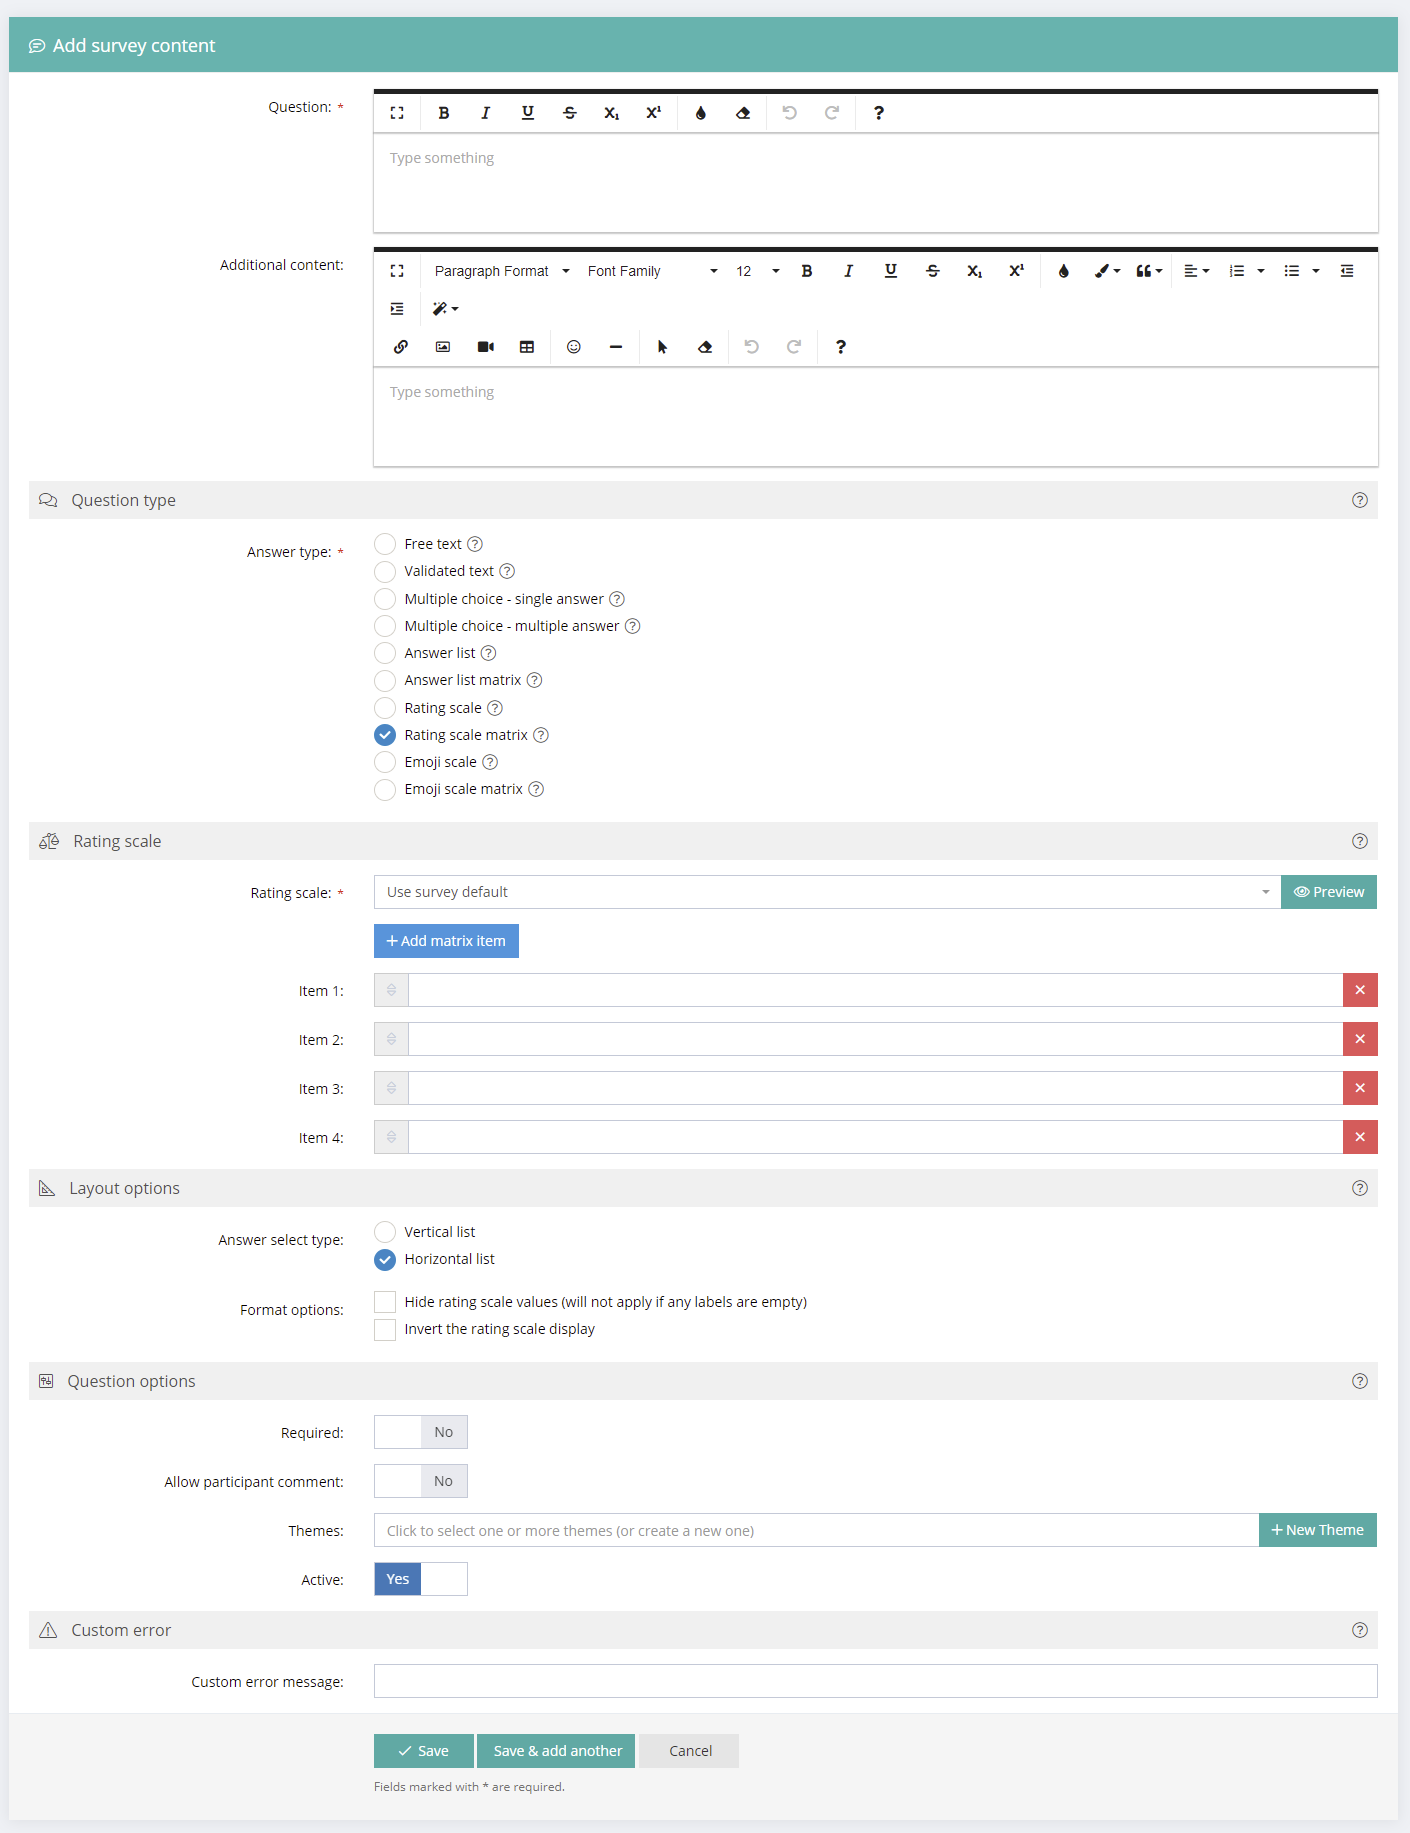
Matrix Rating Scale and Matrix Answer List Questions
Matrix questions can be created by choosing the Rating Scale Matrix question or Answer List Matrix type and adding the matrix items. In the survey project, the Matrix items are presented vertically, with the rating scale appearing horizontally above the response columns. On mobile devices the Matrix layout will revert to presenting questions separately and vertically one question at a time. This is to ensure ease of completion by survey participants.
There is a dropdown option for Answer List Matrix questions.
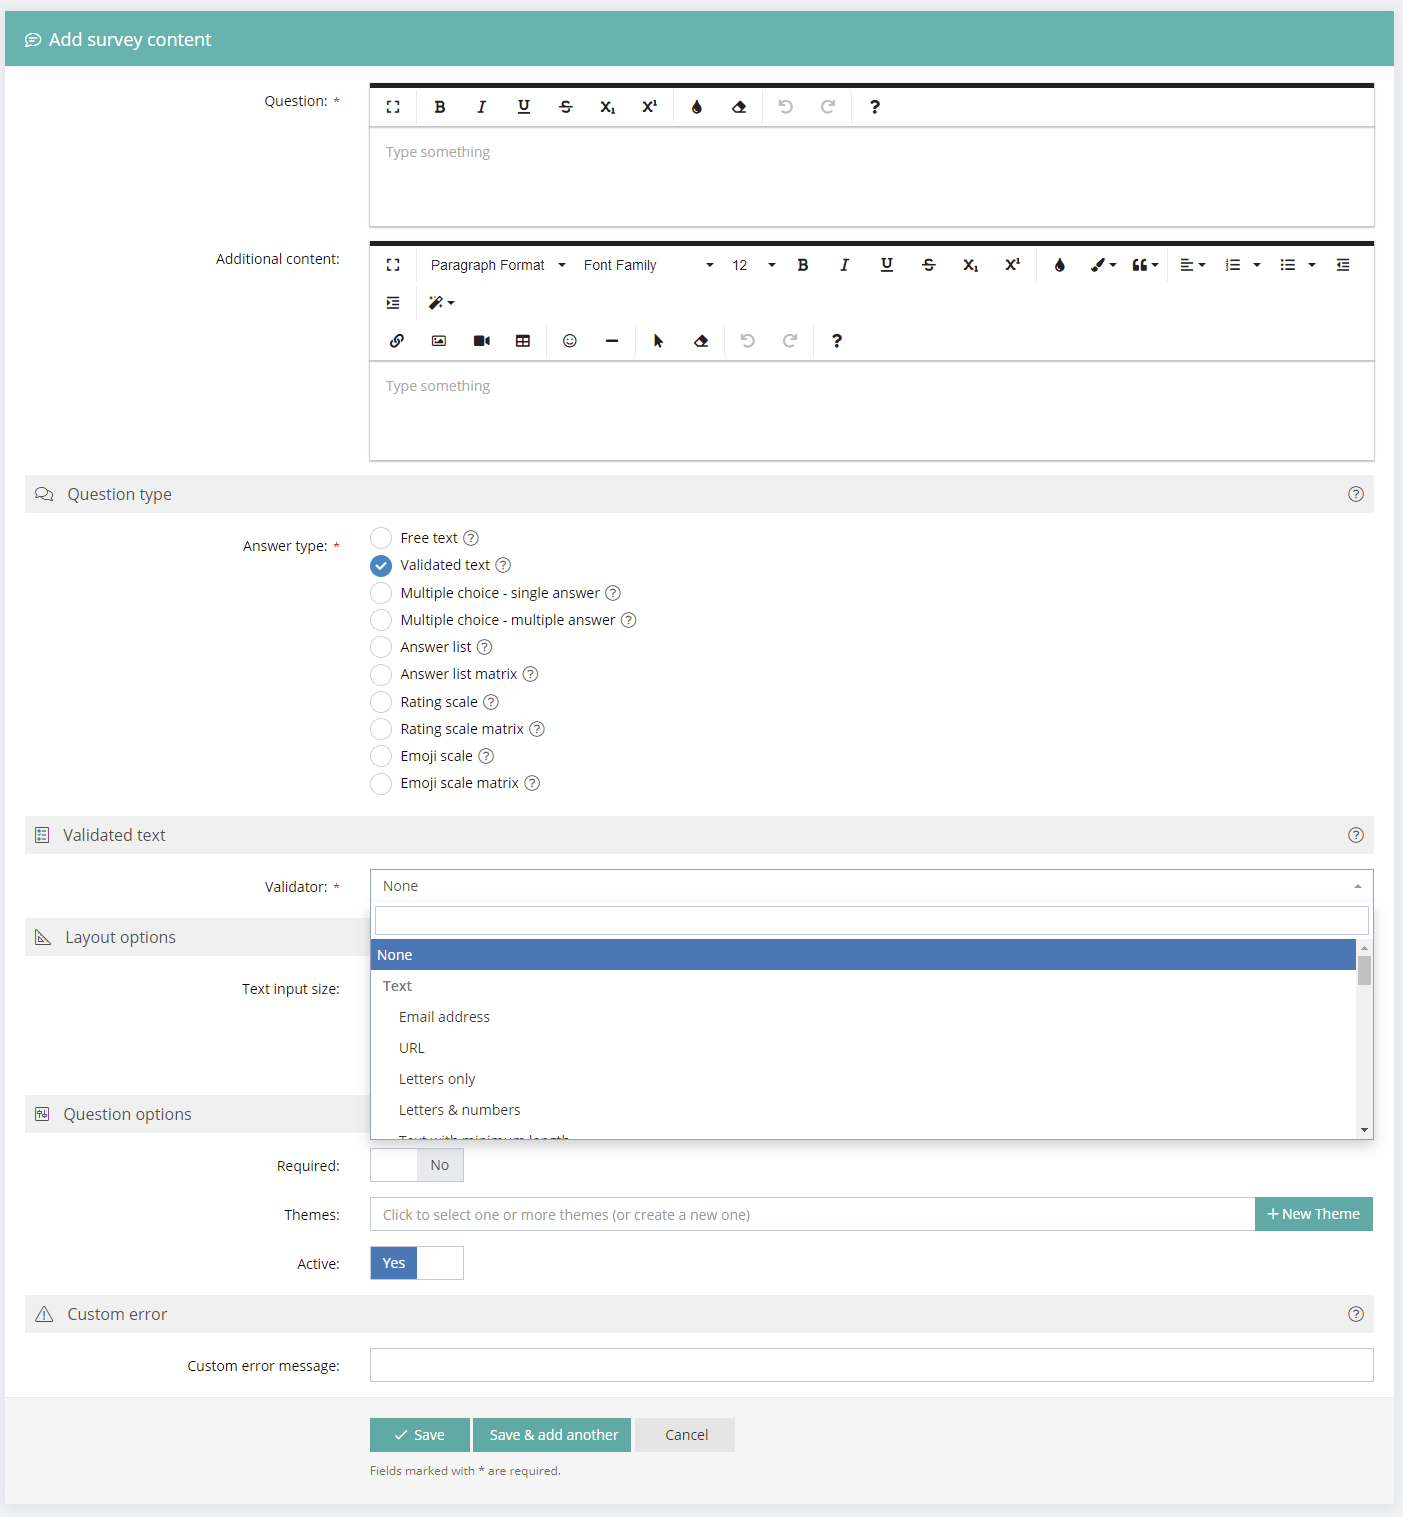
Validated Text Questions
Create questions that can be validated against specific formats.
- Text: Email, URL, letters only, letters & numbers, text with minimum length, text with maximum length, text in length in a specified range
- Numbers: Any number, whole number, decimal number, even number, odd number, positive number, negative number, percentage, number with minimum value, number with maximum value, maximum in a specified range
- Date & Time: YYYY/MM/DD format, DD/MM/YYYY format, MM/DD/YYYY format, time in a variety of formats
- Special: HTML colour value, IP address (in IPv4, IPv6 or any format), random string (for example password generation, using a simple, medium or complex format)
To create one of these questions, simply select “Validated Text” when adding a question to a survey template and choose what data you want to capture.
Please note: If your live survey has custom language / labels enabled and you want to use Validated Questions, please go to your Customise > Language setting and apply the default label for Wrong format message in the Survey Progress section. Any new surveys (or those without custom language / labels) will pick up the new text automatically.
Emoji Scale and Emoji Scale Matrix Questions
Emoji Scale and Emoji Scale Matrix question types are available question types in the add/edit question form. In matrix layout the questions and emoji options are presented in a grid format.
Emoji Scale questions present "Emojis" to survey respondents in horizontal layout and contain "Values" that allow report calculations and comparisons. Emoji scale questions are essentially rating scale questions with emoji images in place of check circles. The calculations in reports work the same as rating scale questions.
A pre-defined set of emoji scale ranges is provided to select from (1 to 3 through 1 to 10). A Net Promoter Sore (NPS) scale option is also provided with a range of 0 to 10 and standard NPS labels (Not at all likely and Extremely likely). Pre-installed language translations are provided for the NPS labels in the Manage Project/Customise/ Language menu. The NPS labels can also be customized for any language.
There are options to show the scale value "Inside the emoji (may not suit all emoji)" and "Under the emoji", or to "Hide" the scale values. The NPS Labels always appear, in accordance with the NPS standard.
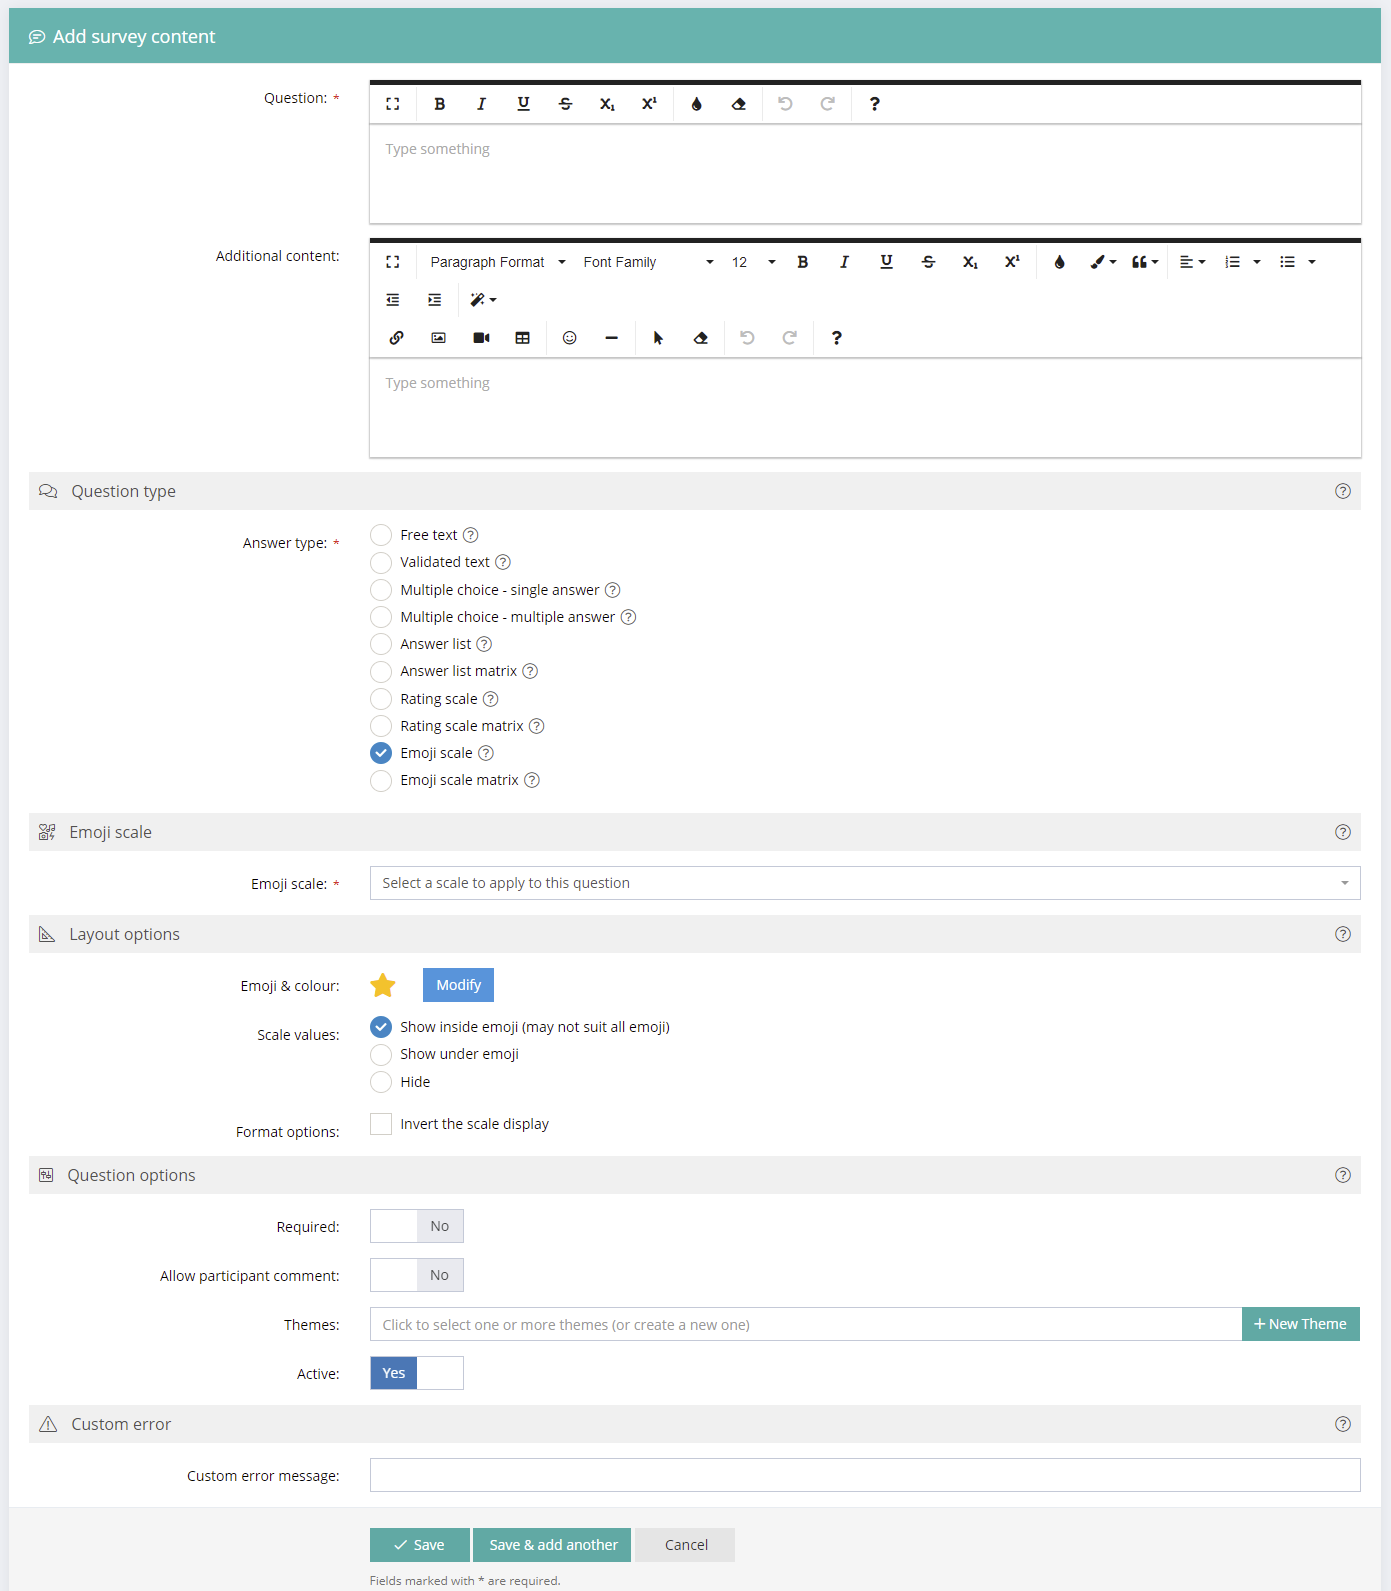
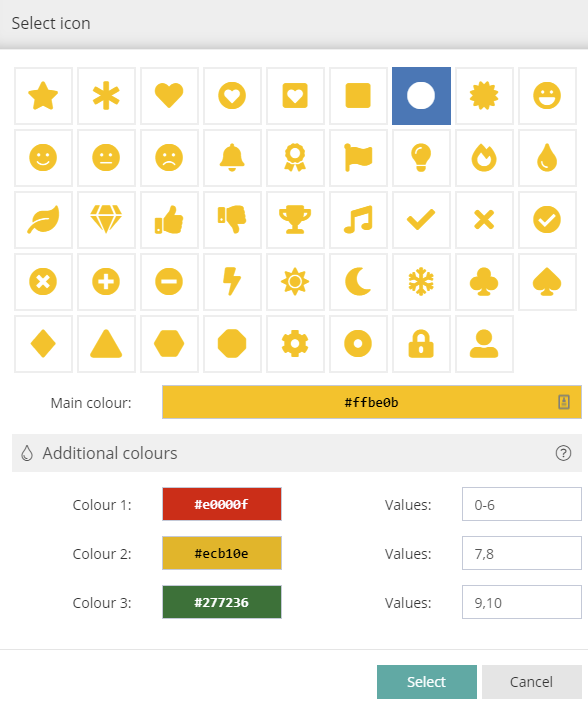
There are 40+ emoji image options available. Up to 4 colours can be applied - a main colour and up to 3 additional colours for selected scale values or value ranges.
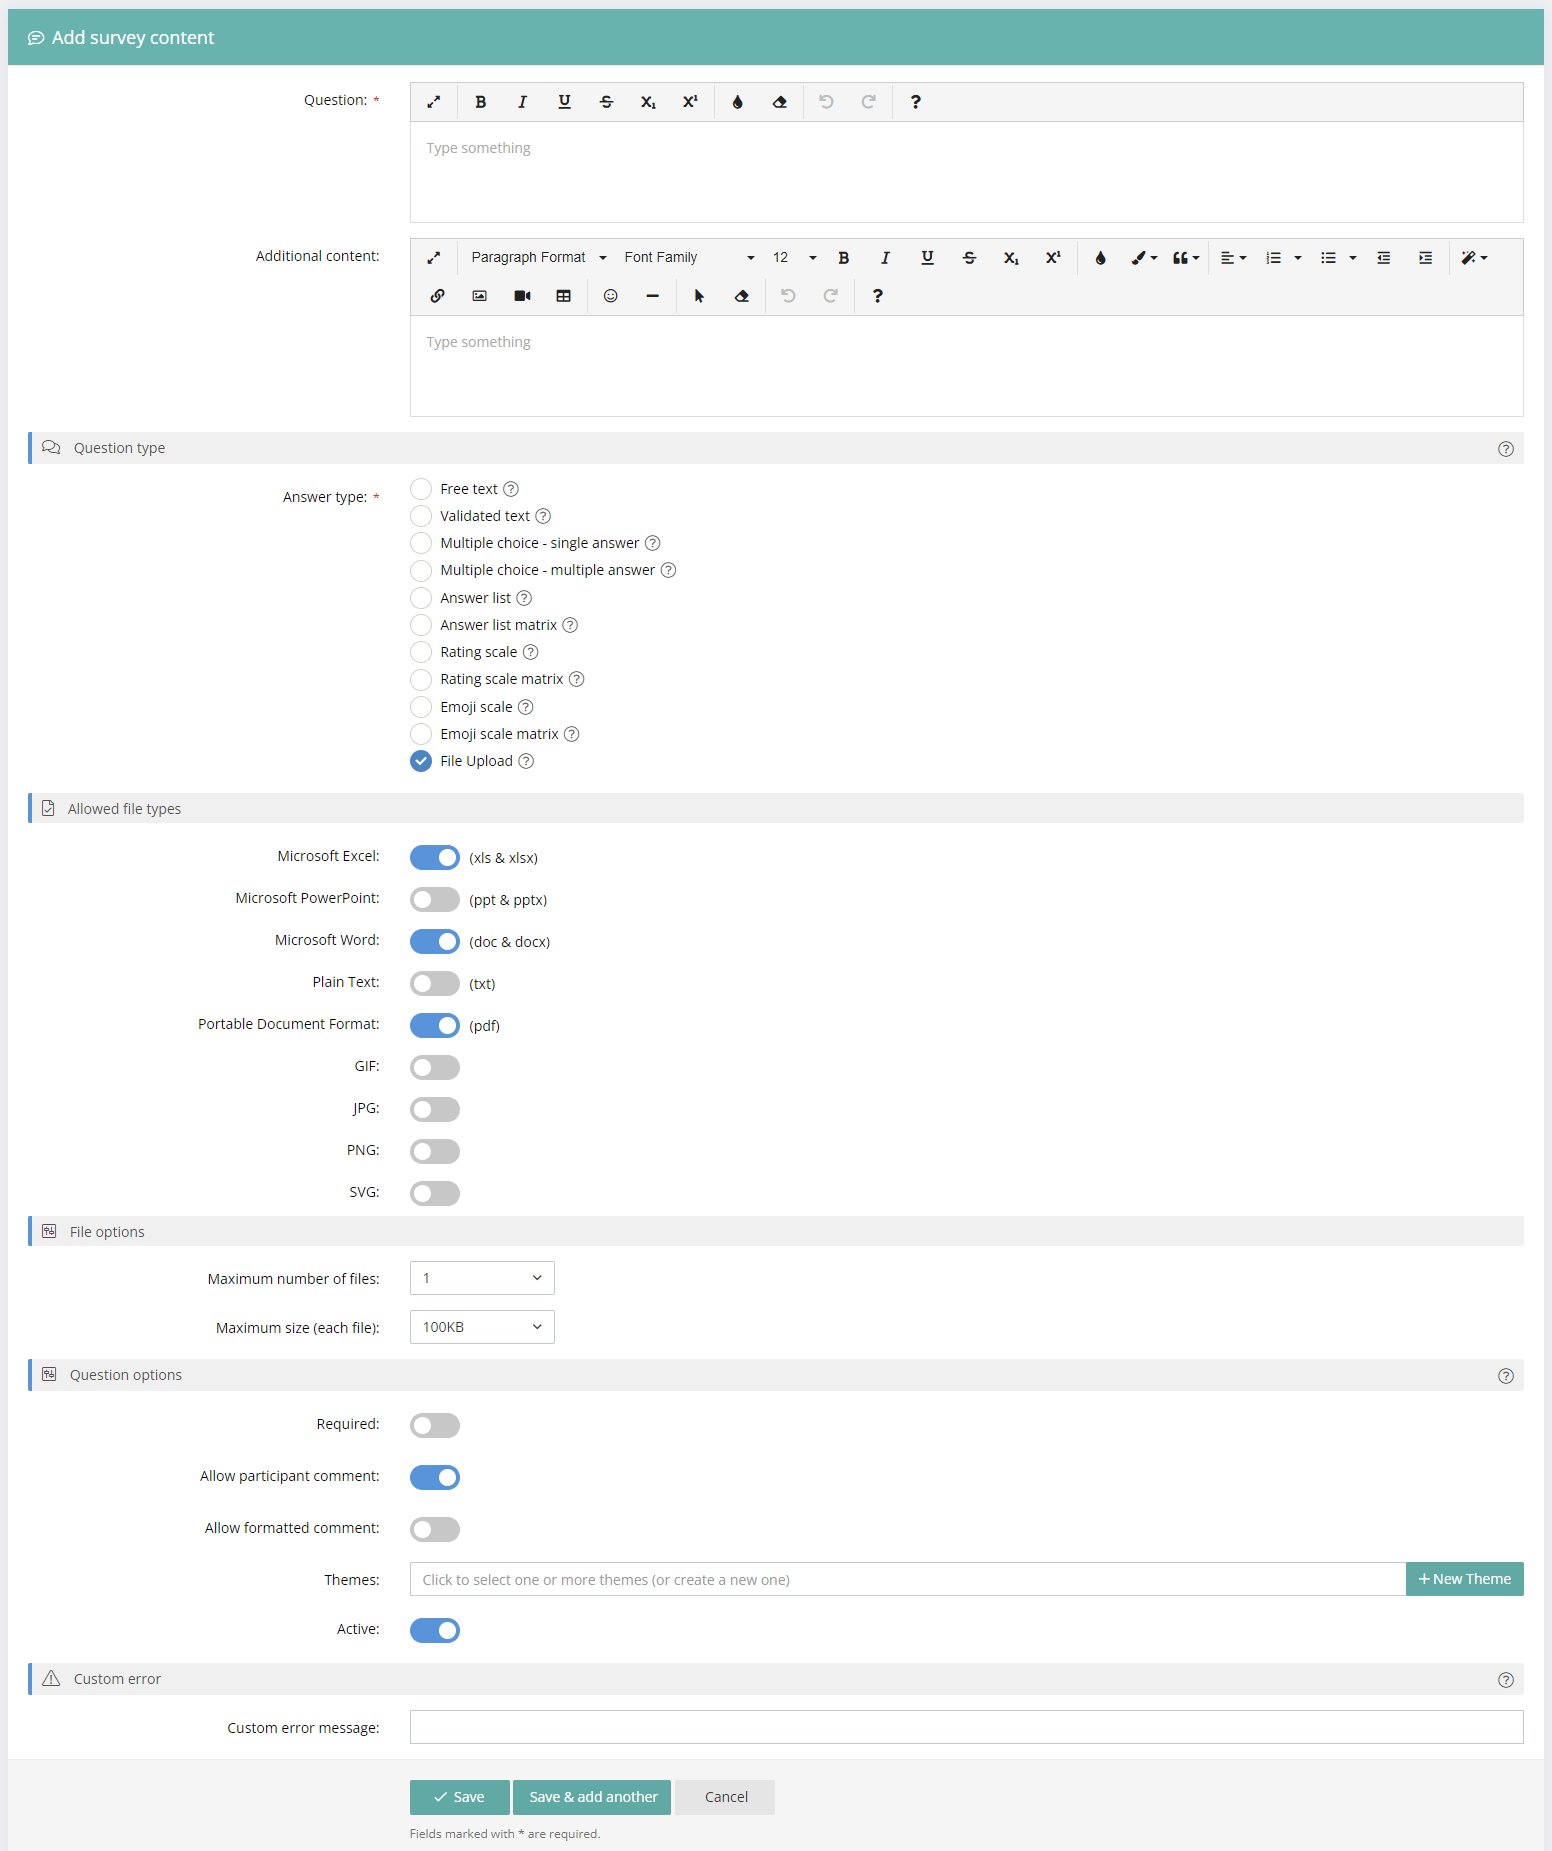
File Upload
File upload questions allow survey respondents to upload files. File formats accepted include Microsoft Excel, Microsoft PowerPoint, Microsoft Word, Plain Text. PDF, GIF, JPG PNG and SVG. Choose the file types you wish to allow, the maximum number of files and the maximum size for each file. Files are available to download in reports and individual participant responses.
Custom Error Messages for Individual Questions
While a generic error message for required questions is great for quickly creating surveys, sometimes you may want to add a custom error for a specific question. You can define a unique error for each question in the Edit Question screen in Survey Templates. This will be particularly handy when using Validated Text questions.
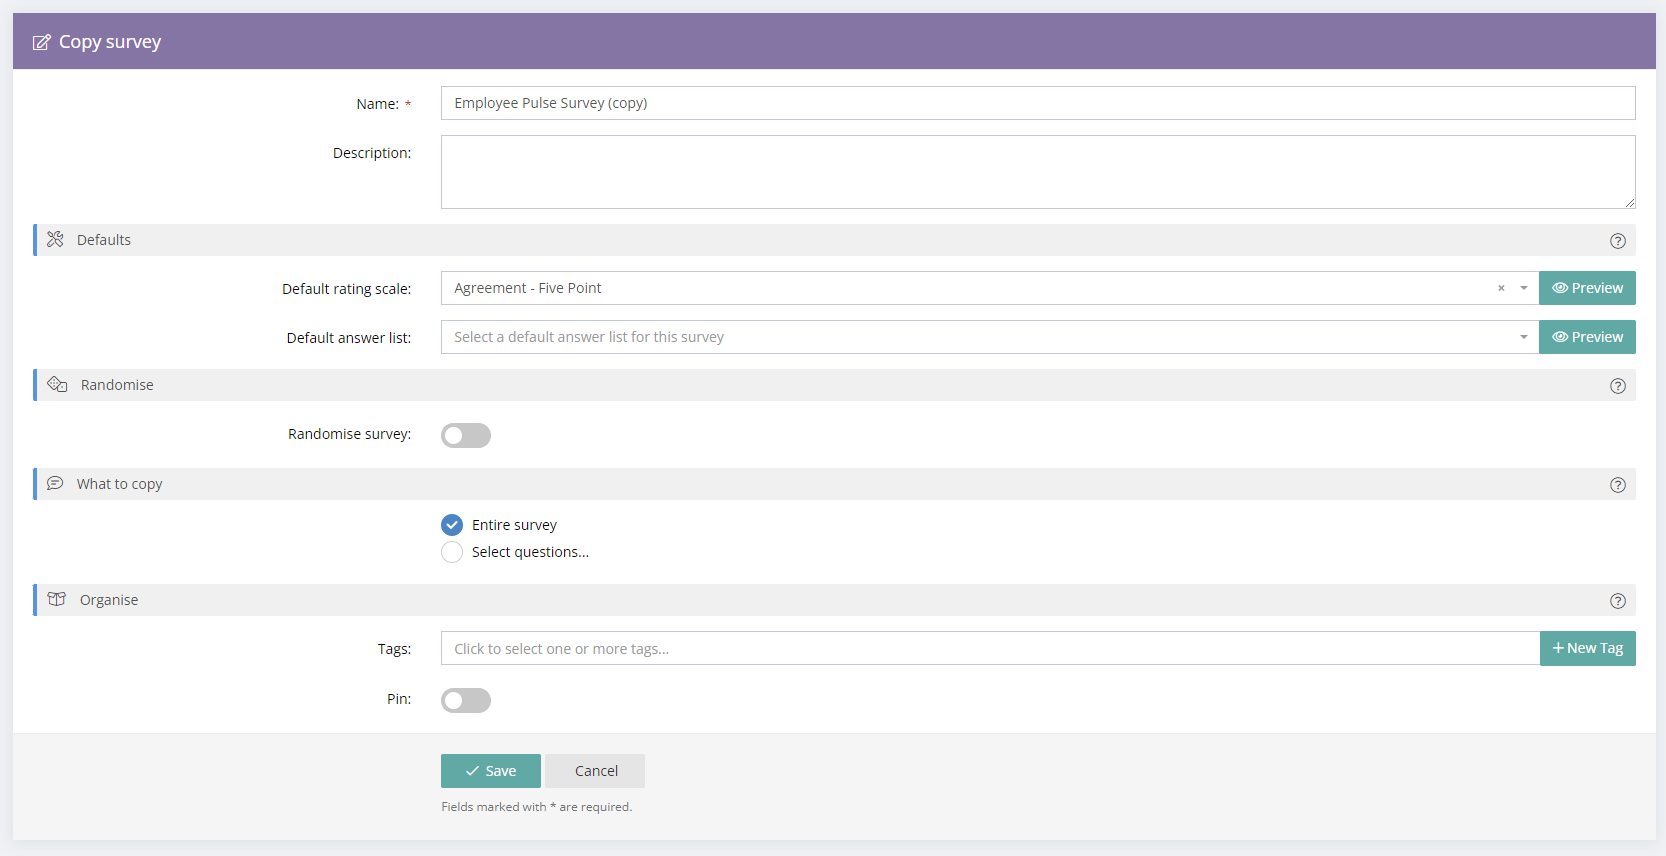
Copying a Survey Template (in Full or Part)
To copy a survey template, including the contents, select the Copy button alongside the survey template. Then, edit the name and description, default Rating Scale (optional), default Answer List (optional), choose what to copy (Entire survey or Select questions) and choose "Save". The copy feature is useful to create a modified version of a survey.
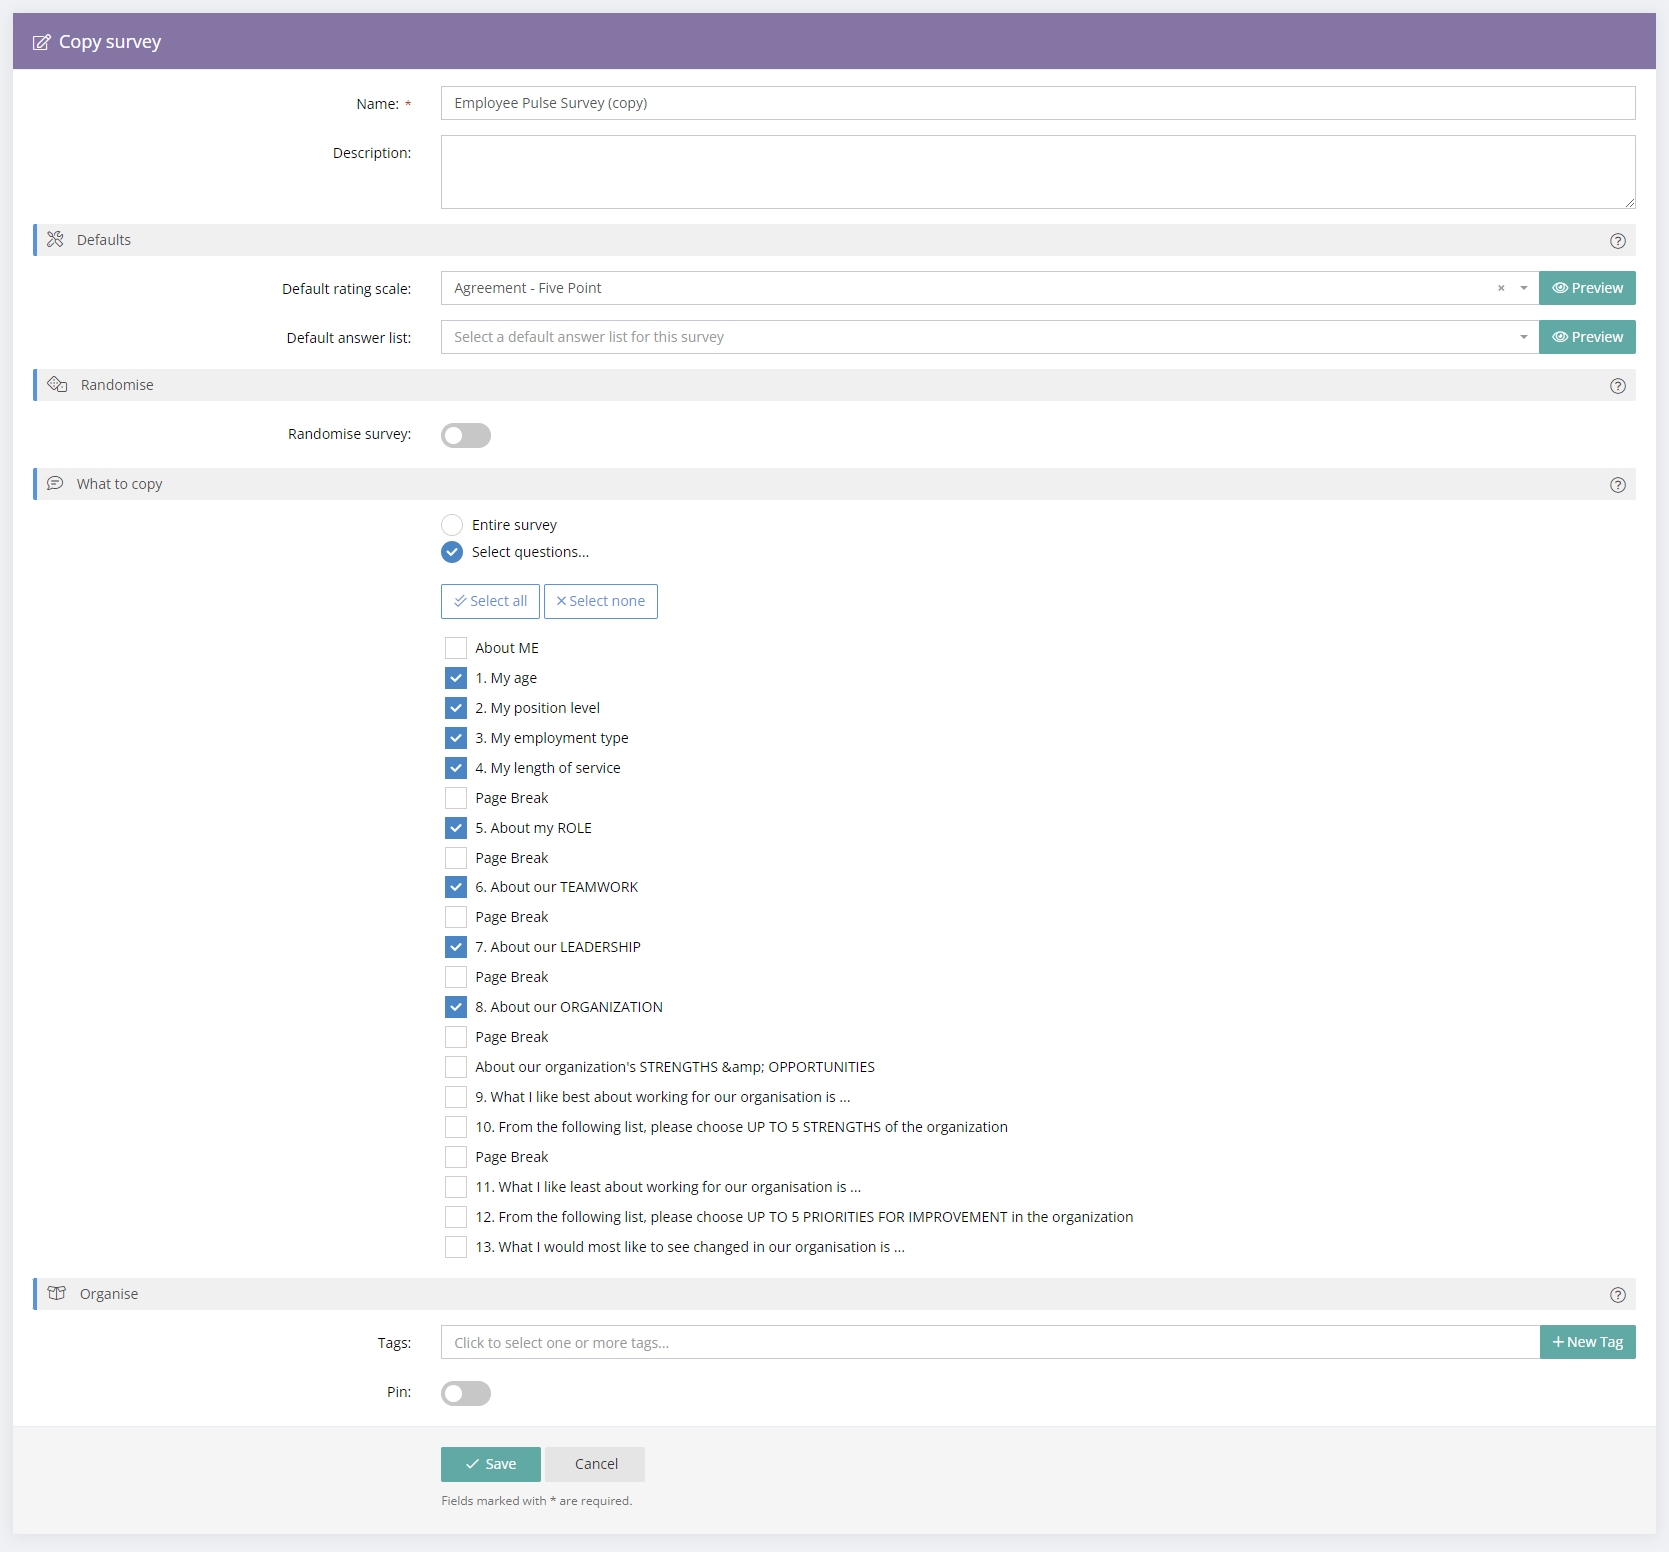
To copy selected questions and elements of a survey, choose the "Select questions" option and then select the elements to copy. Conditional logic will also be copied. It is very important to check all logic when copying parts of a survey template as the logic may be affected due to questions and elements not copied.
Archive, Restore or Delete a Survey Template
Projects, Survey Templates and Tools (Mail Templates, Rating Scales, Answer Lists, Themes) can be archived by selecting the Archive icon along side the project. Archived items can also be restored or deleted permanently. Archived items will show in a Tag called "Archived" in the left hand menu.
It is important to remember that if you delete a survey template that is currently linked to a project which is not launched, you will need to select a new survey for that project. Launched projects are not affected by deleting the survey template.
Conditional Logic (including Skip Logic and other Advanced Logic Features
Conditional Logic can be added using the Logic Button alongside individual questions. Read more about Logic here conditional-logic-including-skip-logic.
Net Promoter Score® (NPS®) - Use Emoji Scale Question Type
The best way to present Net Promoter Score (NPS) questions will be with the Emoji Scale question type. We recommend showing the scale value “inside” the emoji and choosing an emoji that is suitable for the inside format (e.g. a plain emoji image such as the circle or square options). If desired, custom colours can be applied. E.g. red for Detractors (0-6), orange for Passives (7-8) and green for Promoters (9-10).
The NPS Labels always appear, in accordance with the NPS standard. As mentioned above, pre-installed language translations are provided for the NPS labels in the Manage Project/Customise/ Language menu. The NPS labels can also be customized for any language, including the English versions.
The survey display options in the project give increased control over the look and feel of NPS questions and make it much more flexible to embed surveys in a popup or an iframe on a website.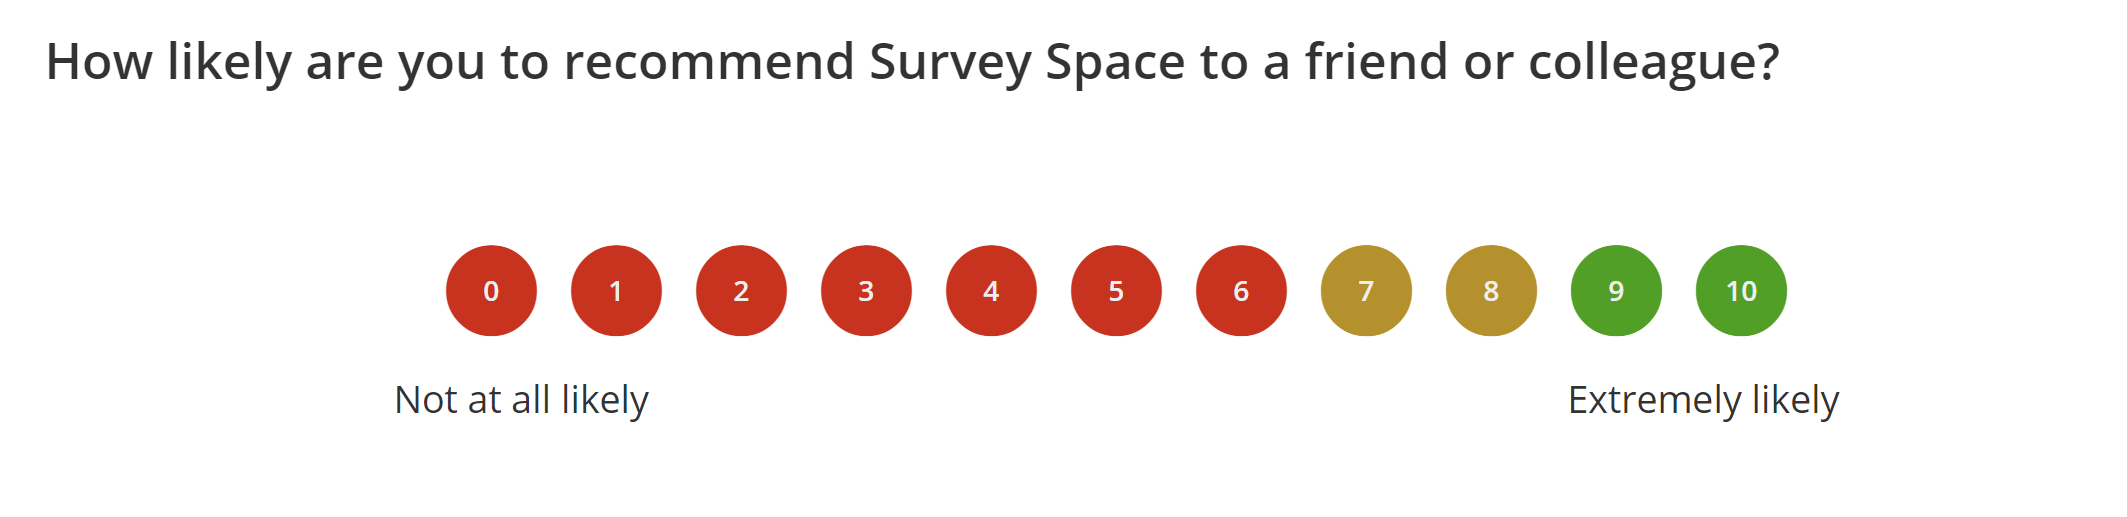
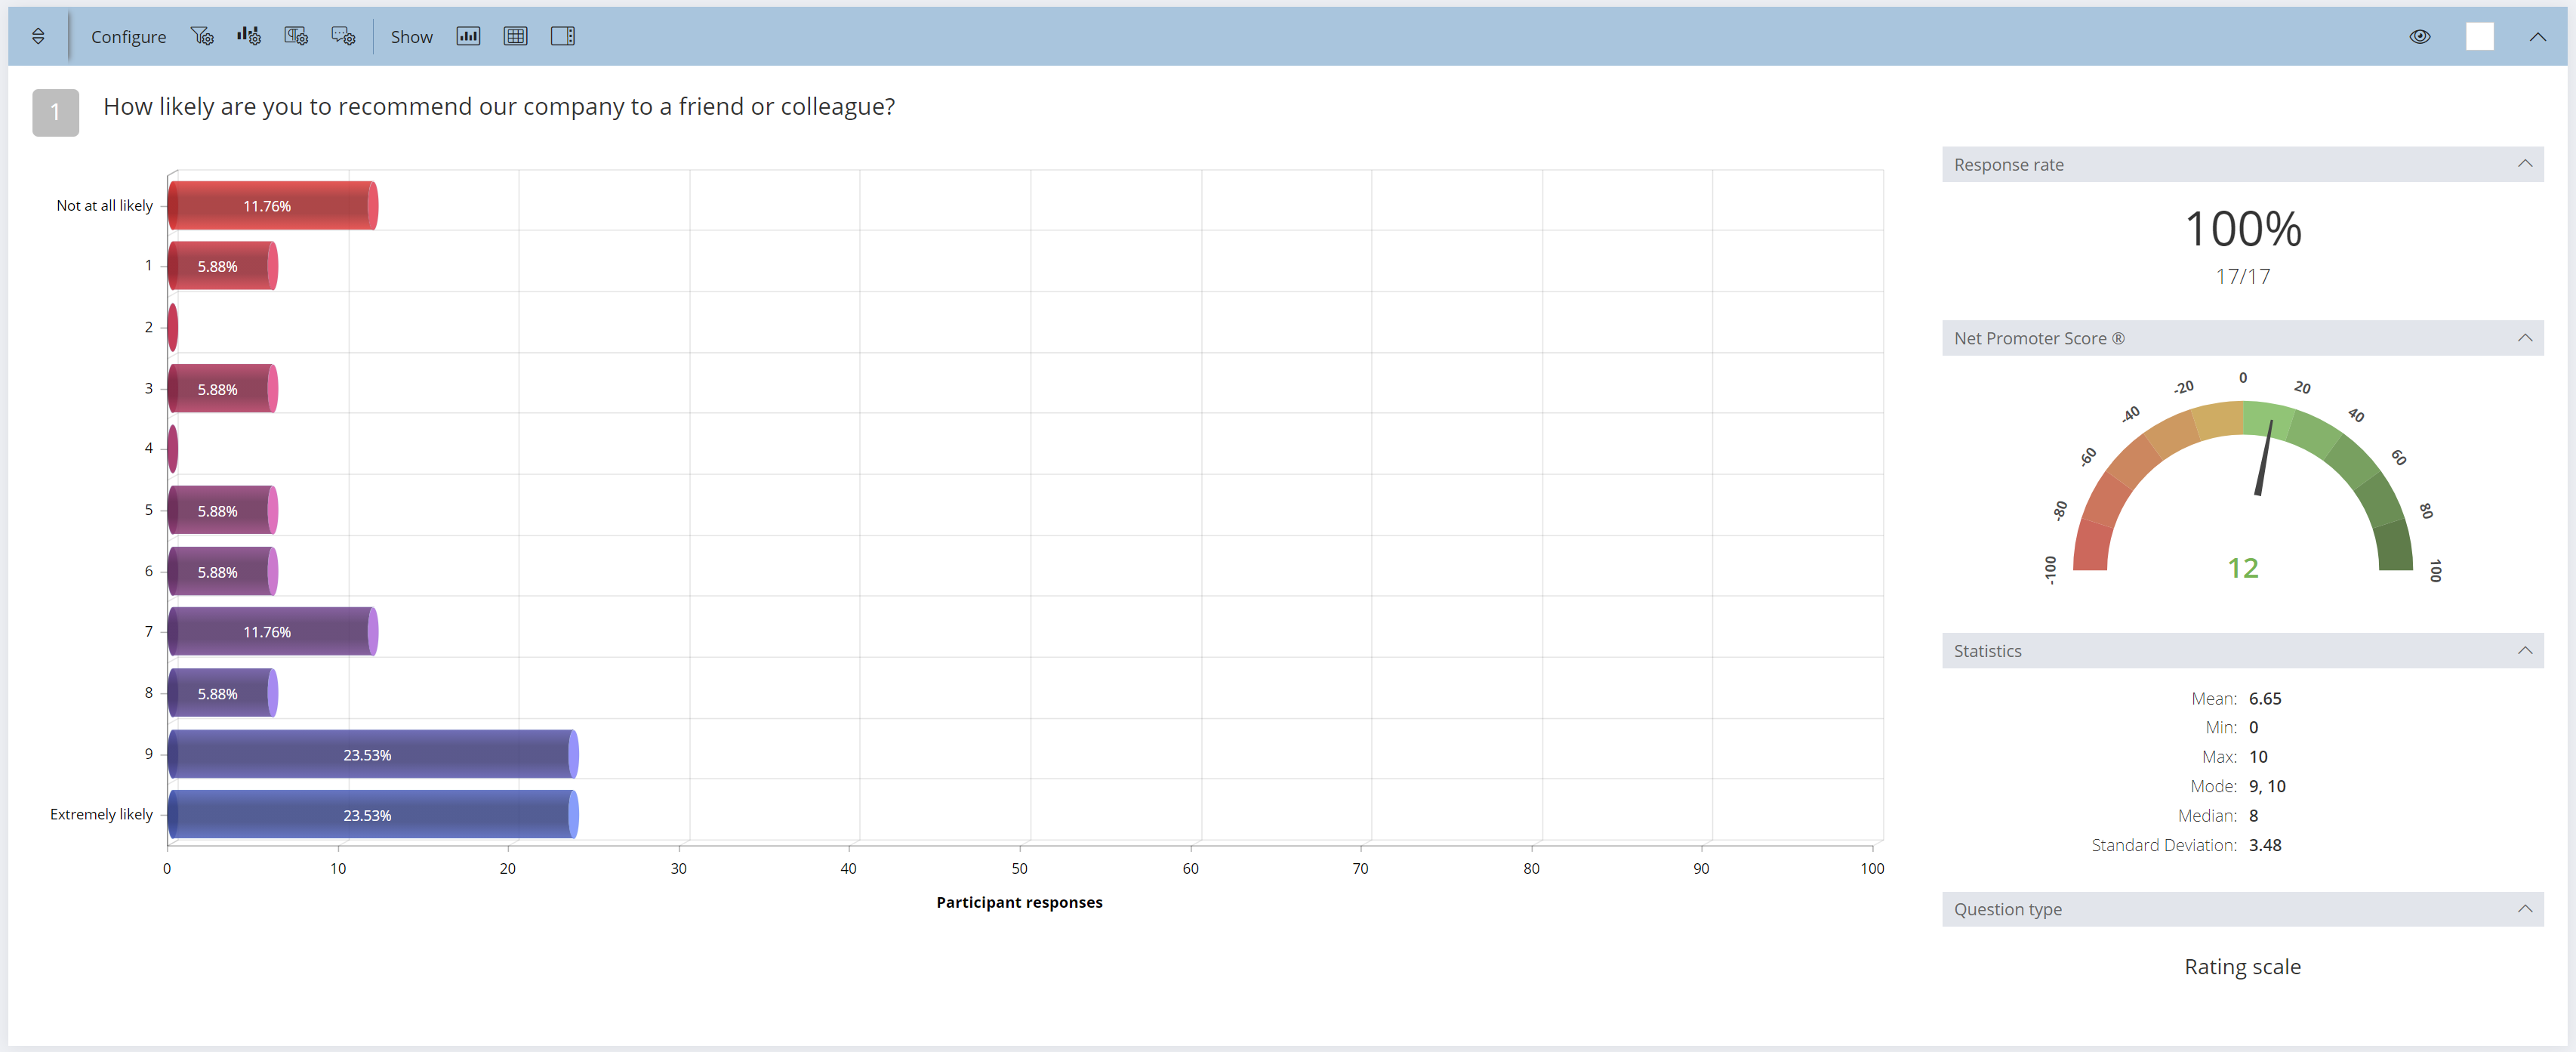
Net Promoter Score (NPS) – Automatic score calculation and a Gauge in reports
The Net Promoter Score now calculates automatically for all questions with a rating scale ranging from 0 to 10. A Gauge with a scale from -100 to +100 will show for NPS questions in reports.
Additionally, reports can be filtered by selected dates, meaning NPS can be measured and reported over time to allow comparison of performance between time periods.