Account and Settings
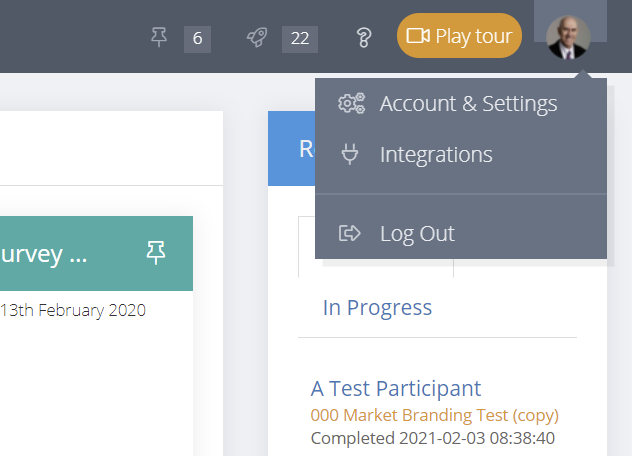
Account and Settings can be managed in the menu under the User Profile at the top right. Here you can manage:
- Your personal profile and password
- Organisation details (Administrators only)
- Survey subdomain (Administrators only)
- Account Users and authority levels (Administrators only)
- Subscription (Administrators only)
- User Interface (including Timezone)
- Project defaults
Account Menu
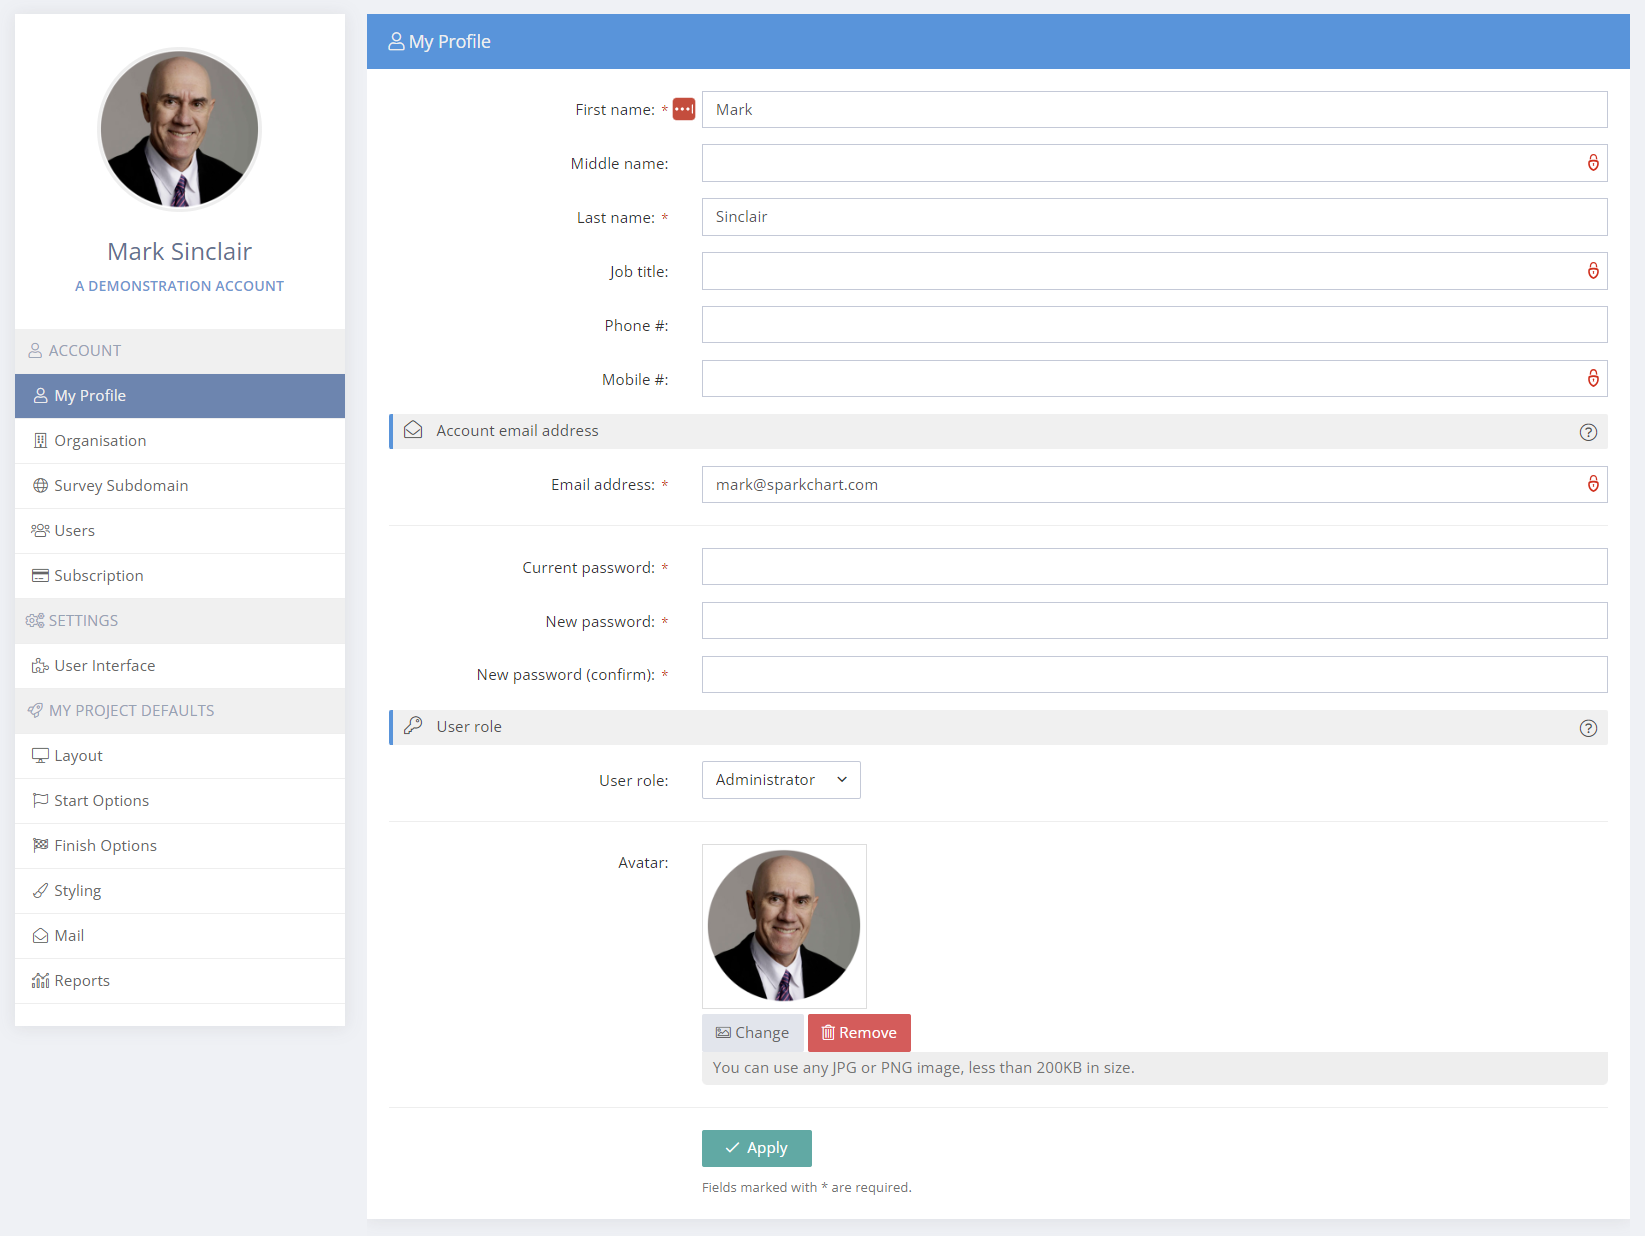
My Profile
My Profile contains personal information including name, email, password and avatar.
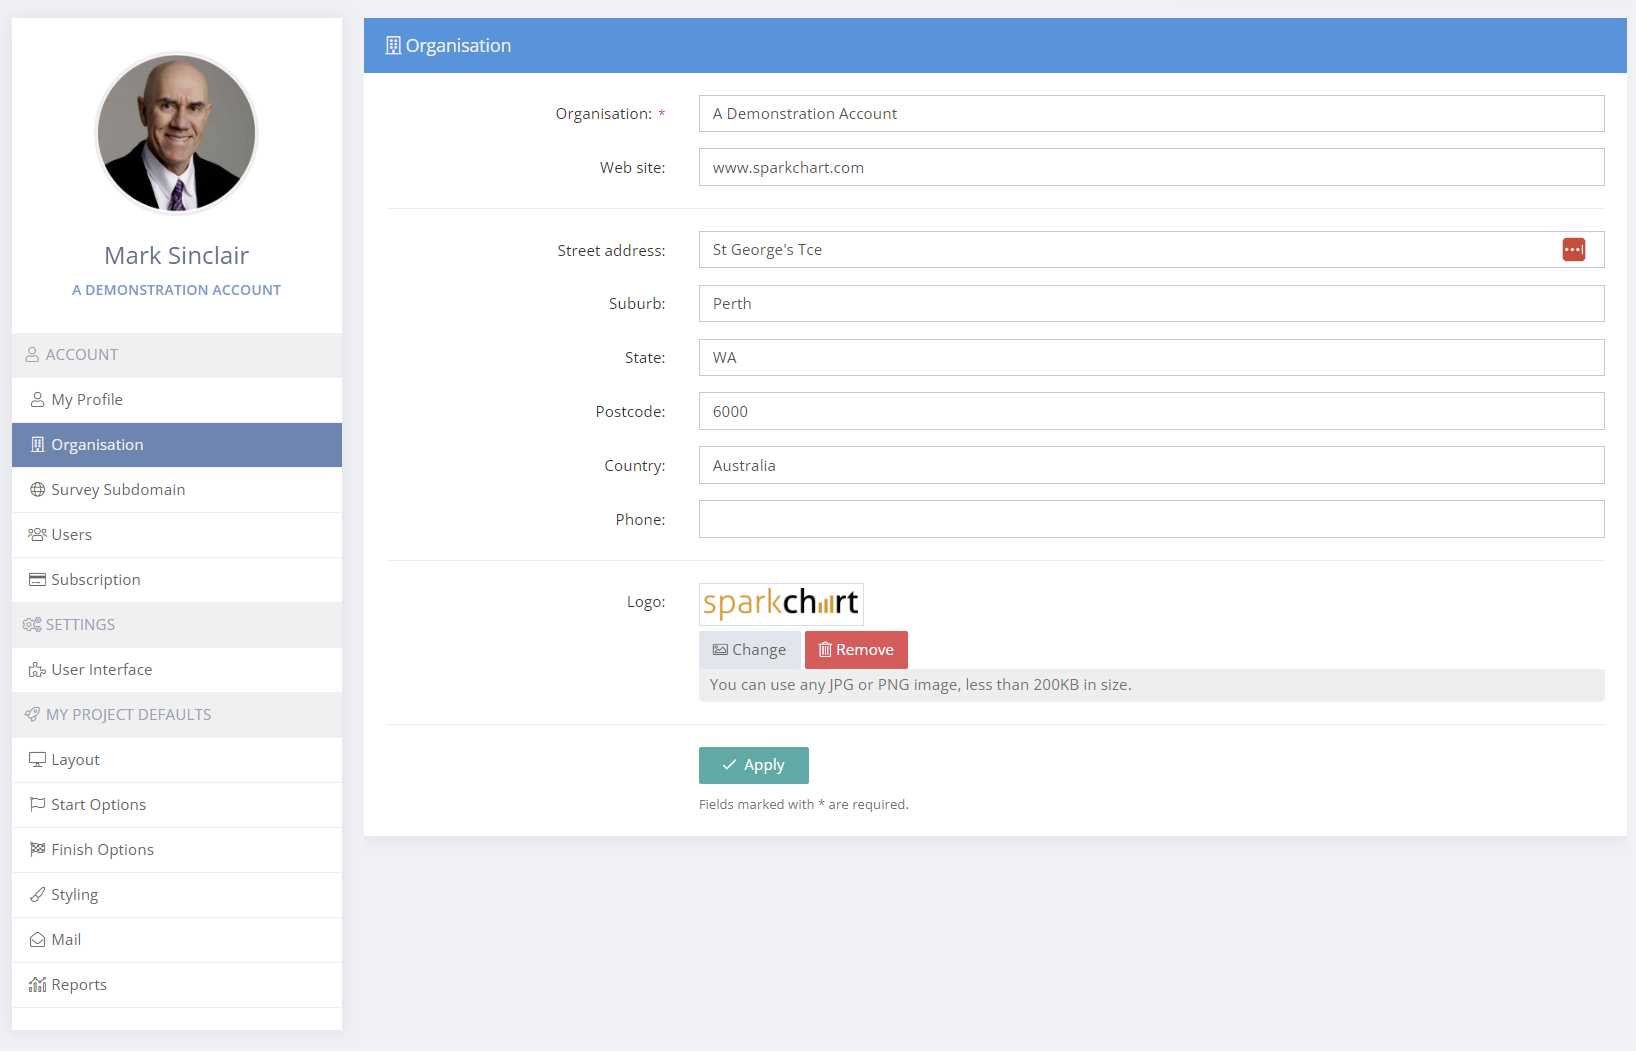
Organisation (restricted to Administrators)
Organisation contains information about your organisation. Change made here apply across the account.
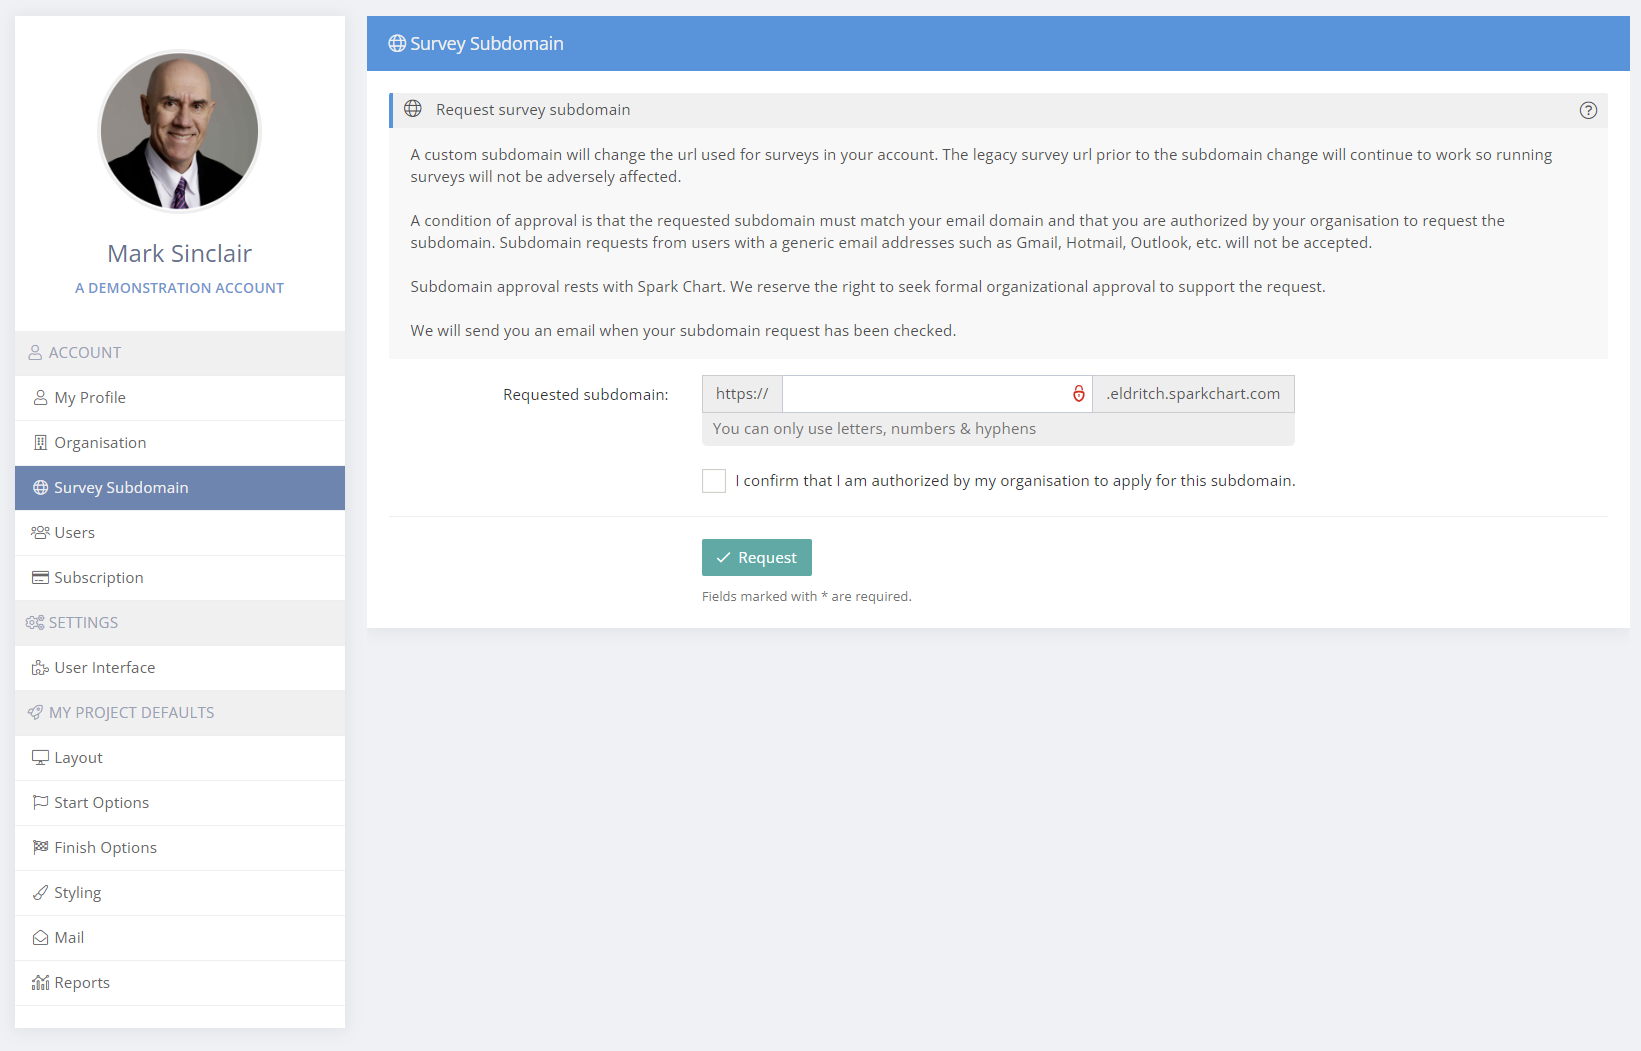
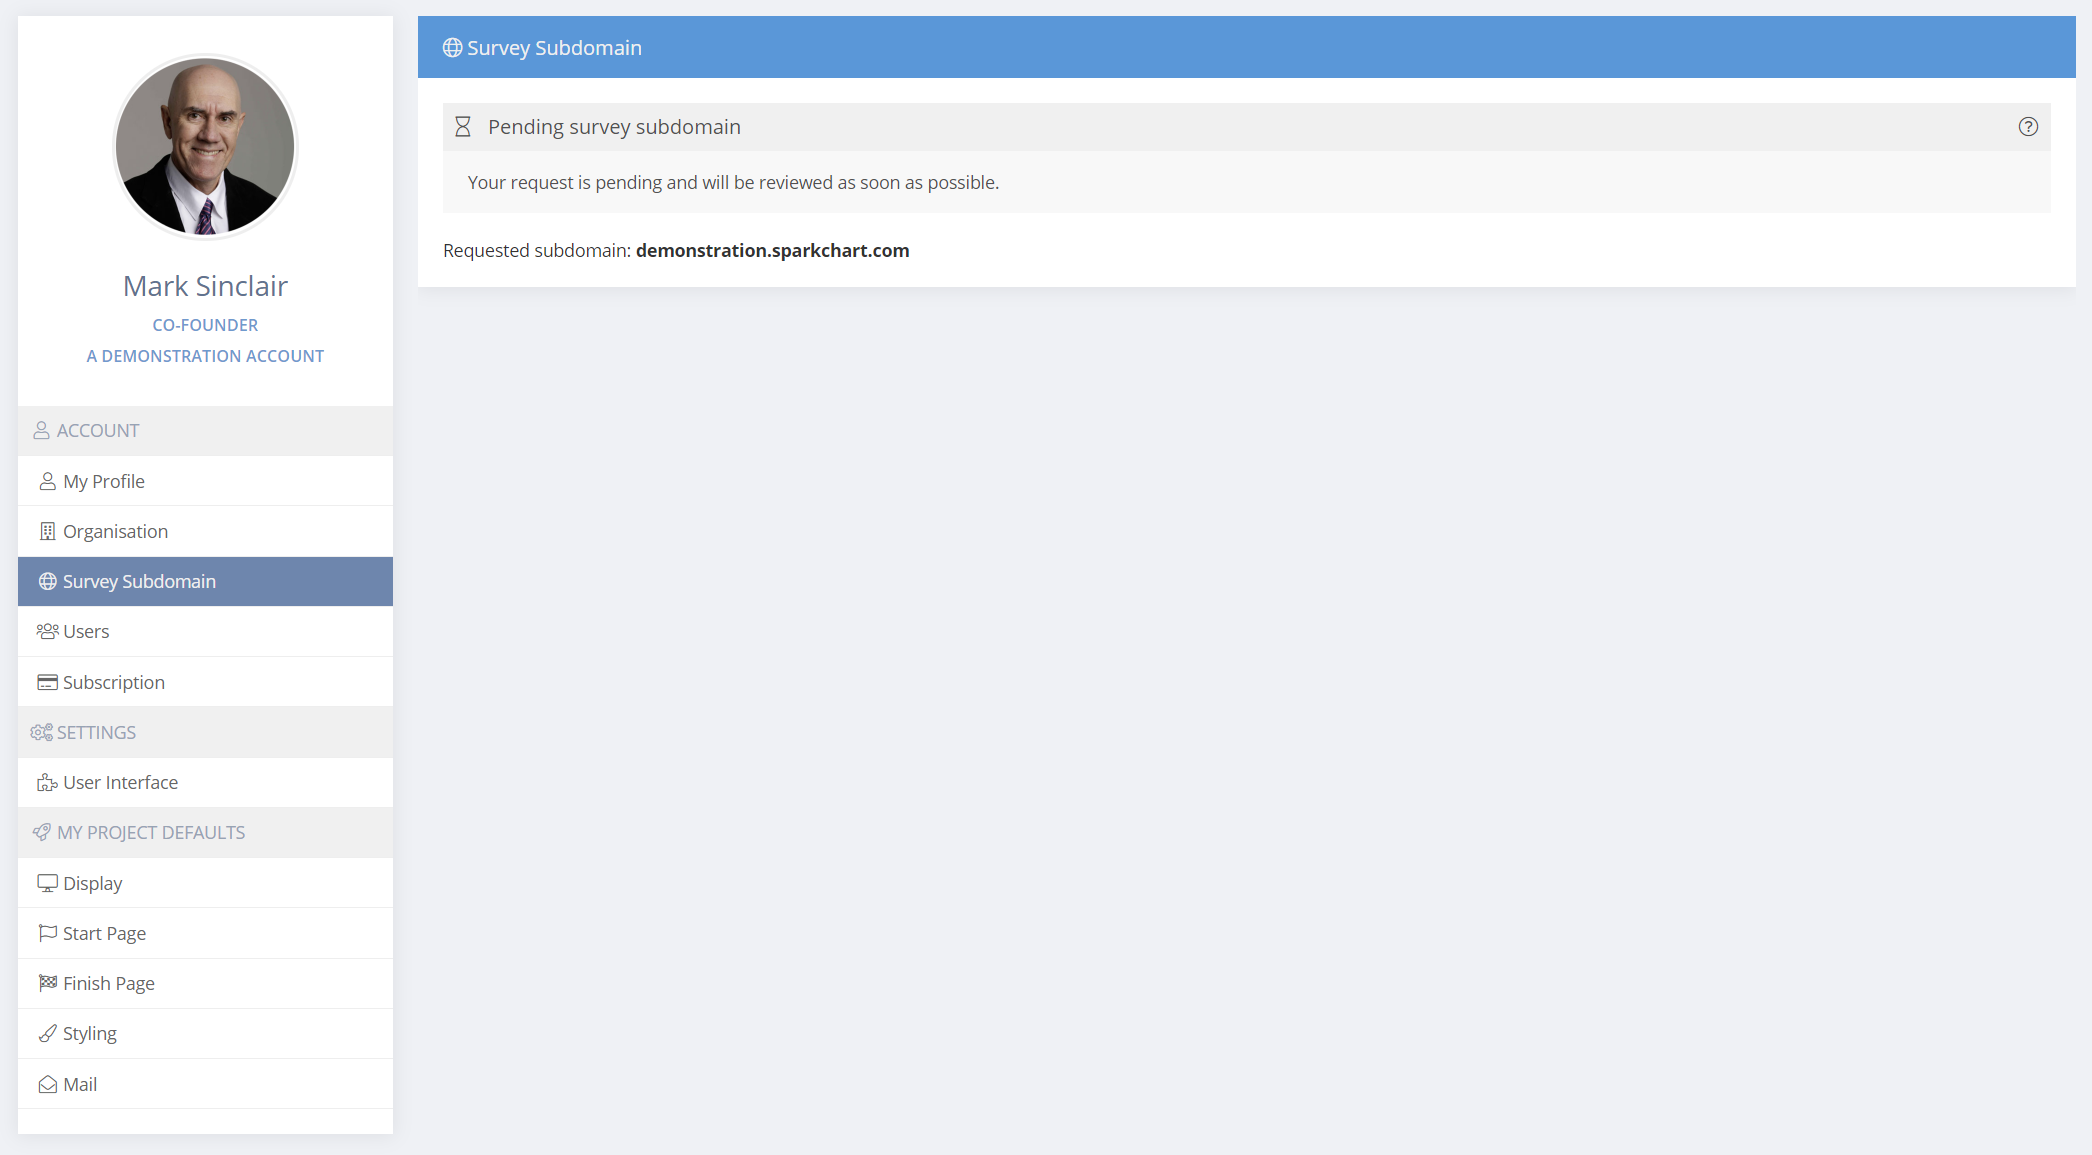
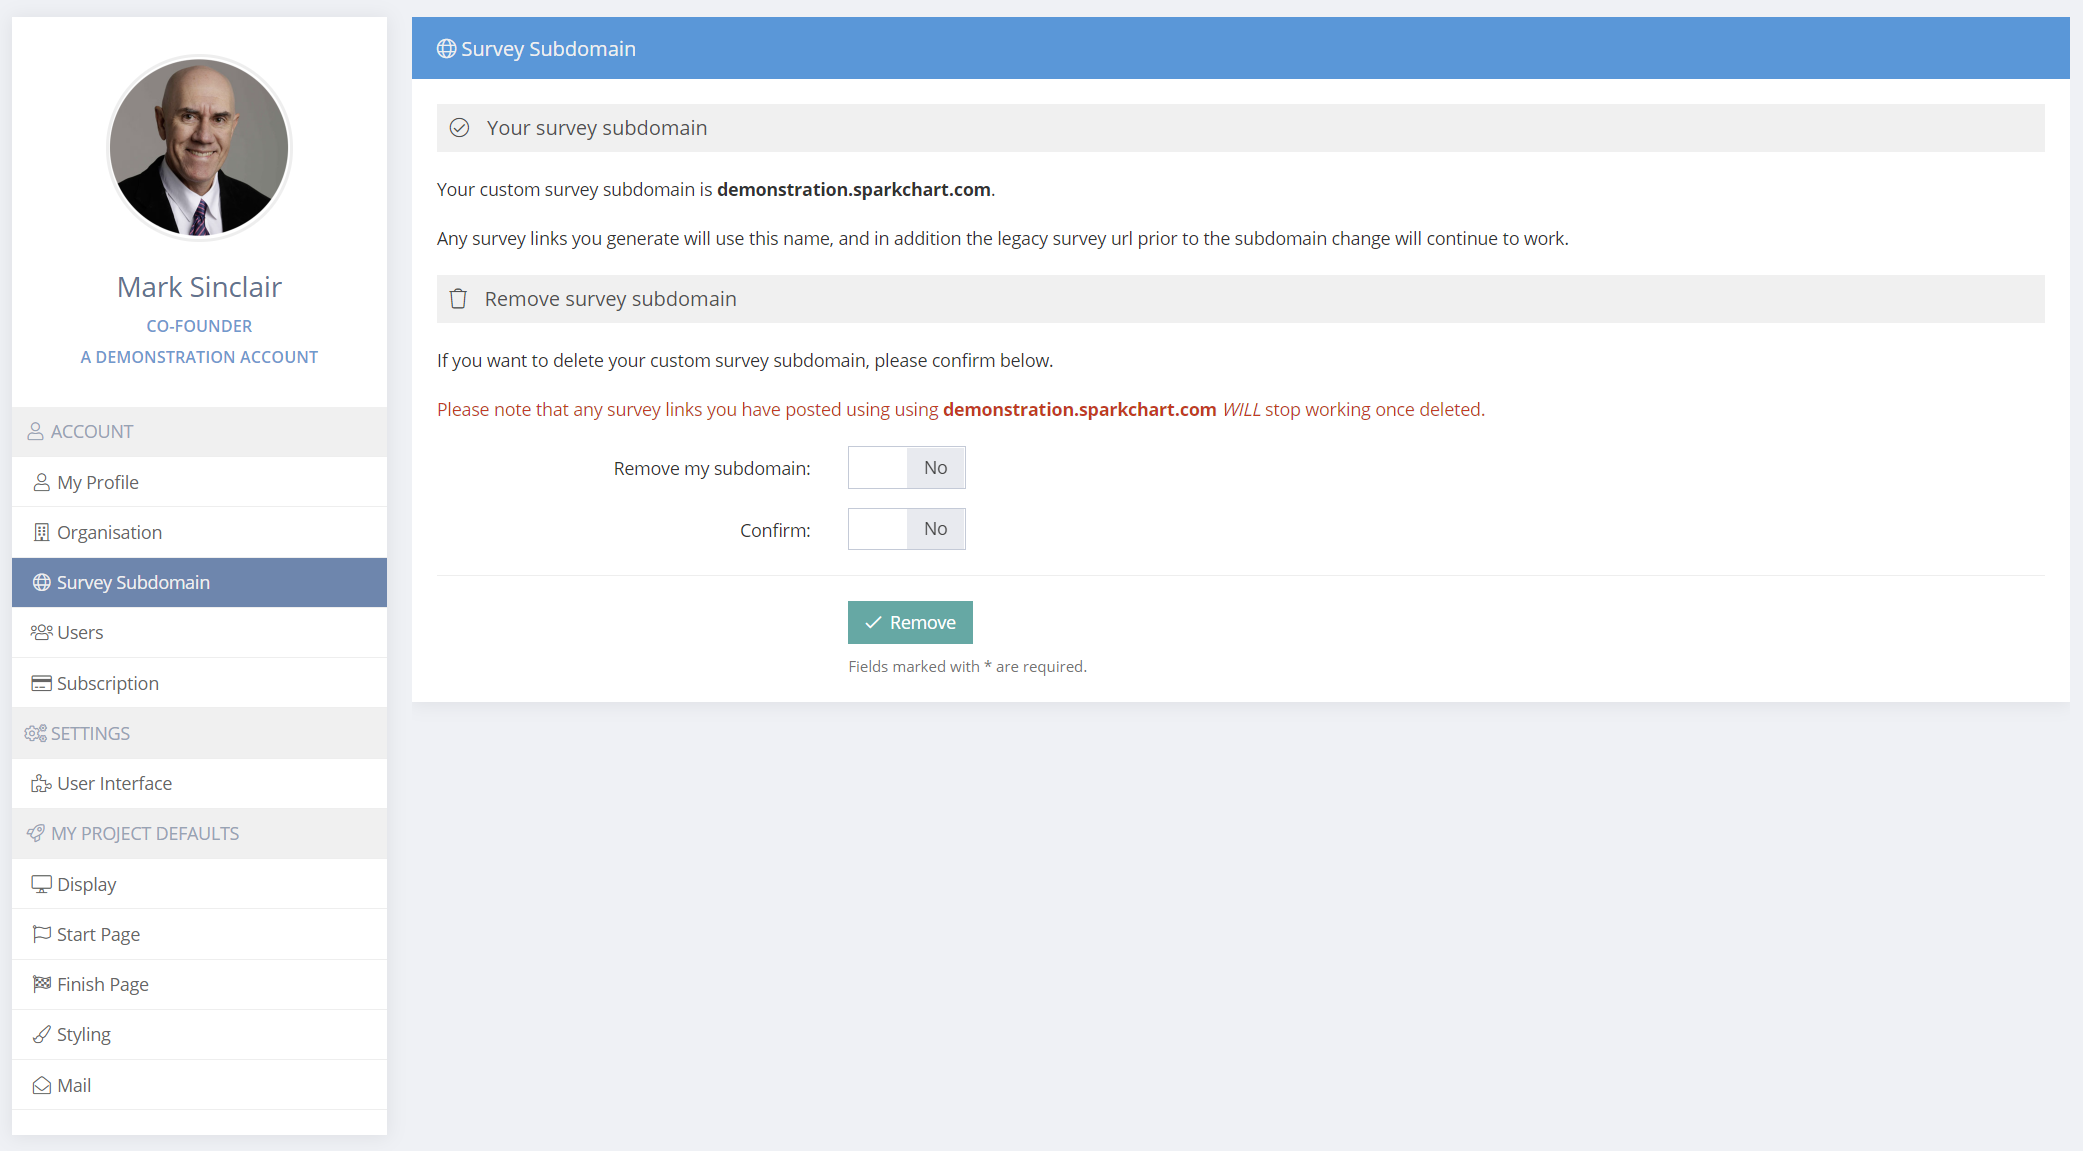
Survey Subdomain (restricted to Administrators)
A custom subdomain will change the url used for surveys in your account. So, as an example, the domain for your surveys would change from "https://survey.sparkchart.com" to "https://yoursubdomain.sparkchart.com".
The legacy survey url prior to the subdomain change ("https://survey.sparkchart.com") will continue to work so running surveys will not be adversely affected.
A condition of approval is that the requested subdomain must match your email domain and that you are authorized by your organisation to request the subdomain. Subdomain requests from users with a generic email addresses such as Gmail, Hotmail, Outlook, etc. will not be accepted. Subdomain approval rests with Spark Chart.
We reserve the right to verify your details and seek formal organizational approval to support the request.
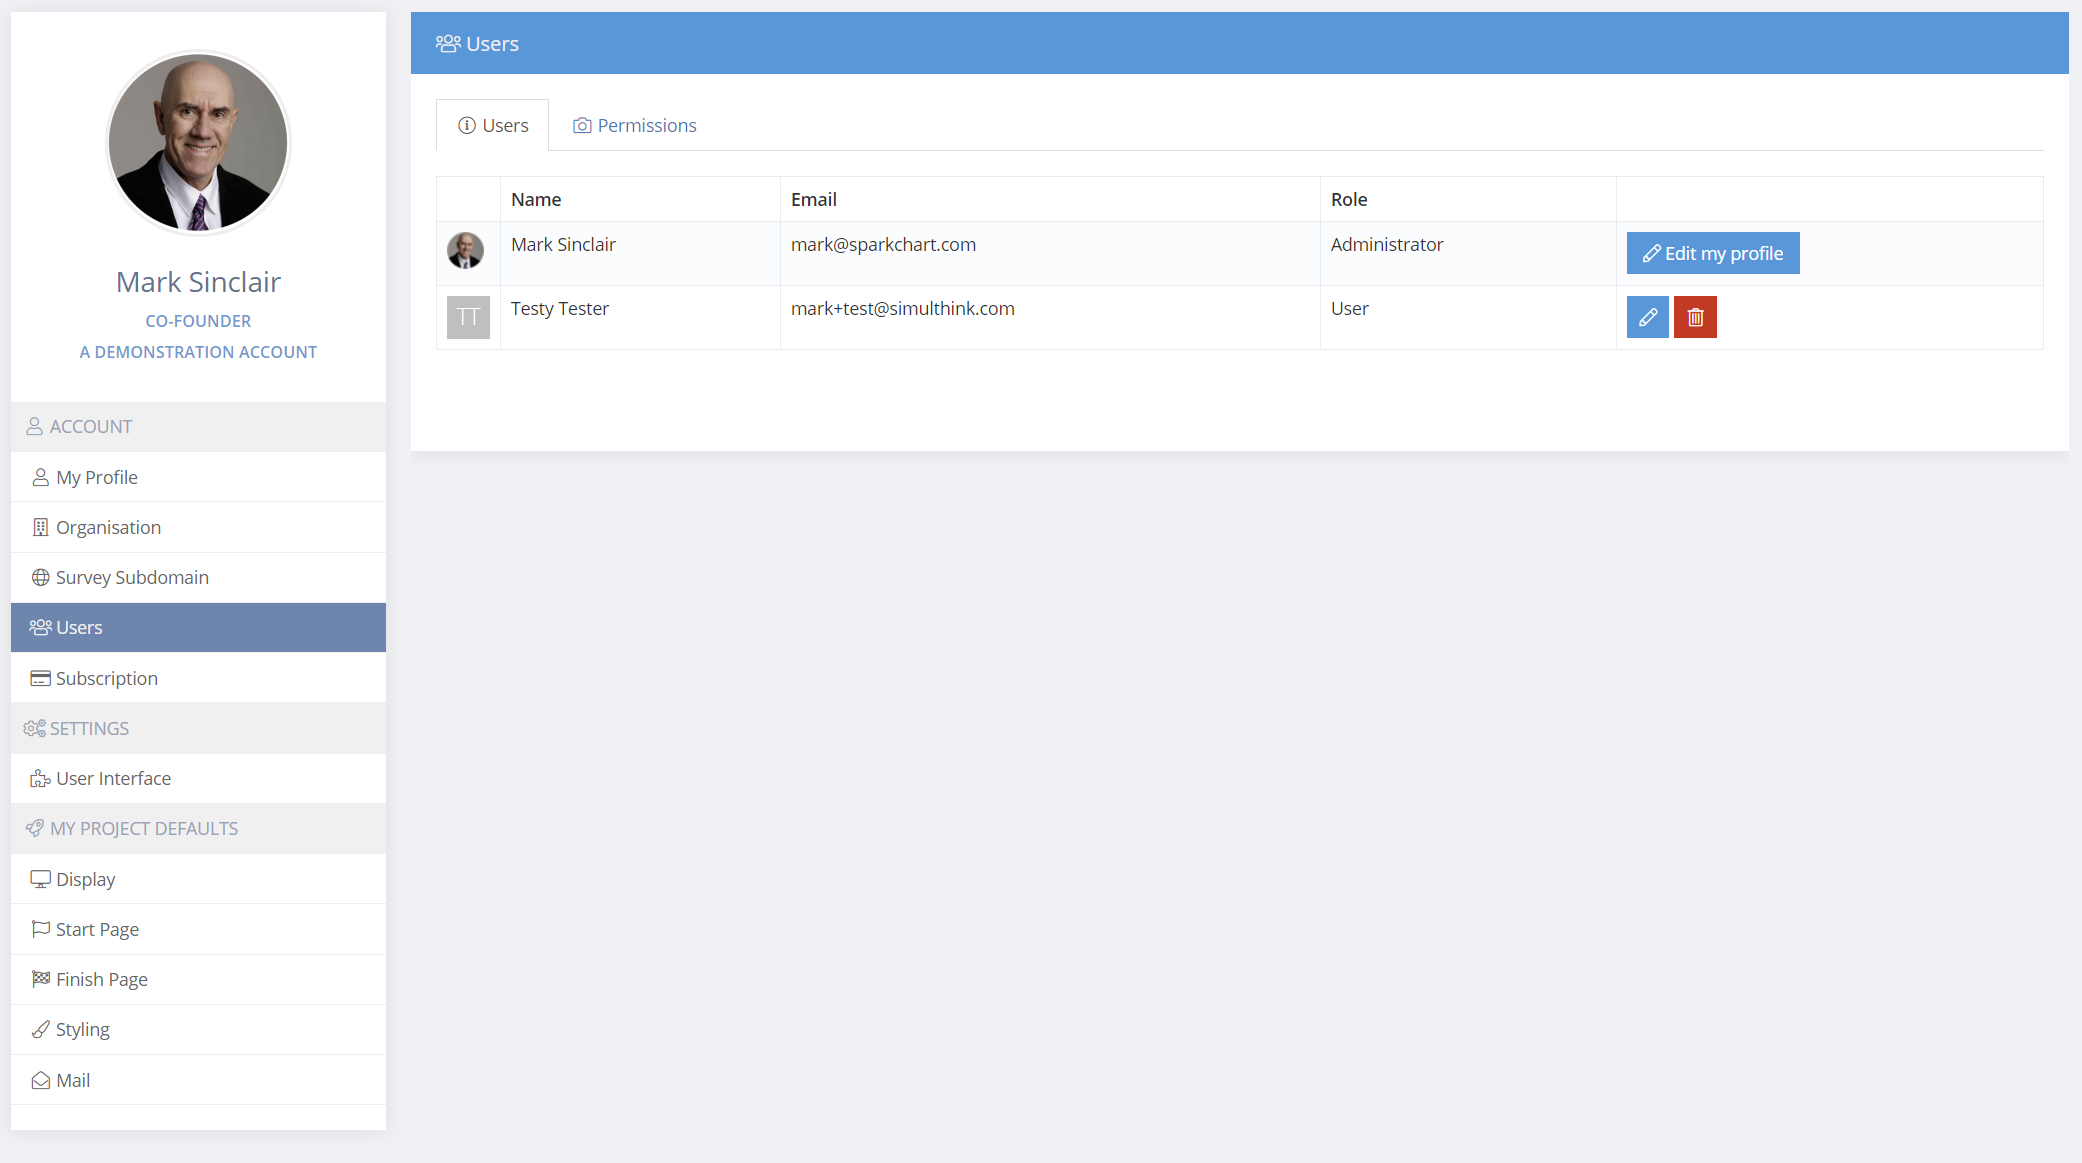
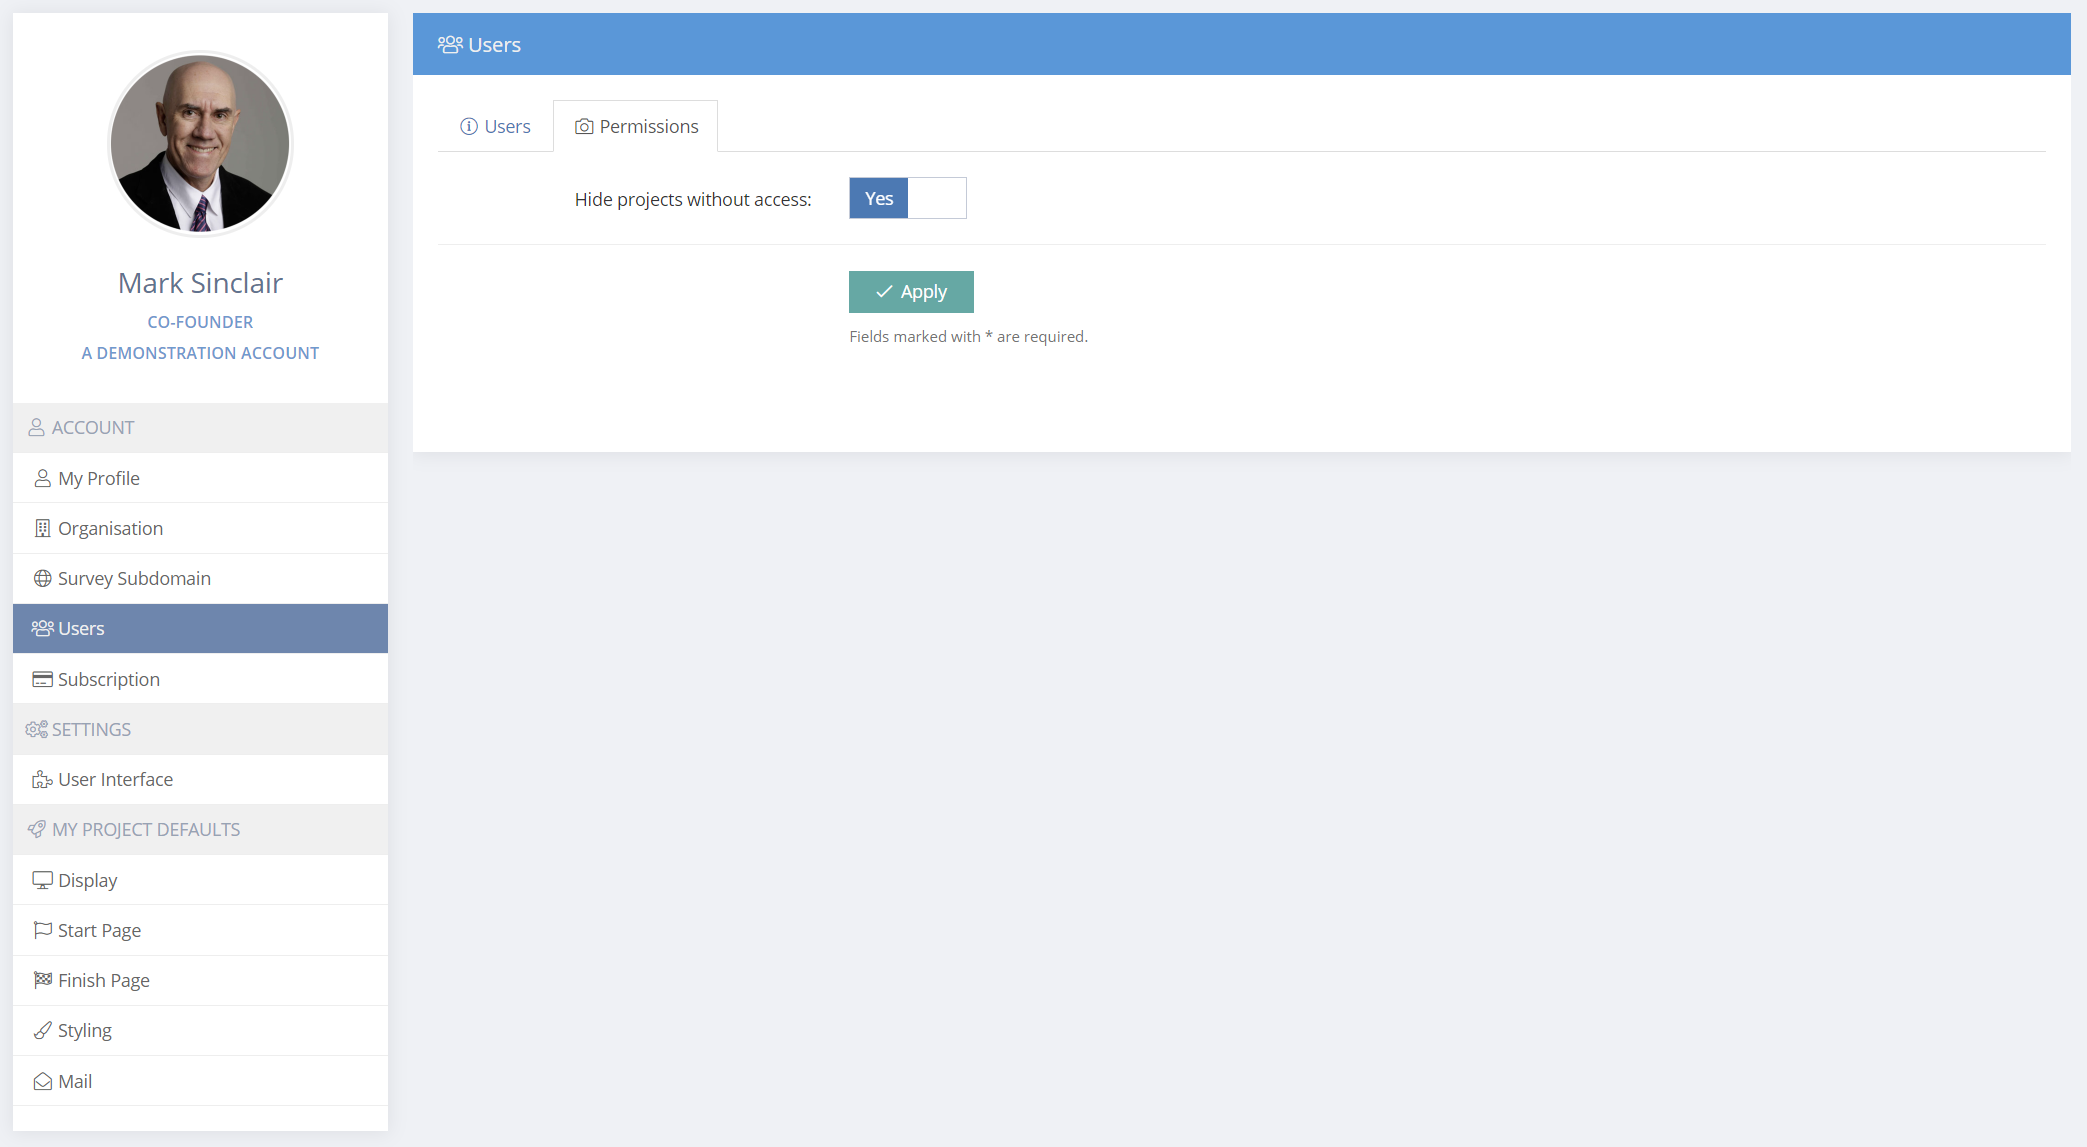
Users (restricted to Administrators)
Administrators have full access to the account They can add and manage users menu and have access to the full features in the Advanced Tab in Project Settings. Administrators can also set permission access for individual projects to allow access only to selected users.
Regular Users cannot add users or modify other user accounts, access the account Settings and they cannot change their role to become Administrators.
For security and other reasons users are restrict from signing into more than one browser or device session at the same time. Multiple tabs can be opened in a browser, however if a user signs into a different browser type or device, the previously open session will be closed. The following message will appear.
“This user session ended because another user session was logged on a different device or browser. You may log back in here and the other session will be closed.”
Administrators can also choose to show or hide projects from users who do not have permission to access selected projects.
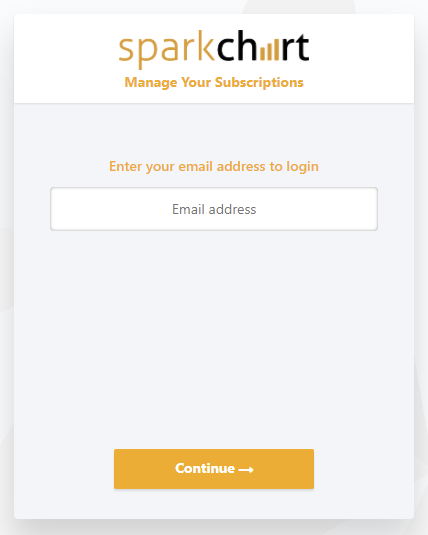
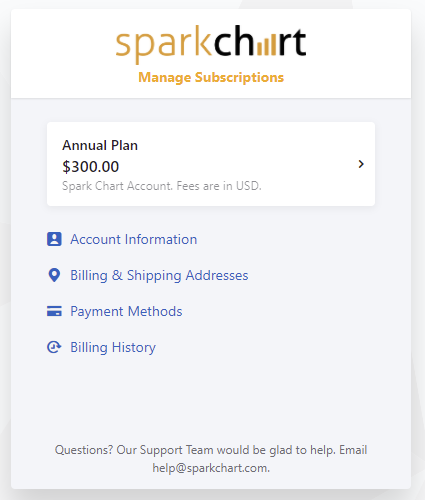
Subscription (restricted to Administrators)
The subscription menu is only available to Administrators. We use Chargebee subscription software to manage subscriptions and all payments. Chargebee is a leading provider of subscription and billing software.
From the subscription menu, you will be taken to Chargebee to make subscription changes and edit billing information.

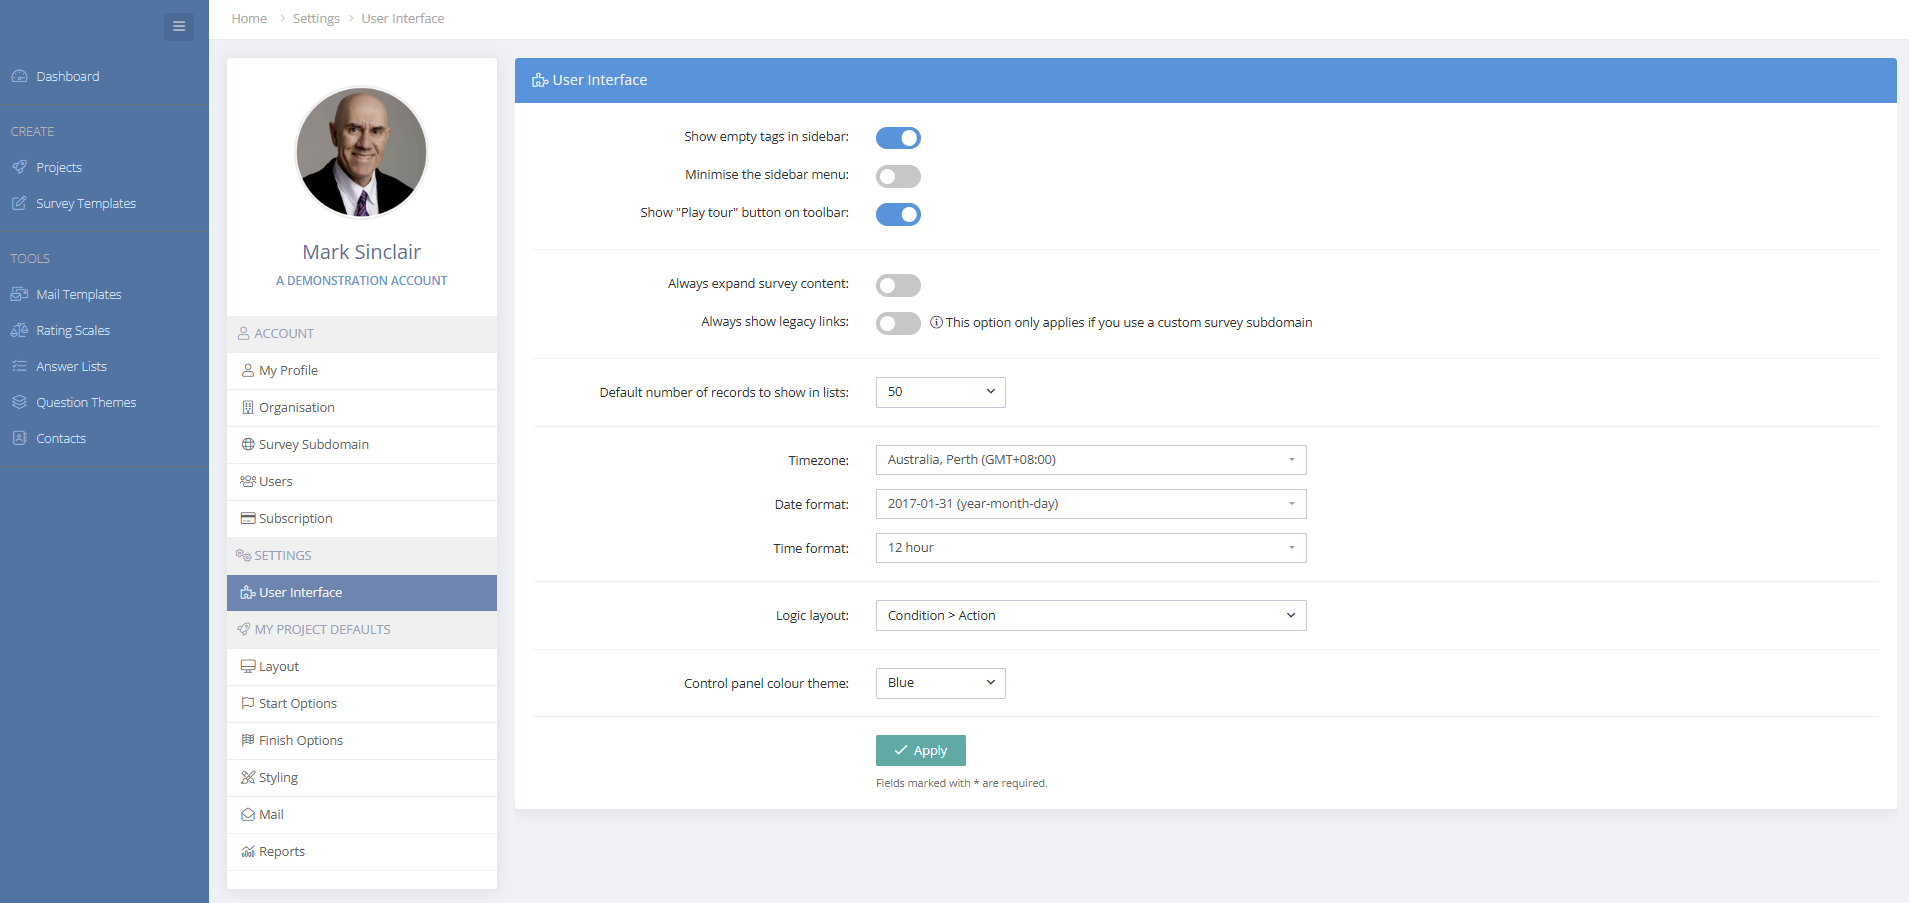
User Interface
Various user interface settings can be applied, including the Timezone, control panel colours, default number of records to show in lists, logic layout preference and more.
My Project Defaults
The branding for each project can be customised separately. Here, you can create personal default project settings that can be quickly applied to projects. The defaults can be optionally selected in projects. All these settings can also be customised for each individual project. Your project defaults will be available to apply in each project. By default, the branding is empty in a new project. If you copy an existing project, all the branding and styling settings will be copied and can be edited.
When working in a project, you have options to apply your default settings. There is also an option to save your current project settings back to replace your defaults.
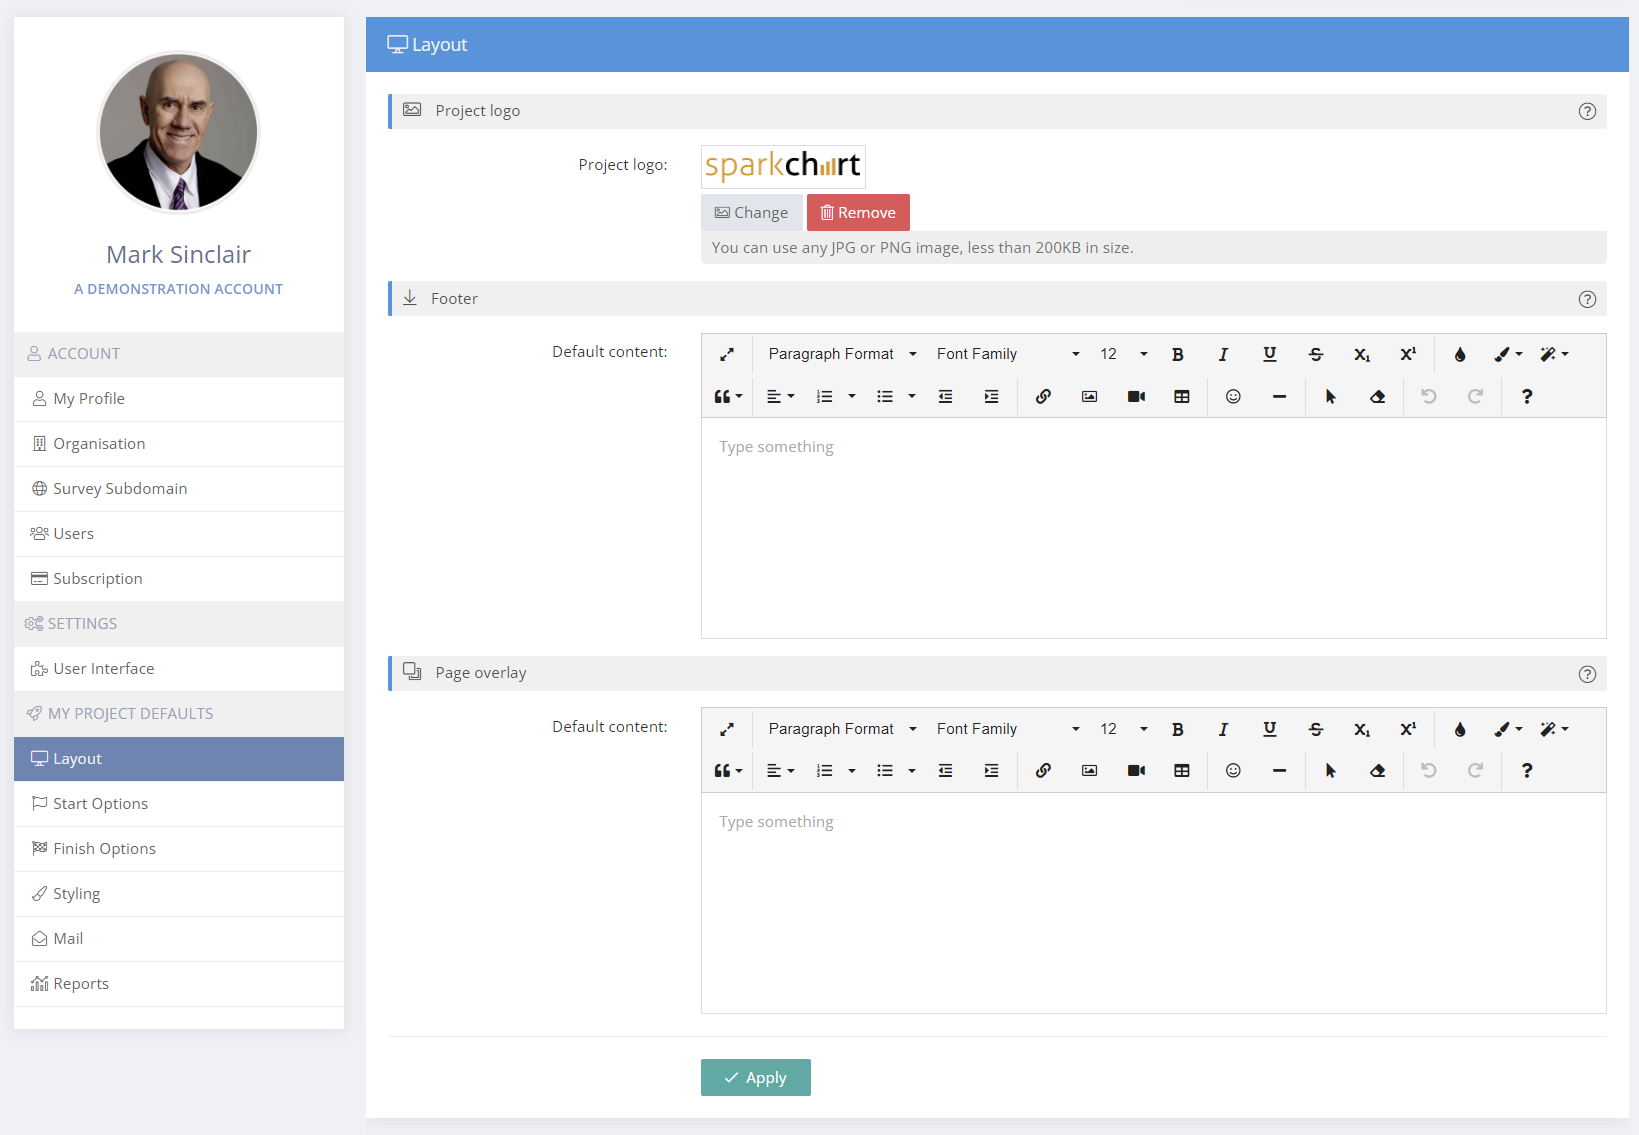
Layout
By default the project logo is displayed on the "Welcome" page of the survey as well as on the start page of any Report Shares you create. There are flexible options for hiding/showing the project logo in Start and Finish pages. The Rich Text editor allows images, videos and more to be added directly into the Start and Finish pages. So, for more control over the display, you can hide the logo and insert it directly into the Start Page and Finish Page text. If you don't upload your own image, the Spark Chart logo will be displayed instead.
If you wish, you can set up your default footer content. By default, the survey will show a very small Spark Chart logo and links to our standard Privacy Policy and Terms & Conditions at the bottom of the page.
When Page Overlay is enabled a hamburger menu will show at the top right of each page in the survey. When selected by the survey respondent, the page overlay content will be displayed over the top of the survey page. On exit, the respondent is returned to the survey page they were viewing.
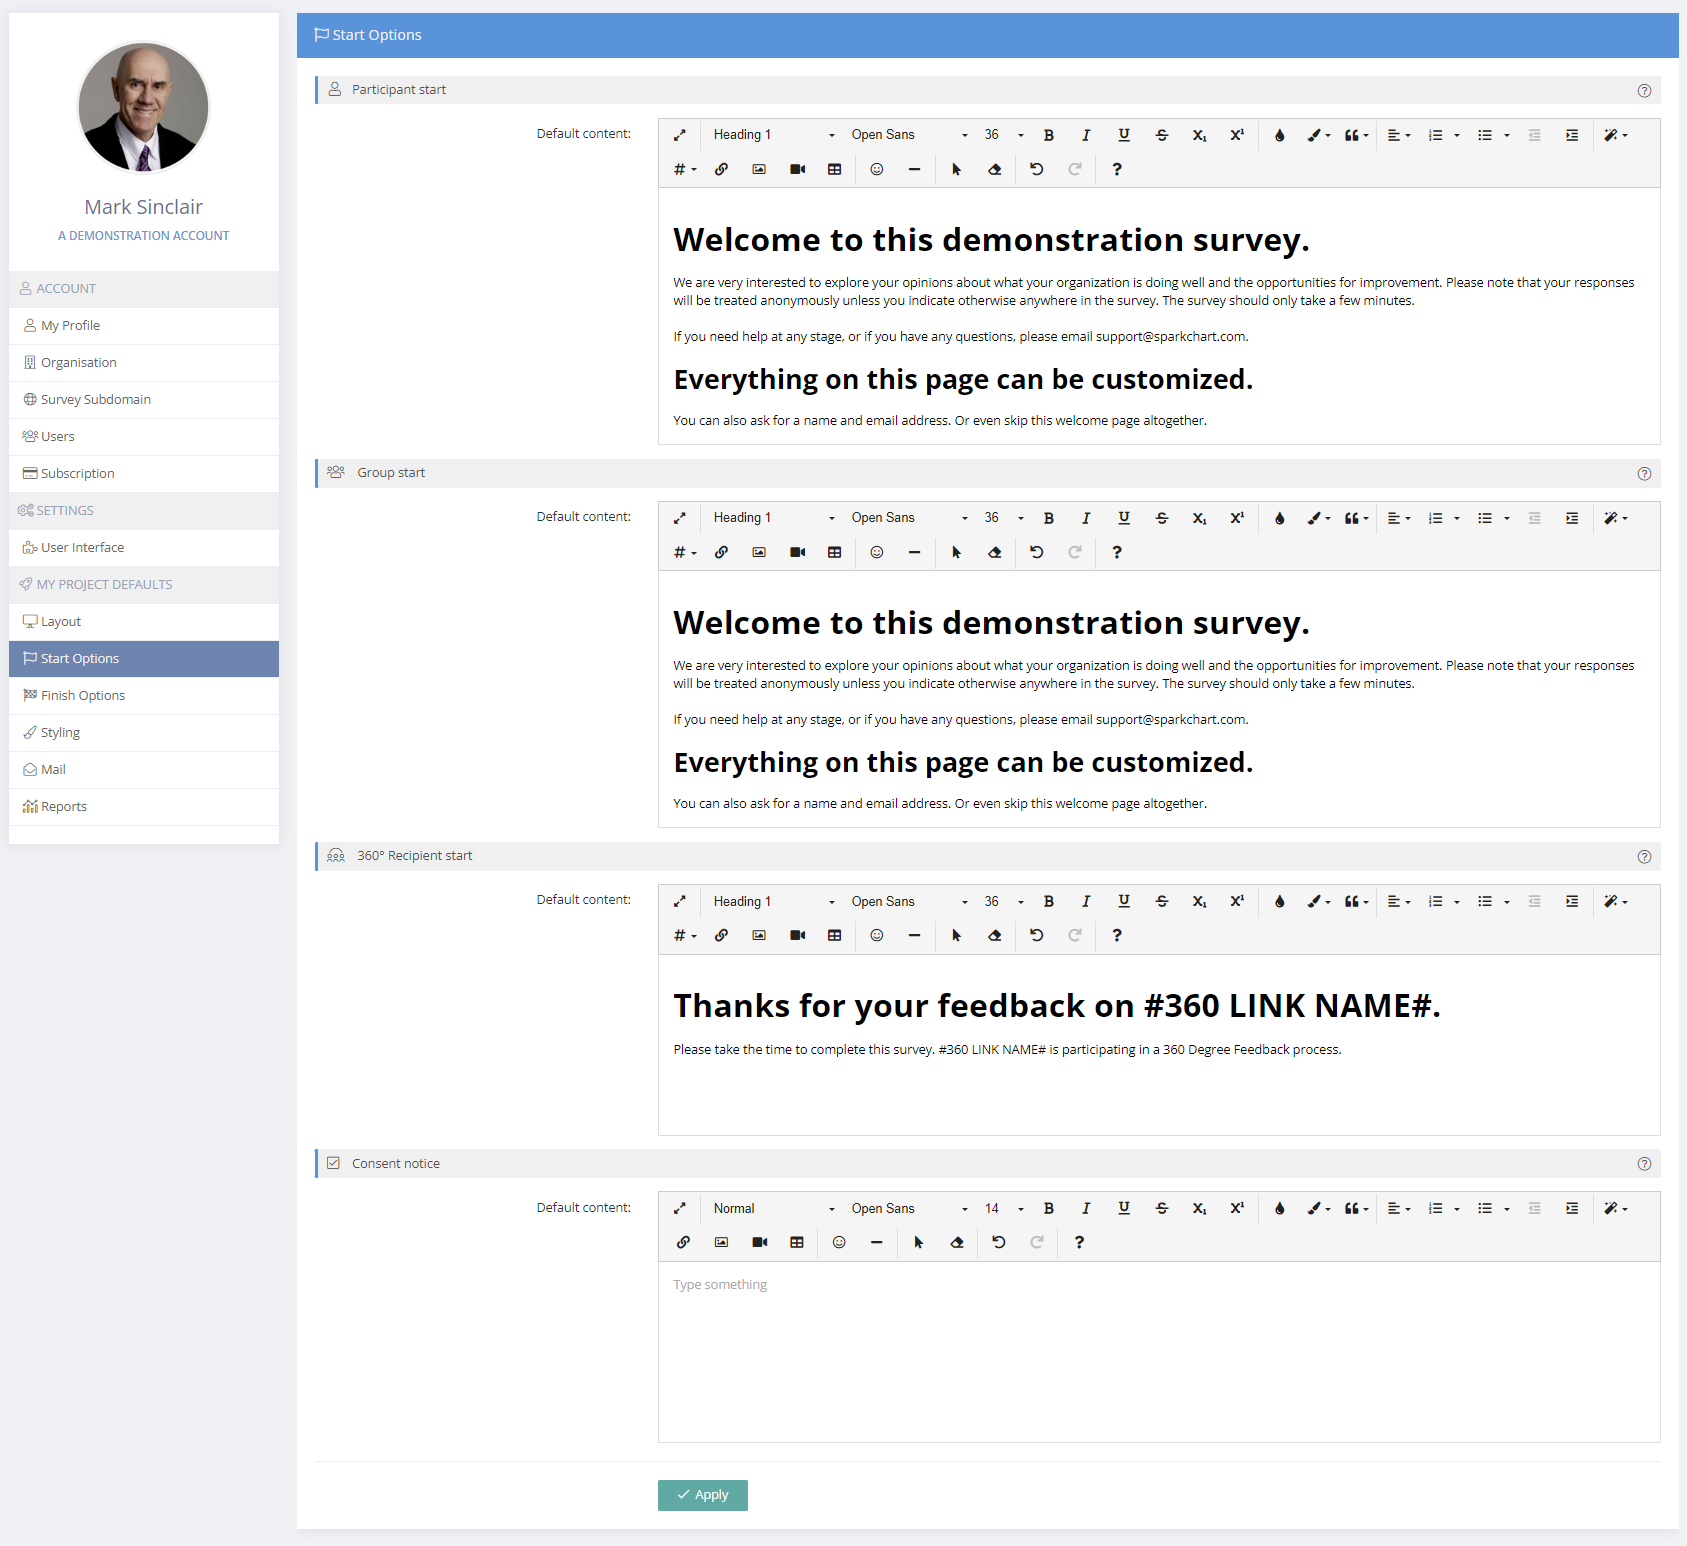
Start Options
Here you can set up default content for the optional Start Page (a welcome page) of the survey and optional Consent Notice.
The Start Page and welcome message is optional and appears when a survey respondent commences the survey from the survey link. The Start Page can be turned off in each project and the respondent will be taken straight to the first page of the survey.
The Start Page may be edited at any stage of the project, including when it is live.
The Start Page message can be customised according to how the survey participant is invited to complete the survey - personalised survey invitation and link (participant start) , a shareable survey link (Group start) or 360 degree feedback recipient link (360 Recipient start).
A default Consent Notice can also be customised.
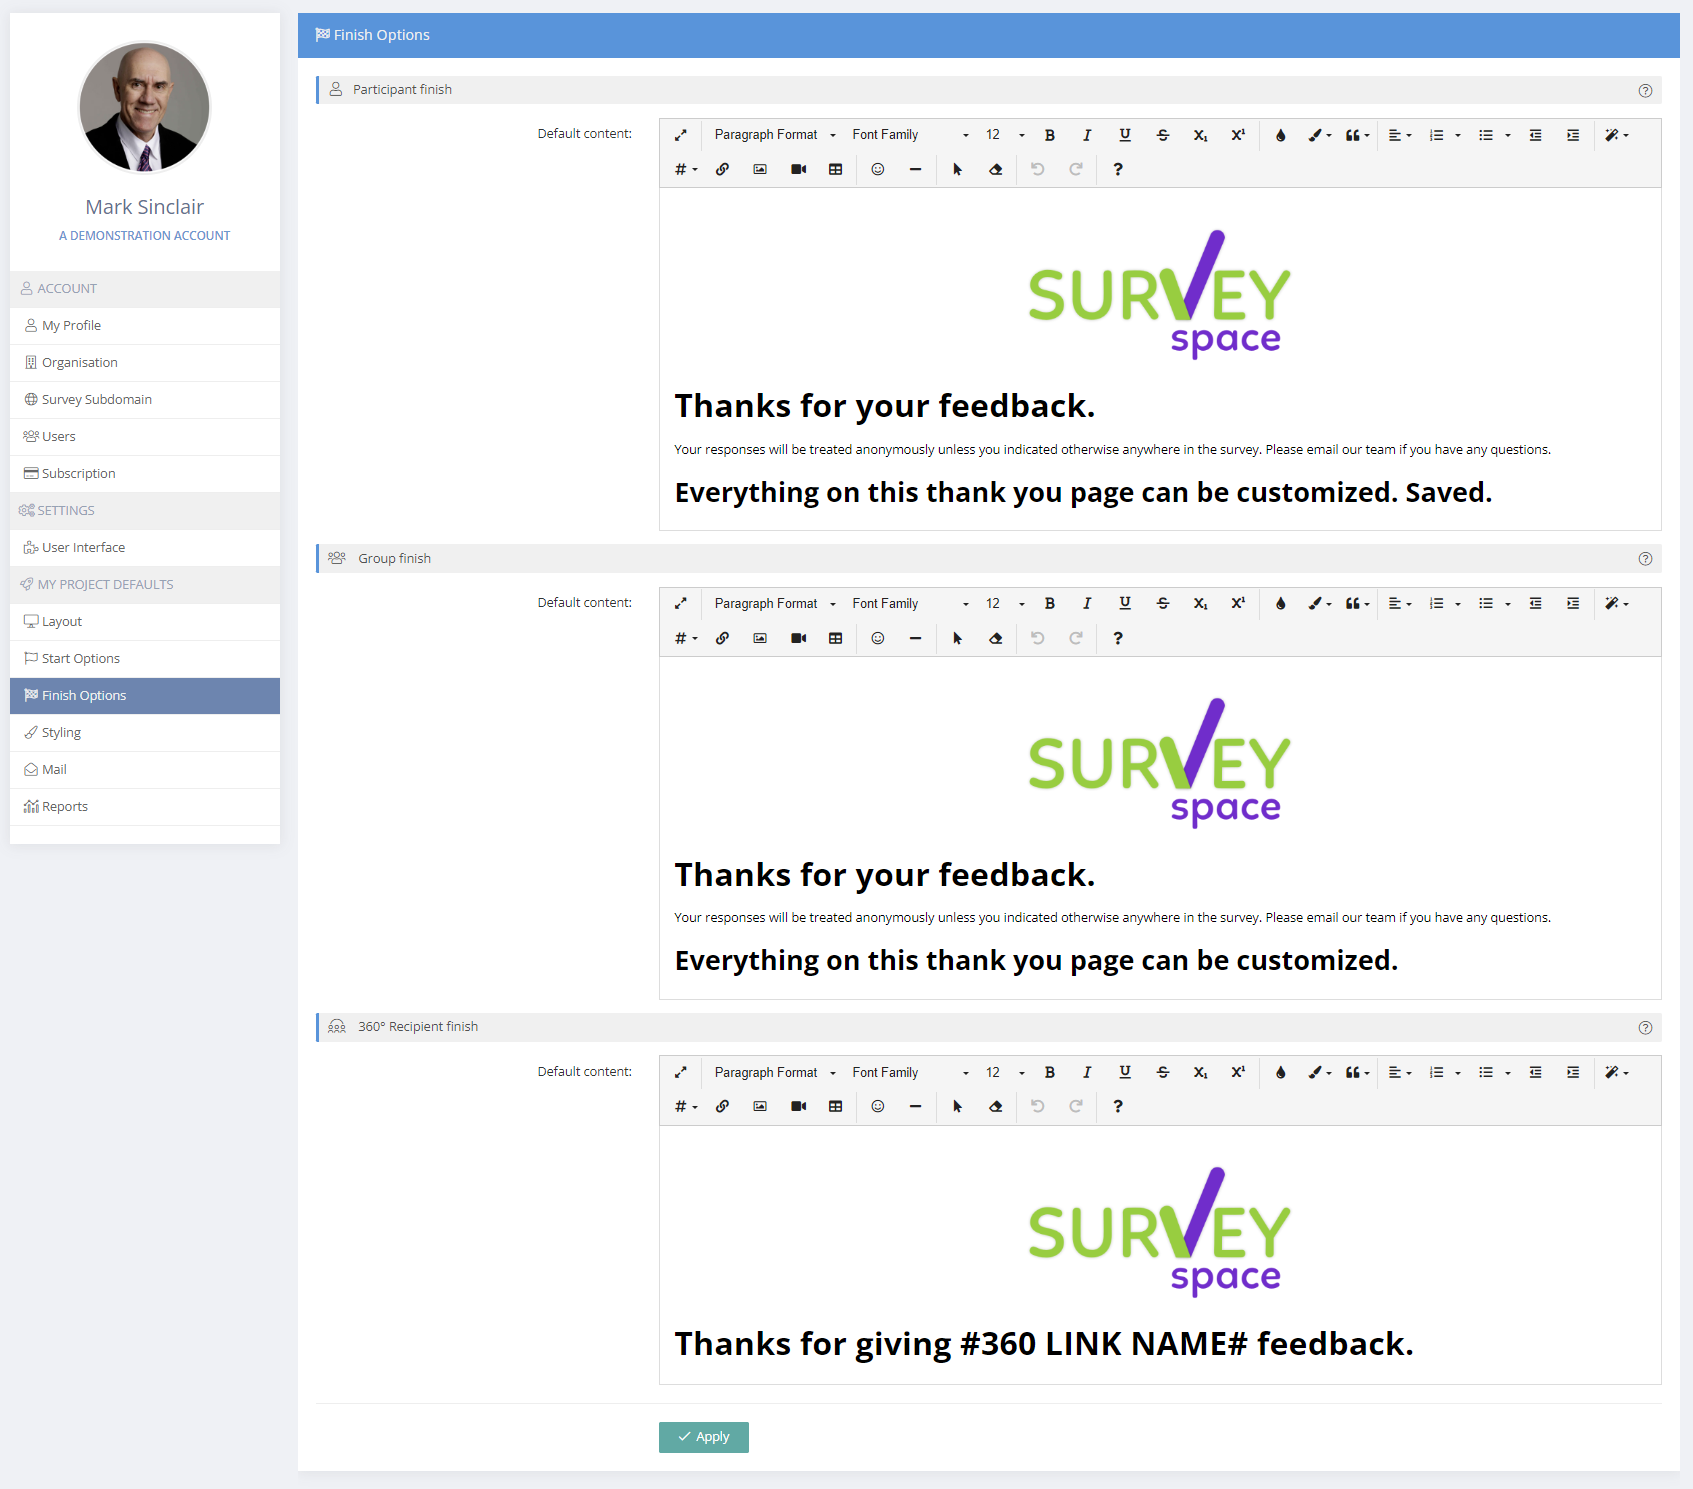
Finish Options
Here you can set up default content for the optional Finish Page. The Participant Finish Page and message appears after the survey has been submitted. A default finish message will appear if left empty or disabled. In each project there is an option to automatically redirect participants to a specified web url once they complete their survey.
Again, the message can be customised according to how the survey participant is invited to complete the survey - personalised survey invitation and link (participant start) , a shareable survey link (Group start) or 360 degree feedback recipient link (360 Recipient start).
Styling
Each survey project can be customised with different colours. Here you can set a default colour palette that will be available to apply in any project Click the colour field to select from the range of preset colours or enter any custom colour code for the background or the text.
The header is displayed at the top of every survey page. The page background surrounds the survey content. The accent colour is used for items such as question captions, radio buttons and checkboxes (for multiple choice and rating scale questions) and other small touches throughout the survey.
There are settings for various buttons in the survey screens.
- Default: is displayed on the survey welcome page, thank you page and registration form for Group & 360 Links
- Navigation: these are the Next/Previous buttons used to move through a multi-page survey
- Save: allows a participant to save their survey responses in case they want to finish a survey at another time
- Finish: displayed on the last page of a survey, and closes the survey & marks it as completed when clicked
- Additional comments: shown for questions that allow additional feedback and comments on individual questions
The colours set in projects are also used in Report Shares if the option to use project colours is set.
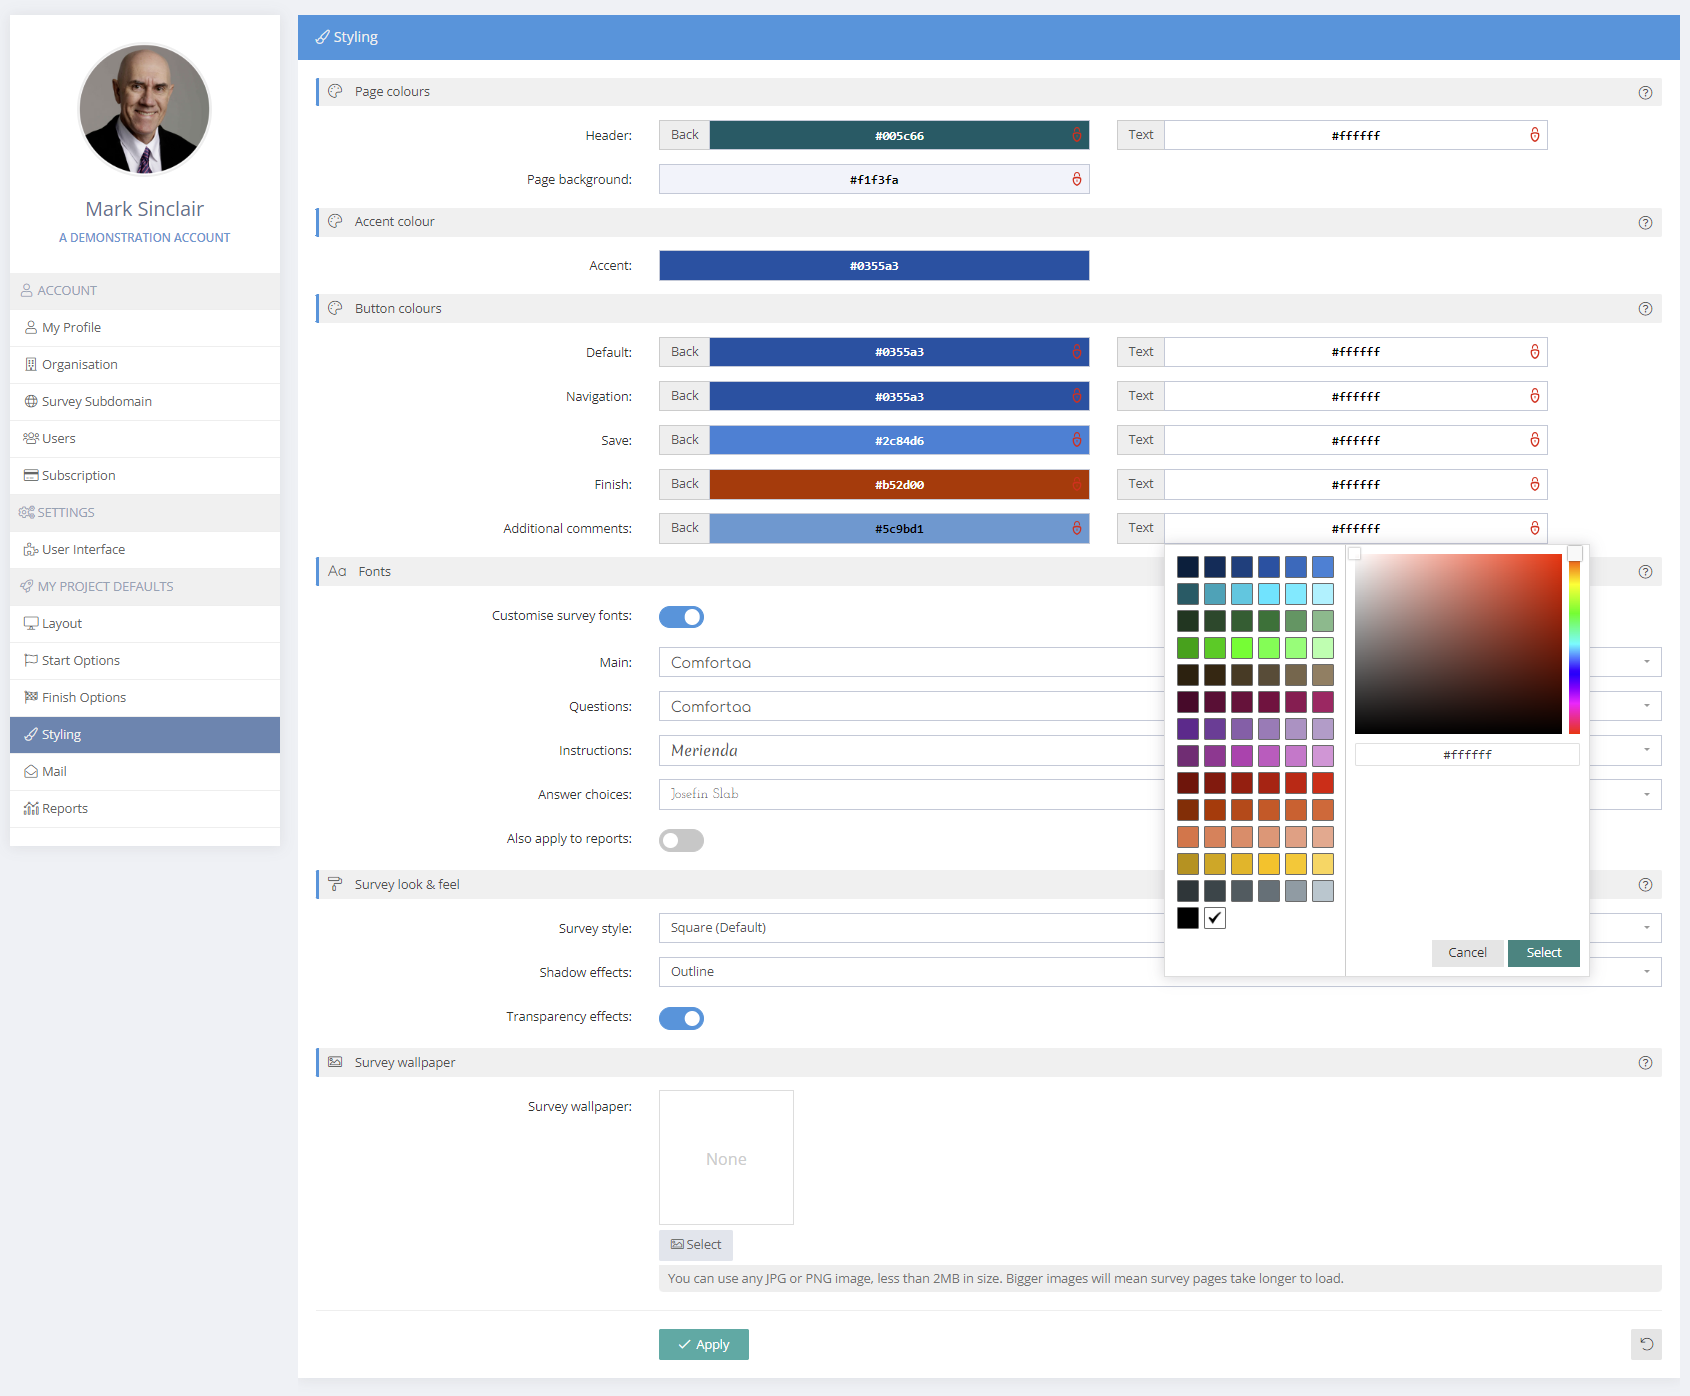
There is a button at the bottom right of the screen to revert the colour palette back to the Spark Chart original default colours.

When working in a project you can also save these items back to your defaults in the Project/Customise menus. Defaults are user specific, so each user can set their own defaults.
In the Survey Look & Feel section, the panels & buttons in the survey can be set to square (the default), slightly rounded corners or fully rounded corners.
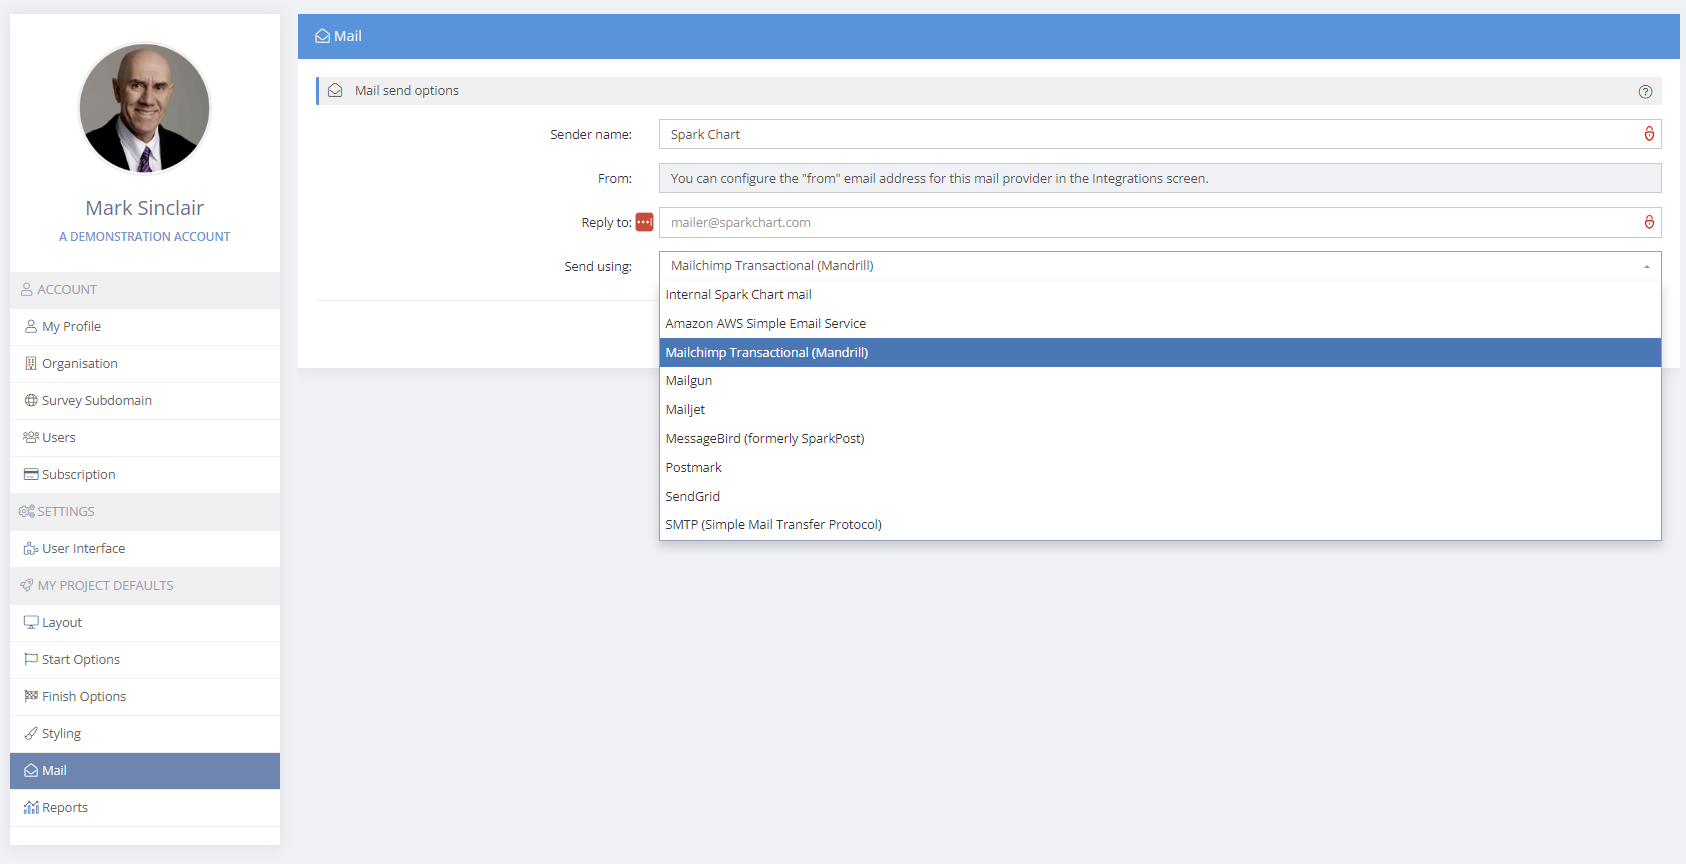
Spark Chart has built in mail support to let you quickly & easily send survey invitations and reminders.By default, mail sent from Spark Chart will originate from a default "noreply" address, with the sender name set to Spark Chart Surveys. You can change this by entering your own details below.
Now you can do so from your own favourite mail provider!
While this gives you more capacity for sending large amounts of mail from the system, the biggest benefit is you can now send mail from your own domains (based on the configuration in your mail provider).
The following mail providers are currently supported.
- Amazon AWS Simple Email Service
- MailChimp Transactional (Mandrill)
- Mailgun
- Mailjet
- MessageBird (formerly SparkPost)
- Postmark
- SendGrid
In addition, you can also use your own SMTP (Simple Mail Transfer Protocol) mail server to send the mail. Many of the providers above support sending mail via SMTP, but you can also configure your own.
To enable any of the above, click your user avatar in the top right and select Integrations. Click on your favourite provider and enter the details as defined within that providers own web site. You can easily send a test email to check that it is all working. You can configure more than one provider if you like, and you can select which one will be used in the Manage Project > Customise > Mail screen.
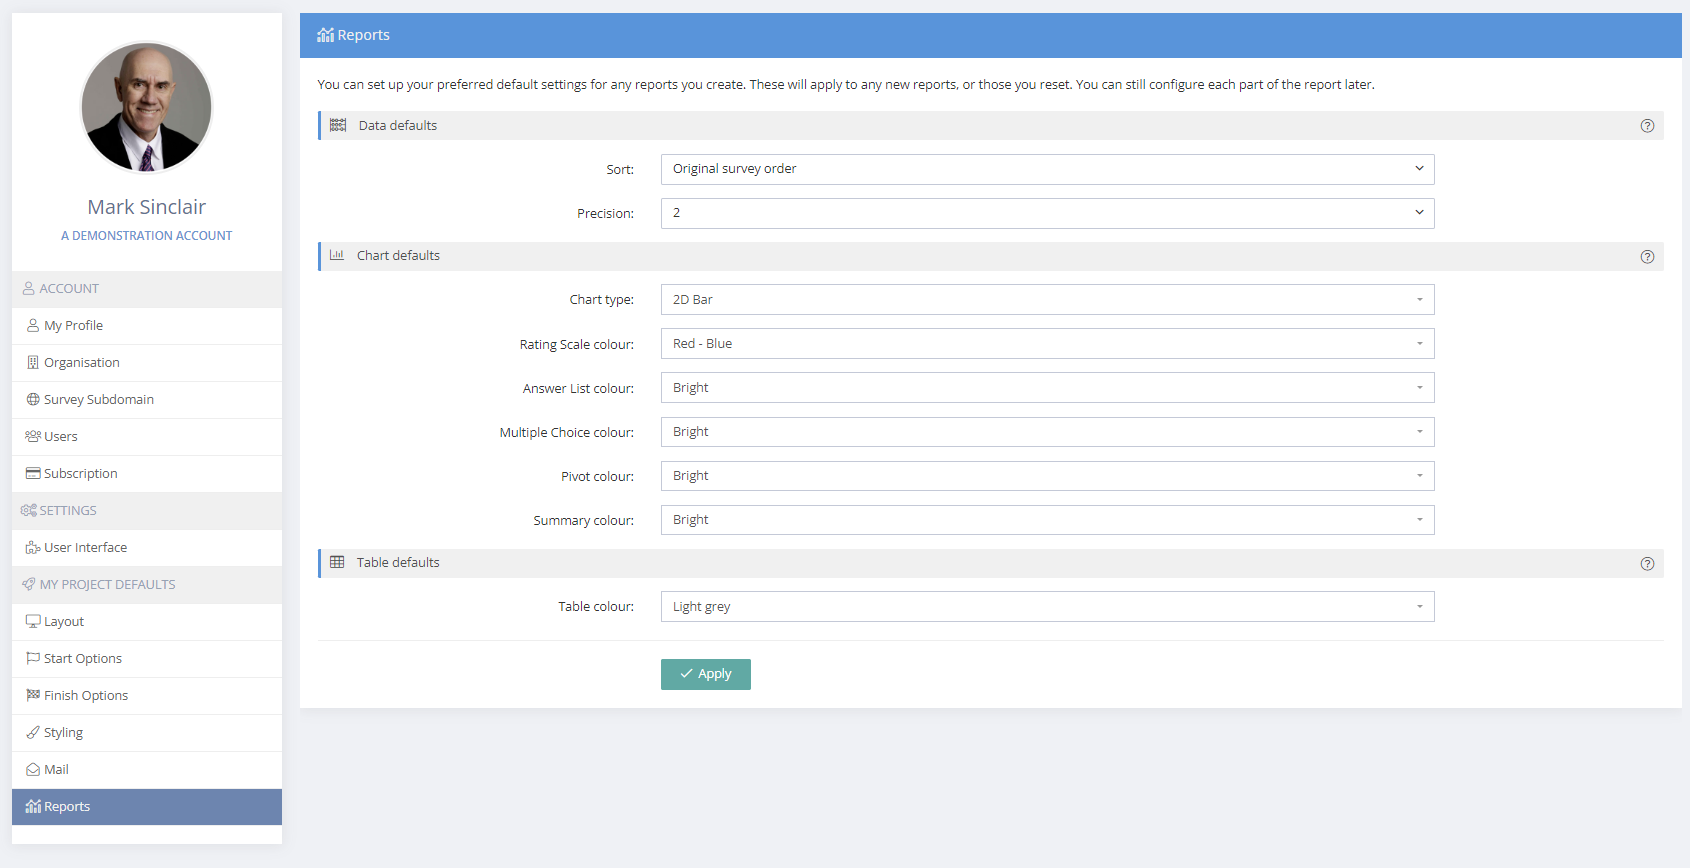
Reports
If you use the same chart types & colours while building reports, you may want to set your favourite options as default values. Changes to your report chart defaults will only apply to new reports created by you and will not affect existing reports or reports created by other users. You can also change chart options when you are creating or editing individual reports.